7 Tips For Balancing Work, Life, and Getting Outside

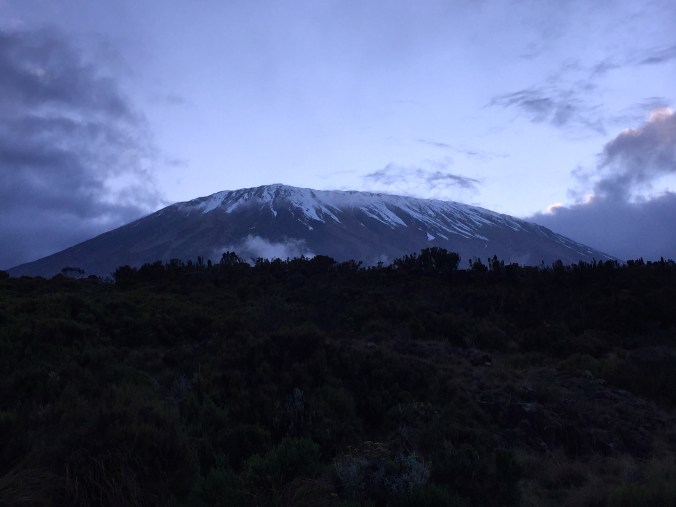
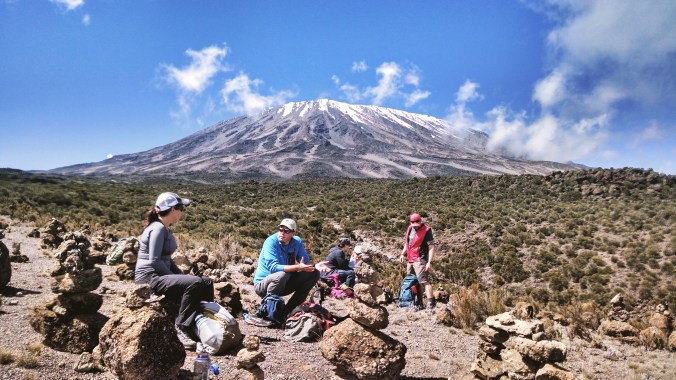
As seen on The Outbound Collective.

Never come down with another case of the Mondays.

There’s this great romantic divide between being a worker bee at a booming tech company and being an avid outdoor adventurer. Your work life and weekend life complement and contrast each other. There are commonalities between both and there are many, many differences.

It’s a fun challenge to maximize the 2/7 days of the week you get to spend away from your desk. Here are a few ideas to help.

1) Don’t let your weekends feel like work. Leave the stress at the office.

There’s nothing worse than beginning an outdoor getaway by shouldering a heavy backpack with the added weight of guilt, worrying, or stress leftover from a weekday dilemma. No matter how serious the issue seems between 9 to 5, a weekend adventure should give you the opportunity to momentarily lapse in these responsibilities and enjoy your time outside.

2) Unplug

We’re wired in all day – on standby to respond to emails, messages, phone calls, and more at the tap or swipe of a finger. So when you get the chance to disconnect from all of the buzzes, ringtones, and notifications that absorb your working life; take that chance.

Distraction-free adventures begin with a simple selection of the “Airplane Mode” function on your smartphone. You’ll still be able to capture the moment with your camera, without letting a text interrupt the perfect sunset shot. Plus, you’ll be conserving the battery life on your phone for up to a couple of days, which could be the extra safety measure that gets you back to your work desk in one piece.

3) Keep good company

Find a group of like-minded folks who are also driven to spend their weekends outdoors. It’s easier to look forward to a weekend full of faces you won’t see every day during the week. Plus, more people means more gear, trail stories, and camp food to share.

For the lone explorer, make your weekend time your “me time.” You spend every other moment during the week fostering connections and creating new ones – use your weekend as a chance to wander alone on a solo outdoor adventure.

4) Do something that scares you

You challenge yourself at work, you’re a go-getter, and your boss knows that you kicked ass on that last quarter-end project. But one thing you don’t get to do behind a desk every day is climb on the side of a cliff or scale a mountain. Let yourself get a little breathless on your weekends, add an edge to the Sunday scaries.

Whether it’s something that truly scares you, or just an activity that momentarily jars you from your everyday mundane, it’s good to do something that makes you feel alive and vulnerable once in awhile.

5) Never stop looking for new hobbies

Just like in your job, you’ll get bored if you’re performing the same task or visiting the same park weekend after weekend. Maybe you’re comfortable with the trails you know or pitches you’ve scaled, but without moving forward you won’t make any progress.

Discover new biking, running, and hiking trails by entering your city name at AllTrails or EveryTrail. Learn every detail about what it takes to summit the mountain on your horizon with SummitPost. Or, explore all kinds of new activities with The Outbound’s first-class search tool. Find something to get your imagination running during the workweek and be ready to push your limits by Saturday.

6) Help your office be eco-friendly

It will be all the more easier to return to your desk Monday morning when you’re working for a company that does good. Ask your team about their Social Corporate Responsibility principles, see where in your office you could improve recycling or electricity preservation. Work for a company that inspires greatness in their employees, and feel better about your work.

7) Find a flexible job that suits your lifestyle

This is the most important part of balancing your life outside of work and your career; with a job that makes sense for you. Find a field job that lets you take on flexible hours. Work at the crack of dawn so your afternoons become yours, or try to pack in your weekly hours into a couple of days to snowball your weekends.

When it comes down to it, money pays the bills, buys the gear, and funds the adventure. So find a job that suits you and what’s important for you, so you can keep exploring.

Summitting Mt. Kilimanjaro (19,341′) via the Rongai Route

Reach the Roof of Africa, Mt. Kilimanjaro (19,341’), on this high-altitude Tanzanian adventure, on the easiest non-technical climb of the world’s Seven Summits. Expect to spend 6-7 days hiking on the Rongai route.

Overview: 6 days, 43.8 miles, 12,945 ft. elevation gain

img_2658

Kilimanjaro is the highest free-standing mountain in the world since it stands alone from any mountain range, making its size and height all the more impressive. Because of its reputation, ease of accessibility, and Tanzania’s affordability, this is an incredibly popular mountain to climb and therefore laden with lots of red tape. It is required to organize this climb through a licensed mountain operator, as well as follow one of the official climbing routes – so be sure to do your due diligence and research the right route for you!

The Rongai Route is one of the least traveled ways up Africa’s tallest peak, allowing a more remote hiking experience. Unlike the southern routes, Rongai is a moorland or high-altitude desert climate, with far less precipitation than rainforest routes. The Rongai route meets the Marangu route on the final night to follow this trail to the summit.

Most, if not all, of the routes up the mountain begin in the town of Arusha, Tanzania, accessed by the Kilimanjaro International Airport (JRO). For this particular itinerary, you’ll head to the northeastern side of the mountain along the border of Kenya, about a five hour drive from Arusha. Expect to spend 6-7 days hiking on the Rongai route.

img_2717

Day 1: Nale Moru (1,950 m/6,400 ft.) + Simba Camp (2,650 m/8,700 ft.)

  • Walking distance: 6.5km/4 miles
  • Elevation gain: 700m/2,300 ft.

Today is the start of it all, beginning at the Rongai Gate in Nale Moru. After registering with park officials and finalizing the last of your packing, your hike starts through fields and a few small villages. You’ll spend the night at Simba Camp, close to the First Cave, overlooking the Kenyan plains.

Day 2: Kikelewa Caves (3,600 m/11,810 ft.)

  • Walking distance: 9 km/5.6 miles
  • Elevation gain: 950m/3,110 ft.

On the second day, vegetation grows thinner and you’ll enter into a truly high-alpine desert biosphere. Pass by the Second Cave (where you might stop for lunch) and end your day at Kikelewa Camp, next to the Kikelewa Cave.

img_2707

Day 3: Mawenzi Tarn (4,330m/14,210 ft.)

  • Walking distance: 6km/3.7 miles
  • Elevation gain: 730m/2,400 ft.

As the week progresses, your days grow shorter, and this hike to Mawenzi Tarn should only take a couple hours as your body adjusts to the higher elevations. This is when proper hydration and a slow pace (pole, pole, as the Tanzanians would say) play a huge part in your successful acclimatization. You’ll spend this night at Mawenzi Tarn and have plenty of time in the afternoon to explore the plains and rocky outcrops in this vast area.

Day 4: Kibo Huts (4,330 m/15,420 ft.)

  • Walking distance: 9km/5.6 miles
  • Elevation gain: 370m/1,215 ft.

This is the point where the Rongai Route meets up with the Marangu Route for your final summit push. You’ll want to leave Mawenzi Tarn early this morning so that you have plenty of time to rest and prepare for your summit bid later in the night. The Kibo Huts are a little like a semi-permanent village, with huge crowds from both routes and plenty of noise and excitement.

img_2677

Dancing at the summit of Uhuru Peak, Kilimanjaro.

Day 5: Summit via Gilman’s Point to Uhuru Peak (5,895m/19,340 ft.) to Horombo Huts (3,700m/12,200 ft.)

  • Walking distance: 5km/3.1 miles ascent + 15km/9.3 miles descent
  • Elevation gain: 1,195m/3,920 ft.
  • Elevation loss: 2,195m/7,200 ft.

Day 5 begins late night of Day 4, waking, eating, and heading out of camp by midnight for your summit bid. The first half of your early-morning leading up to Gilman’s Point (5,700m/18,700 ft.) will be full of undulating switchbacks that may be made more brutal by biting cold and harsh winds, as we were. From Gilman’s Point you’ll get to look into the huge volcanic crater and surrounding ice caps, with the true summit just ahead. The crater rim to your left leads you all the way to Uhuru Peak with the famous summit sign of Kilimanjaro.

Unfortunately this last push is where hikers are most likely to feel the full affects of altitude sickness, and we saw lots of folks being ushered or even carried down the mountain at this point. That’s why it’s all the more important to limit your time at the top and descend quickly, back to the Kibo Huts for some fuel and a short break, before you’ll continue on to the Horombo Huts.

Day 6: Marangu Gate (1,860m/6,102 ft.)

  • Walking distance: 20km/12.5 miles
  • Elevation loss: 1,840m/6,040 ft.

After all of the climbing you’ve accomplished, this hike out should feel like a piece of cake. Descending on the southside, you’ll be immersed in a beautiful rainforest as well as the infamous crowds you avoided to the north heading up for their chance at the summit. Take your time, enjoy the scenery, and give yourself a huge high-five once you’ve reached the final Marangu Gate.

img_2709-version-2

The final crater rim walk up to Uhuru Peak from Gilman’s Point.

While this climb is truly non-technical and often described as “easy” or a simple “walk-up,” proper planning and packing is essential to any climber’s success. Freak weather storms, freezing temperatures, and debilitating altitude sickness can occur at any time without warning. Pack for everything, and be prepared for anything.

Packing List

  • Wool hat + sun hat
  • Sunglasses
  • Sunscreen, +SPF chapstick
  • Heavyweight gloves
  • 3+ upper body layers – shirts, fleece, long underwear
  • Hardshell rain jacket
  • Down jacket
  • 2+ lower body layers – trekking pants, long underwear
  • Hardshell waterproof pants
  • Gaiters
  • 6+ pairs wool socks
  • Sturdy hiking boots
  • Trekking poles
  • Headlamp + extra batteries
  • 40+ liter backpack
  • Sleeping bag + sleeping pad
  • 2+ liter water bottles
  • Iodine or other water treatment
  • First aid kit
  • Deck of cards, journal, or charming humor for afternoons spent acclimatizing at camp