Four Volcanoes, Five Days, and Endless Tacos: Climbing Mexico’s Highest Peaks

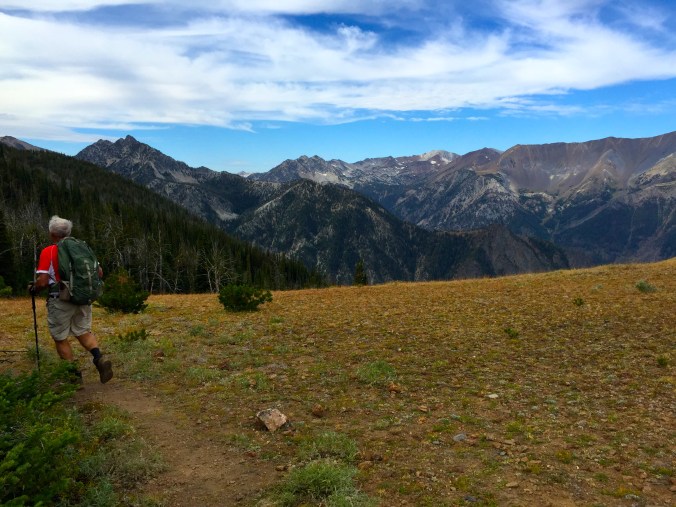
Last week I had the privilege and pleasure of joining a group of mountaineering friends in Mexico on one of the toughest climbing programs I’ve ever participated in. What I expected to be a typical acclimatization-then-climb schedule turned out to be anything but that. Our international team sought to summit a series of 15k, 14k, 17k, and 18k foot volcanoes over the course of a working week. Crazy? Yes. Doable? Surprisingly, yes.

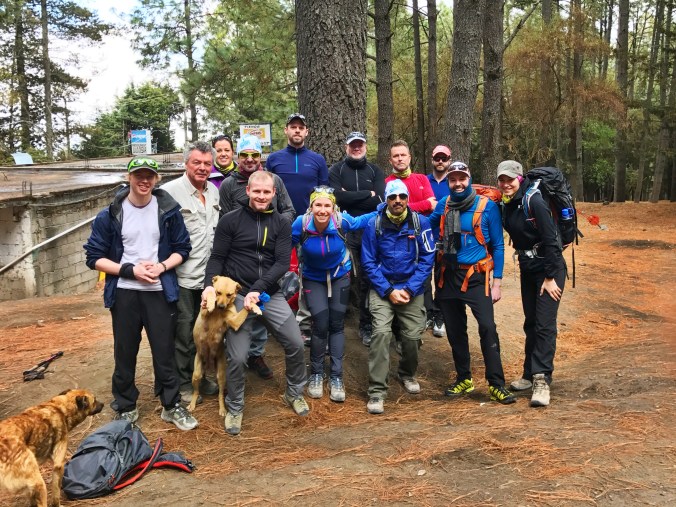
The 13 of us came from every corner of the world: Norway and England, Canada and the United States, even India. We had varying levels of mountaineering experience under our belts, from seasoned Everest-summiters to first-time climbers. But most importantly, we all shared a positive attitude and were bursting at the seams with excitement over this incredible adventure.

Here’s a walk through our high-intensity, high-altitude itinerary of four volcano climbs in five days.

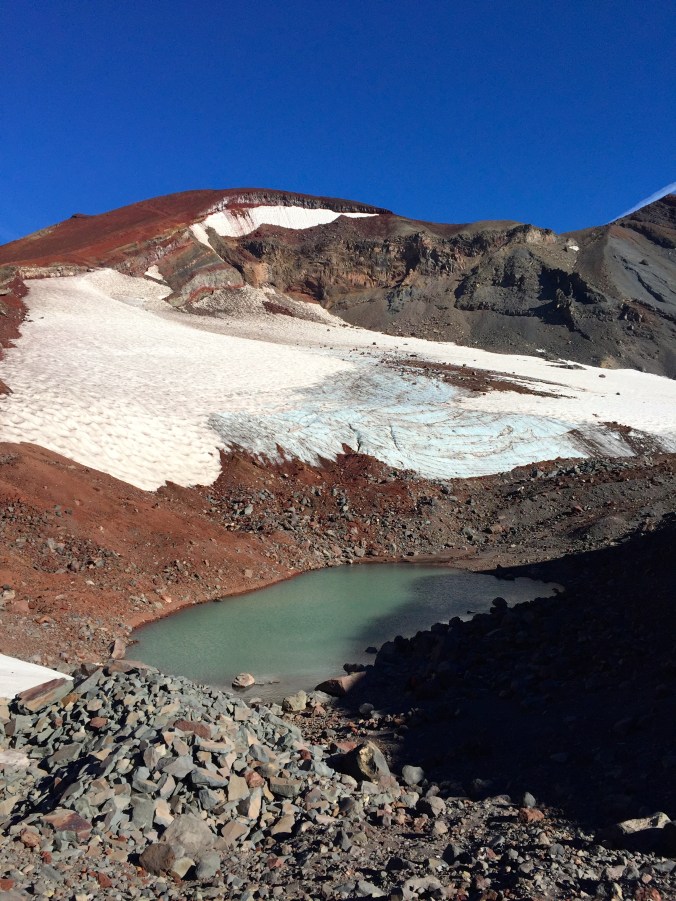
  1. Nevado de Toluca (15,354’)

Overview: 6 miles + 1900 feet elevation gain

IMG_8168

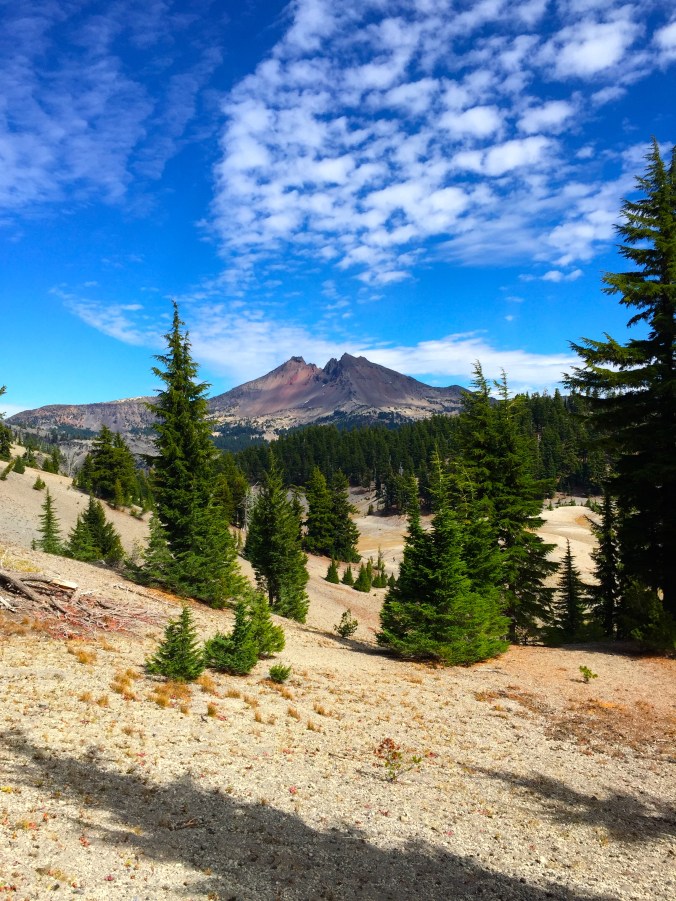
The Nevado de Toluca National Park is touted as a family-friendly, crowded weekend getaway for local Mexicans – which, by all means, it is. But the imposing summit of Toluca casting down on the sibling lakes of Laguna de la Luna and Laguna de la Sol draws in a different crowd… the type that like to get their hands dirty and fingernails gritty on sharp, steep granite and climb their ways to the top.

We moved fast, spending about an hour on the park’s designated trails before reaching a class 2 or 3 scramble (American grade) that led us up another hour to the summit. Being mid-March, we were just weeks away from Mexico’s wet season and saw the weather changes full force on each of our climbs. Afternoon snowstorms were to be expected.

At the end of our first day, we were all feeling a little more sore than expected, but still stoked for the days to come. We heeded our leader’s warning: It’ll only get tougher.

  1. Malinche (14,636’)

Overview: 7 miles + 3700 feet elevation gain

IMG_8263

Our climb in La Malinche National Park reminded me of everything I learned about mountaineering on Central Oregon’s volcanoes – including insane amounts of scree.

But far before we hit scree, we enjoyed hiking through a classic Mexican jungle scenery, with thick wooded forests that had tropical canopy tops. We followed a trail for what felt like endless miles until we breached the tree line and set our sights on the summit of Malinche. Everyone appreciated today’s straightforward climb, as there was no guessing which way to go: All slopes point to up.

After everyone celebrated a teammate’s birthday on top with a gigantic Mexican cake and candles (you can’t make this up), we began the long, slow journey down. It was during this relentless descent of our second day that the group began to understand that our weeklong program wasn’t a typical guided itinerary.

My best piece of advice for Malinche hikers: Stick around after your climb to visit the restaurant at base camp / parking lot area, and trust the hostess to tell you what’s good that day.

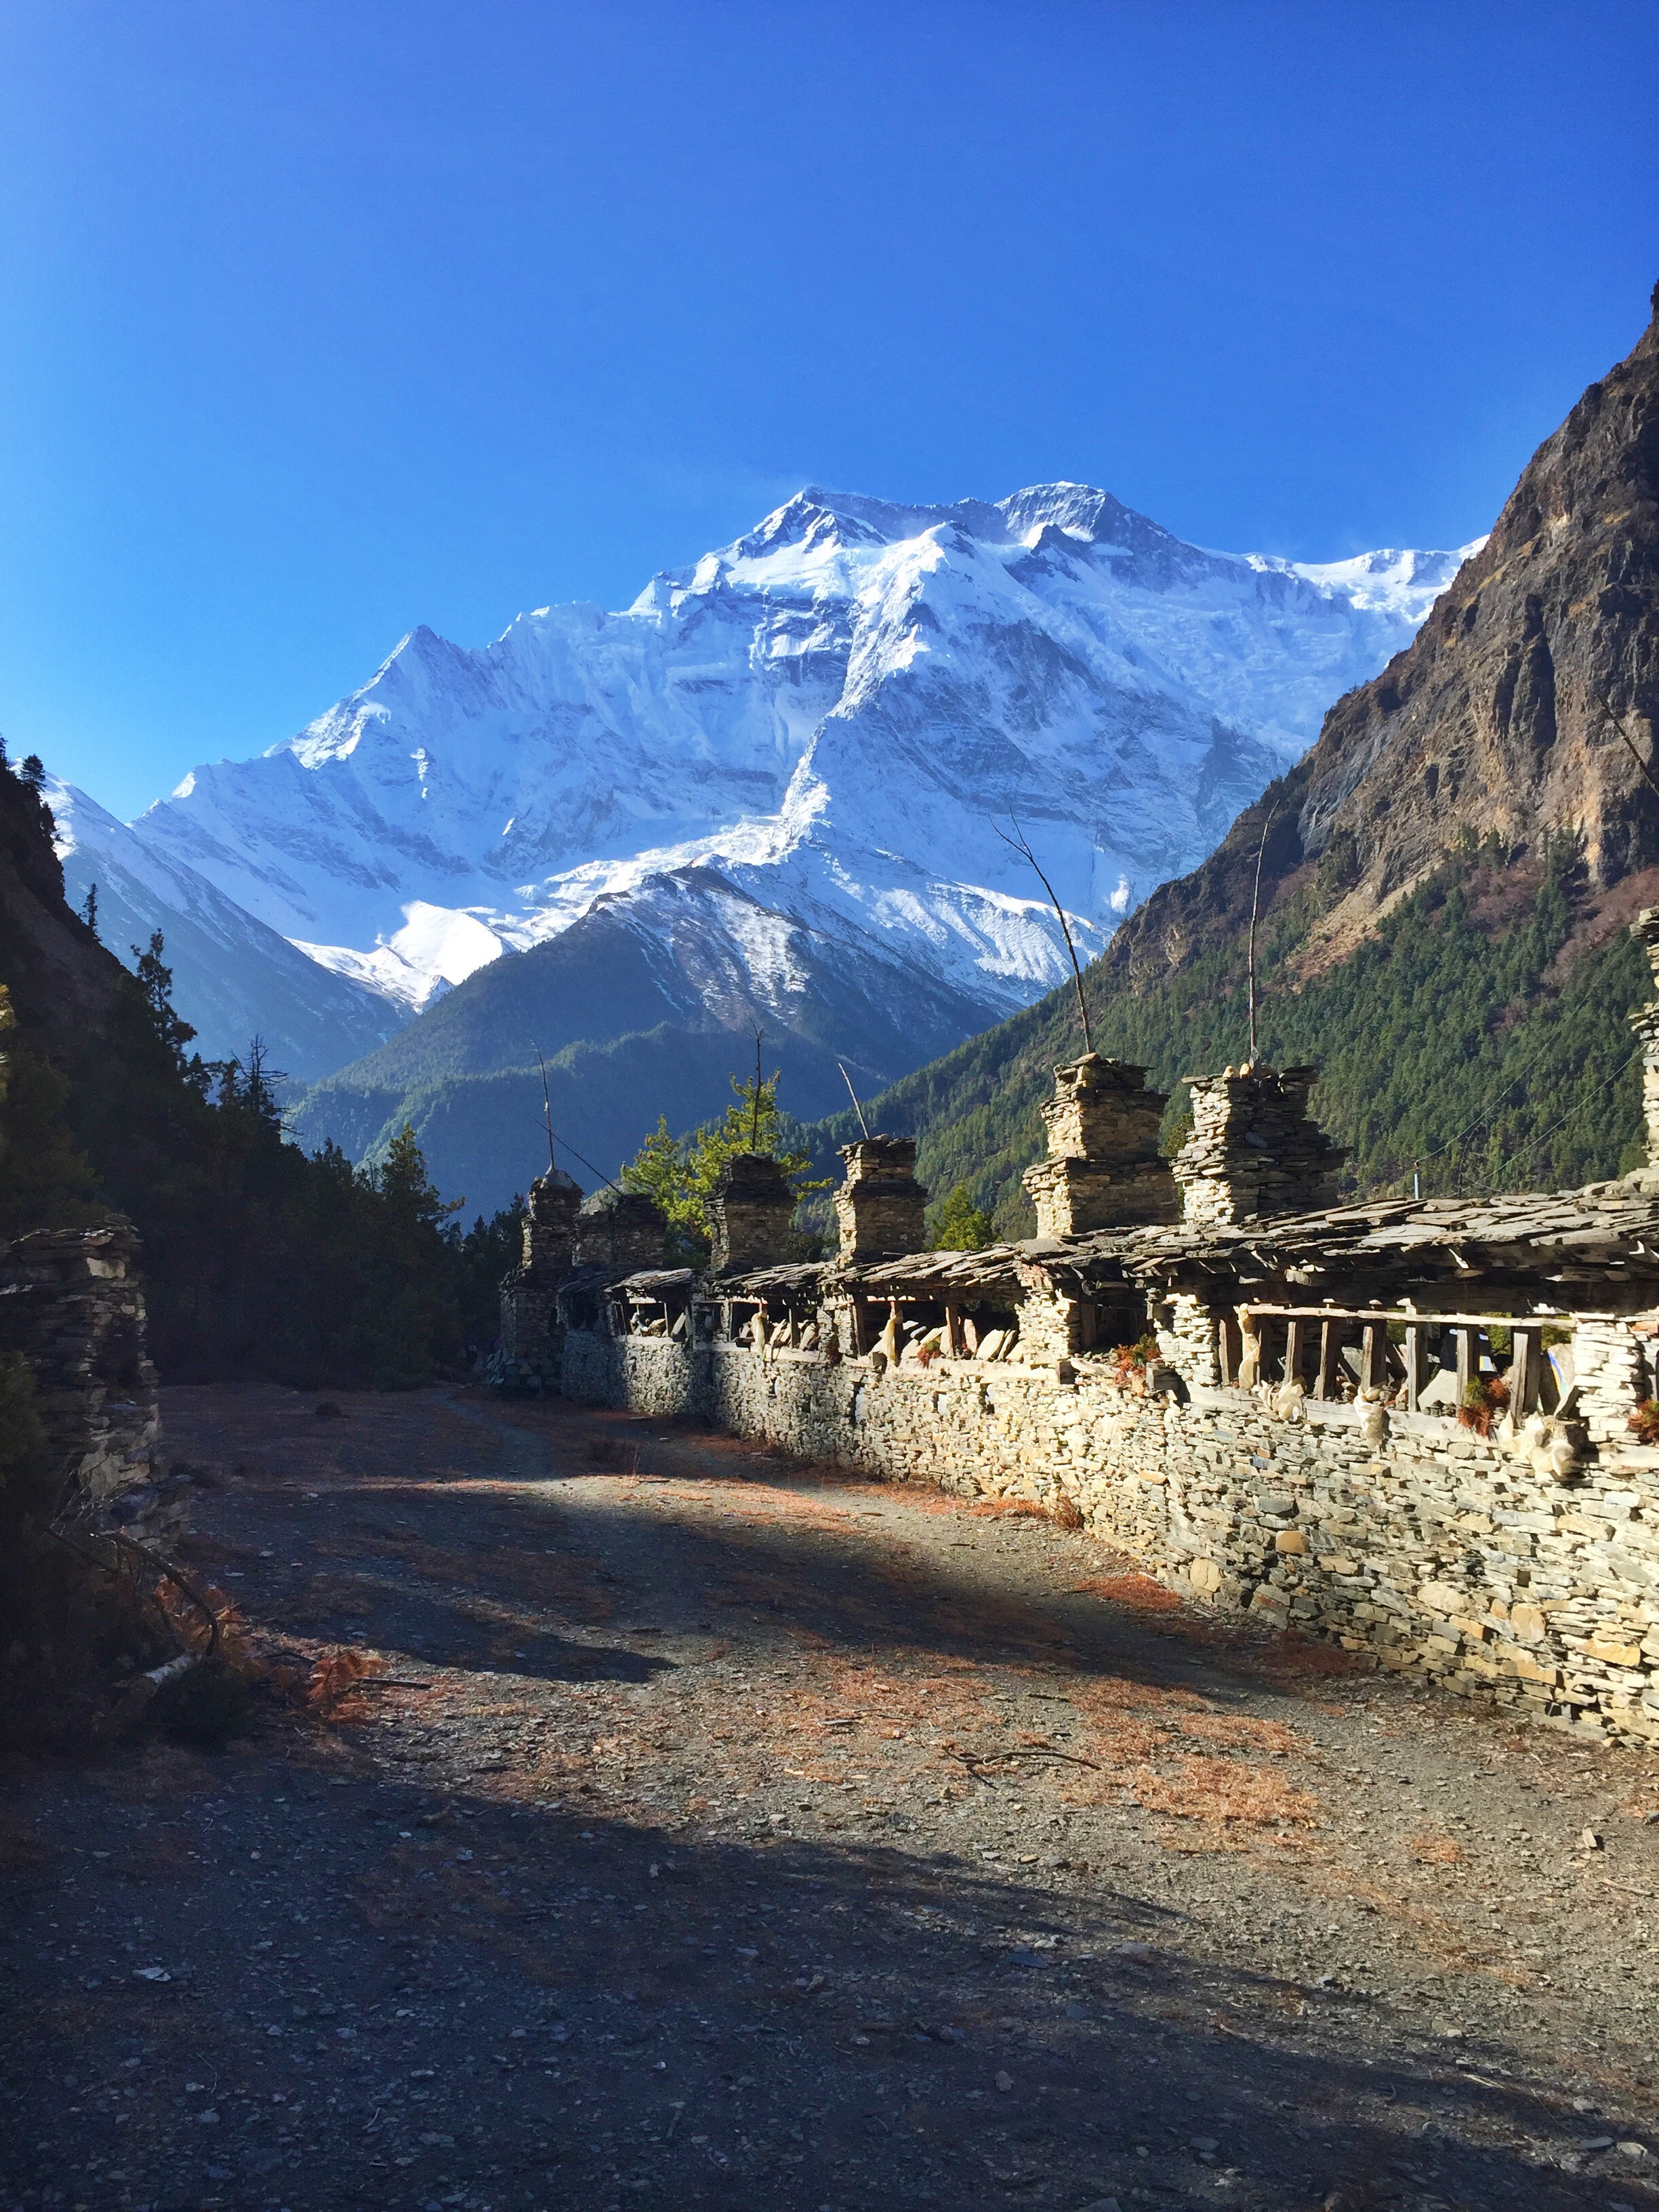
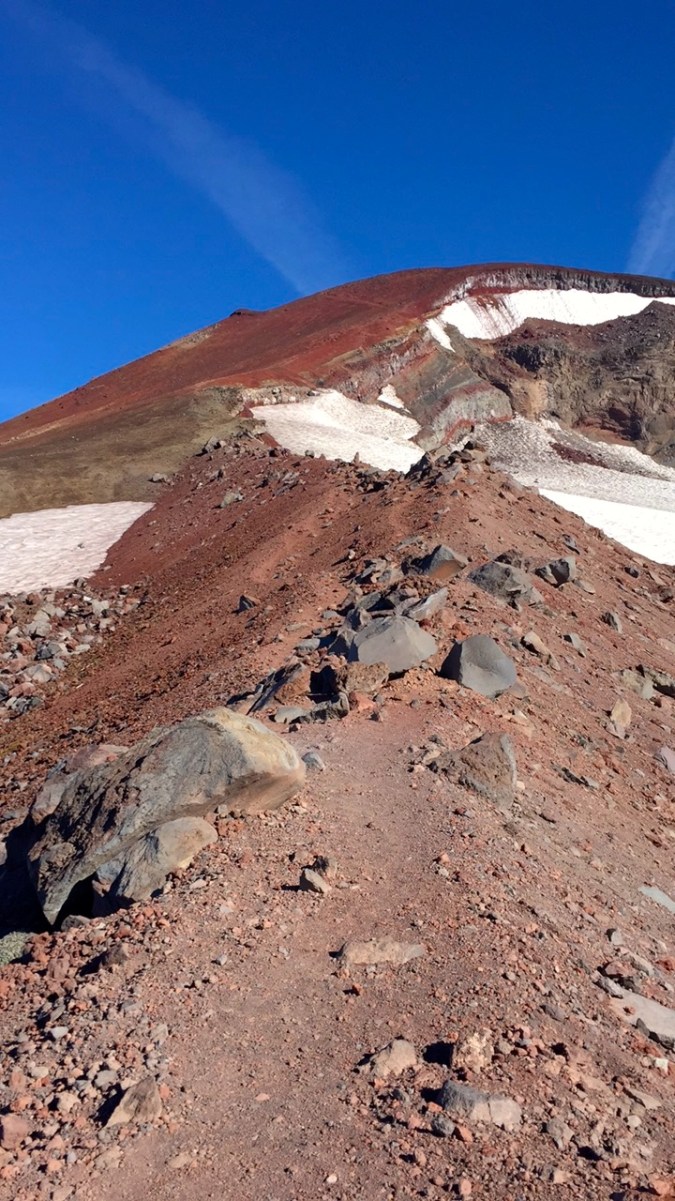
  1. Iztaccihuatl (17,159)

Overview: 6 miles + 4200-5500 feet elevation gain

IMG_8309

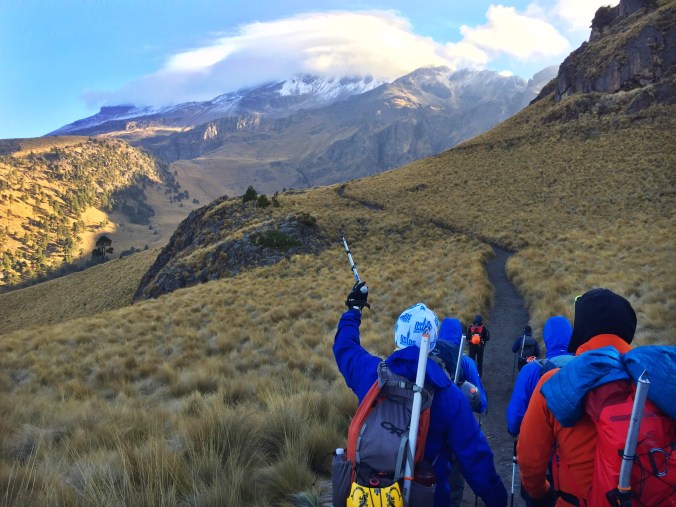
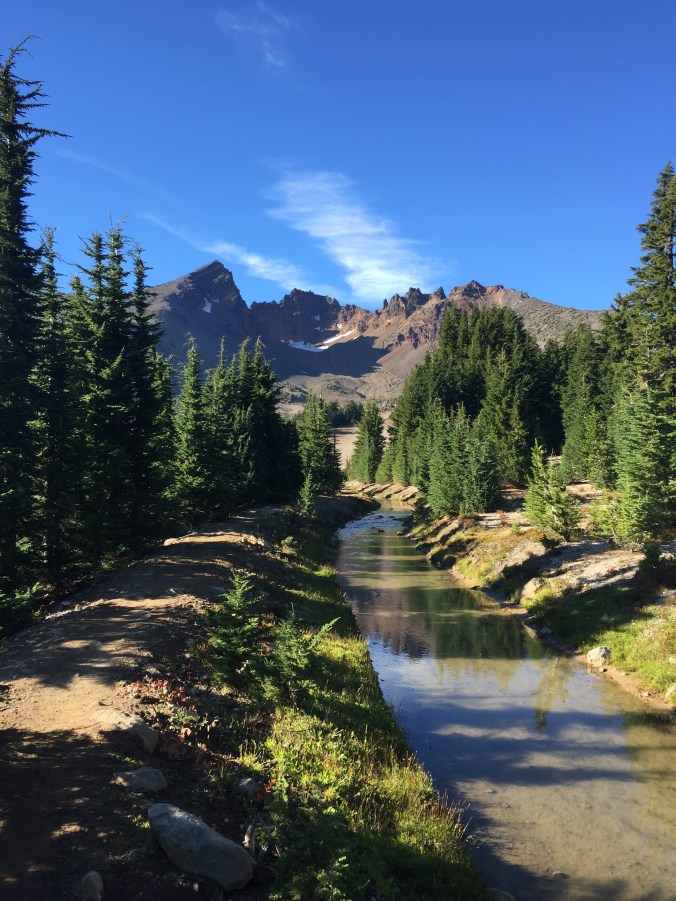
In the car on the way to the Iztaccihuatl and Popocatepetl National Park, our local guide told me that he was especially excited for today’s climb because he’d never before had clients who had wanted to do it in a single day. This was not a good sign.

Truthfully, the opposing Izta and Popo volcanoes were some of the most breathtaking and scenic mountains I’d ever seen before, but I was having a tough time enjoying their beauty while agonizing over the day’s climb. This route isn’t quite as straightforward as point A to point B. Izta has as many as seven official summits, but our course demanded we ascend and descend three of these, with as much as 300 feet of elevation gain and loss in between. That number may not sound so intimidating at sea level, but after 4 hours and 4k of scree at 17,000 feet – it’s a little more daunting.

Weather again turned on us this day, leaving those who made the summit suffer through a windy whiteout on the way back down. At the end of the day, we did all but crawl back to the car, grateful beyond our years that the following day would be full of rest (and more tacos).

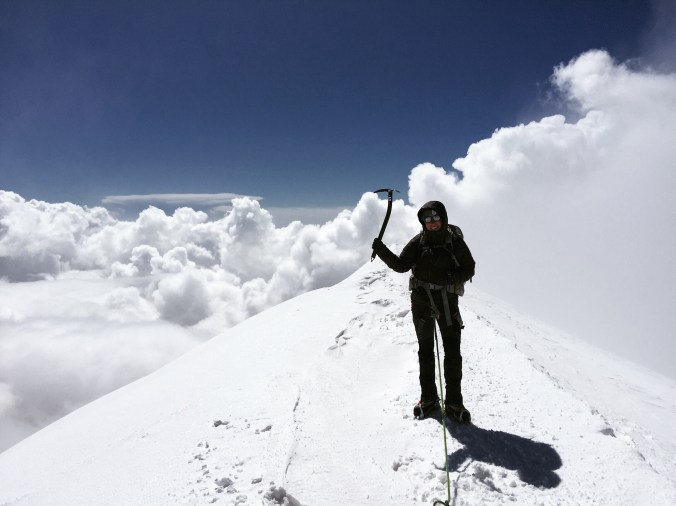
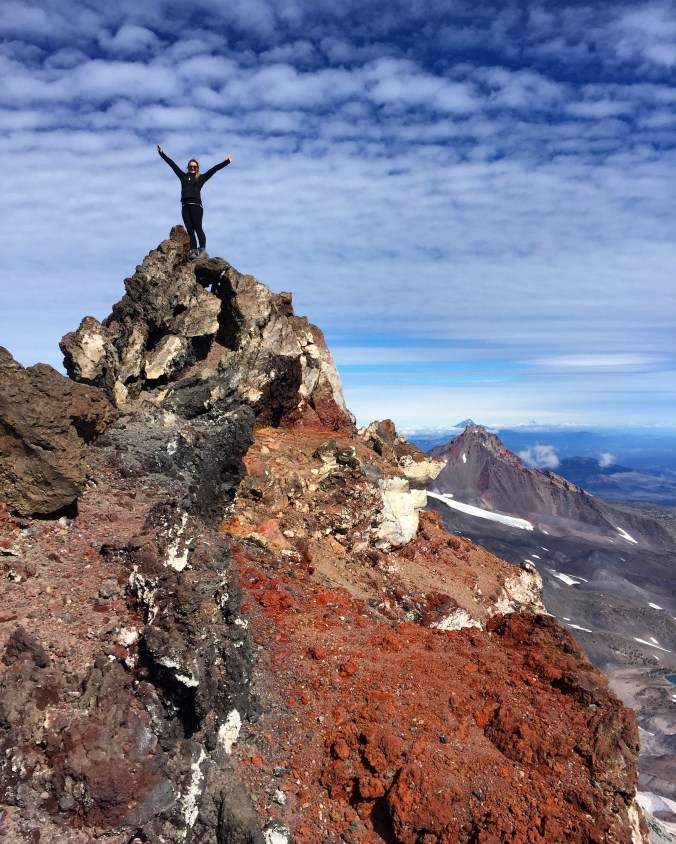
  1. Pico de Orizaba (18,491’)

Overview: 4 miles + 5000 feet elevation gain


IMG_8390

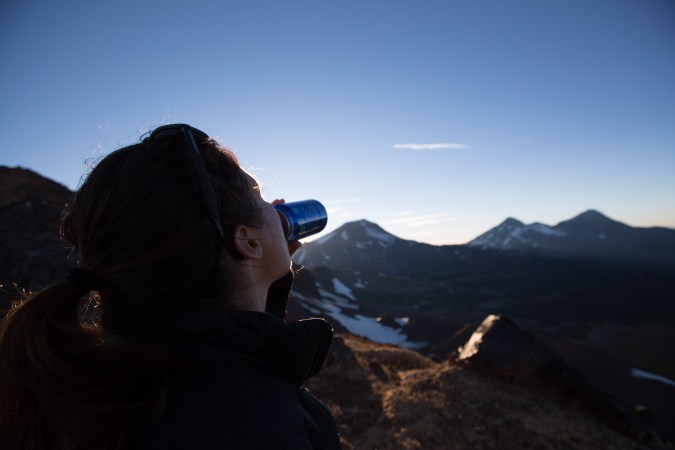
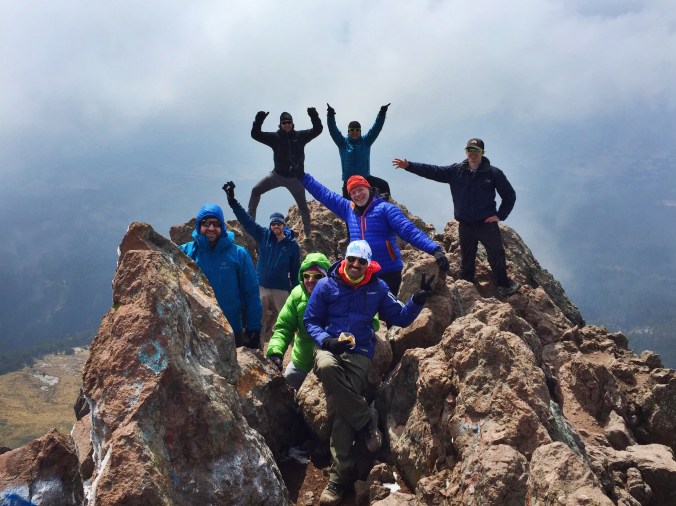
This is what we all came here for: The chance to stand on top of Mexico’s highest peak, and the 3rd highest peak on the North American continent: Pico de Orizaba. Out tough acclimatization days, and rigorous itinerary, had all been designed so we could reach this one goal.

Today was where most of us finally got within our comfort zone, with crampons strapped to our boots and ice axes leashed to our hands. Since we’d been acclimatized, we slept in the town of Tlachichuca and took off towards the mountain in a 4×4 to start hiking at 5am. Fresh snow caked the ground and warmed us up, and we all shared a spectacular sunrise on the North Face’s infamous Labyrinth, just an hour away from the glacier.

After spending hours with our heads down, focused on the tedious task of navigating across snowy rock fields, the landscape suddenly opened up and we found ourselves at the base of the glacier. Finally, we could see our end goal: the summit of Orizaba. But just as soon as we began celebrating, we were greeted by a harsh warning from a local guide… the top was much farther off than we thought.

And so we began the long, arduous slog up the 45-degree snowfield laden with blue ice and hidden crevasses. A few in our group darted up quickly, without seeming to feel a single effect of the high-altitude atmosphere. Others took their time, carefully following the 2-point rule, anchoring their axe or boot with every step. But eventually each of us made our way up the mountain in splendid time, with the last summiters topping out just 6 hours after we hit the trail. It was a breathtaking, head-splitting moment for many, and an incredible achievement for all.

Orizaba provided all of us with an awesome mountaineering challenge, for both the seasoned and beginner climbers in our group. We got lucky with crystalline snow conditions and a bluebird sky morning. Everyone successfully avoided crevasses, as well as falls or other injuries. It was by all means a perfect day, on the perfect mountain, with the perfect group of people.

IMG_8248

At the end of the day, we hiked over a marathon’s worth of miles, climbed over 16,000 vertical feet, and ate no fewer than ten million tacos.

We shouldered our way through uncomfortable cold and slight injury setbacks and we ended nearly every day with a smile and hearty cheers. And most importantly, we did it all without killing each other.

If it’s possible to do something, it’s possible to do it bigger and better – which is just what we’re planning for next year! Here we come, Ecuador 2018!

2017 Goals! My New Year’s Resolutions to Adventure More

The last year has been a whirlwind of international travel, more than a few successful summits, and weeks-long treks through some of the most beautiful mountain ranges in the world. I saw and did way more in 2016 than I’d ever expected, so my goals looking towards the New Year are more focused – and more local.

One huge difference in 2017 is my focus towards running. The six months I spent hiking and climbing last year left my legs stronger than they’d ever been before, and completely unfit for running. The adjustment back to a quick pace has been a long and gradual one, but the first adventure goal on my list (first full marathon) is sure to kick my butt into gear.

Things I WILL do:

Things I’d like to do:

  • Mt. Hood Winter Ascent: This goal depends on how long winter lasts, and whether I can rally a climbing partner to join me. Any takers?
  • Take a ski mountaineering course, ice climbing course, and more ropes courses at an indoor gym. Ski touring and ice climbing is something I’m totally unfamiliar with, and I’d like to learn more about avalanche safety and crevasse navigation before setting off on a winter ascent of Adams, St. Helens, and other more remote volcanoes.
  • Run the Zion Traverse (50 miles, 6500 ft. elevation)
  • Run the 8000 meter challenge (40 miles, 12000 feet elevation), also known as the SoCal Triple Crown
  • Ragnar Trail Run Relay: Mt. Rainier
  • Explore the Tetons National Park, climb Grand Teton (13,770 ft.)
  • Explore Yellowstone National Park, run the Yellowstone Half Marathon
  • Explore the Colorado 14ers and backpack, climb, or run

Things I’ll table for 2018 or beyond:

… and I’m sure that as the year goes on, so will my list 🙂

Comment below if you’re interested in joining me on any of these adventures!

Sea Level Training for High-Altitude Endeavors: My Regimen for Aconcagua

Just two weeks ago I made the plunge and decided to join one of my most fearless friends on another high-altitude excursion across the world: Aconcagua in Argentina. At 22,841 ft., this mountain will be the highest (and hardest) summit we’ve ever pursued, and I couldn’t be happier to be embarking on this expedition with one of my bravest, most driven and adventurous friends.

When I tell people I’m leaving in a week to climb the tallest mountain outside of the Himalayas, the highest point in the Western hemisphere, and the Seventh Summit of South America – the first question I get is inevitably: How are you training for high altitude while you’re here at sea level?

The easiest (and only) answer: You simply can’t prepare for altitude. But you can condition your muscles and mind to be ready once you arrive.

Here are the main ways I’ve been amping up my cardio, strength, and endurance training for Aconcagua the last three weeks…

img_7330

Viewpoint from Pittock Mansion in downtown Portland

(1) Trail Running

Despite its notorious rain, Portland is one of the top destinations for runners in the country, partly due to the trails it has right within its city blocks.

Hands down, my new favorite running trail has been Leif Erikson Drive. Super accessible from anywhere in NW Portland as well as right off of the freeway, this wide, gradual, and feet-friendly trail is over 11 miles long. Plus: this route features distance markers every 1/4 mile, which make it super easy to track your progress. I started out at 10 miles, then onto 12, and on my latest trip I reached 15 miles round-trip. It’s definitely my go-to spot for upping my mileage week after week as my climb approaches.

This has been my first winter back in Oregon since high school, and the adjustment from a California climate to the snowy season we’ve been having has been a learning lesson for my layering system. I’d read some time ago that cold air makes your lungs work harder to metabolize oxygen, so frigid temperatures should get you used to these same effects at high-altitude and help enhance your ability to acclimatize. So in a way, the winter weather is really doing me a favor.

img_7271

Hike Lower Macleay Park in downtown Portland

(2) Strength Training

Because I already love running, the first to-do of my training list was a cinch. I knew that my biggest challenges would come in strength training, which I hadn’t done since before I left on my worldwide trip in February (nearly a year ago). So I got to dust off my weights, and I now dedicate 3-5 days per week on different arm, abdominal, and leg muscles during 20-40 minute HIIT (high intensity interval training) sessions.

My strength training regimen also includes weighted walking, which is when the photo above was taken. On this brisk Friday afternoon I loaded my backpack up with 40 lbs of Nalgene water bottles, handheld weights, and heavy books to hike out of Lower MacLeay Park. I was not paying attention to how far I could go; I knew that distance and pace mattered little to me today. I simply set out with a goal of spending at least 2.5 hours without dropping my pack, continually moving, to get my entire body used to the strain that would be put on it on the slopes of Aconcagua.

At altitude, every little detail is over-exaggerated. Weight feels heavier, breathing feels harder, muscles are more sore and headaches are more severe. The more I can get my body used to this agony  while stuck in the city, the better I’ll perform in the mountains.

(3) Duration Over Distance

Throughout all of my training, no matter where, when, or what; my main focus has been on endurance. Endurance Athletics is all about how long you can last under extreme physical strain – and that all comes to how well you are prepared for it.

That’s why when you’re training to do a seriously intense athletic feat, it’s important to place a huge emphasis on duration over distance. Even if you find yourself trotting downhill and hiking slowly uphill (as I did on the day that this photo was taken), the most important part of training is to work through the hurt. And trust me, your training should hurt. After all…

Progress doesn’t happen within your comfort zone.

Like I mentioned, this mountain is close to 7,000 meters and poses all types of objective climbing hazards, and because of this – our #1 goal is getting down safely. Aconcagua has a 30% success rate, mostly for its subzero temperatures, unpredictable weather, and seriously high altitude. Because of all of these factors, this peak demands humility from those who attempt to climb it. I feel no pressure, I only have hope that all works in our favor and we can reach this incredible summit in the heart of the Andes.

I am excited, I am anxious, and I am ready to chase this dream with such a kickass friend by my side. Keep an eye out for my wrap-up post at the end of January!

Hike to Steelhead Lake (10,350’) Through McGee Creek Canyon

Explore one of the most beautiful high-altitude lakes in the John Muir Wilderness, Steelhead Lake (10,350’), while trekking through an awe-inspiring High Sierra canyon.

Overview: 11.5 miles, 2,510 ft. elevation gain

img_6995

Whether you’re looking for a dayhike near Mammoth Lakes, planning a backpacking trip along the JMT, or have a few extra hours to spare on a cross-California road trip, this is an easy and popular trail choice for killer mountain views.

I was delighted to discover that this is one of the most easily accessible trailheads in the Eastern Sierras. You’ll be looking for the McGee Creek Road exit off of Highway 395, 8 miles south of Mammoth Lakes exit 203, or 30 miles north of Bishop. Drive straight pass the RV Park and Campground for about 4 miles, passing a horse camp, where the road will turn to gravel that’s easily drivable for any vehicle. The end of the road reaches a large paved parking area and trailhead for McGee Creek Canyon.

img_7006

From the parking lot there are a few trails that branch left and right and eventually converge a short distance up ahead. The entire McGee Creek Canyon trail is smooth, wide, and easy to follow even with some snow. You’ll start out close to 8,000 ft. and its first mile takes you through a high alpine desert until you reach an aspen forest where you’ll find Buzztail Spring.

At 2.5 miles you’ll reach your first creek crossing over two large, lopsided logs armed with hand ropes for extra support. This is your first of three crossings – and in high water periods (Spring, after a storm) – these sections can be tricky. Another half mile ahead the trail slopes flat around a large pond with Mt. Crocker looming ahead.

img_6992

The trail continues flat to mile 3.5 where you’ll cross the creek again over two much sketchier logs where you’ll want to exercise extreme caution – these were crooked and awkward when I crossed them in November of 2016. From the other side, you’ll slog upwards through a forest and farther away from McGee Creek. A mile later, around 4.5 miles from the trailhead, you’ll hit a fork in the trail and want to veer left (east) where you’ll hit your final log crossing. From here you’ll follow the steep switchbacking trail all the way up to your destination.

After 5.75 miles you’ll reach Steelhead Lake at 10,350 feet, tucked away beneath stunning walls of granite. There are plenty of camping spots along the shore, and even better places to stop and enjoy a picnic lunch before either continuing on up the trail or returning back through the canyon.

img_6997

img_6998

If you’re feeling up to a bigger challenge, you can continue on up the trail all the way to McGee Pass at 11,895 ft. for a total length of 20 miles roundtrip and almost 4,000 feet of elevation gain.

Cell service ends almost as soon as you get off of 395, so be sure to pack a map and other navigational tools. Check out the Mammoth Trail site to download a map before you go.

7 Tips for High Altitude Hiking

As seen on The Outbound Collective.

High altitude hiking is one of the most challenging and rewarding outdoor activities that you need to add to your summer adventure list right now. From the Rocky Mountains to the Sierras, to international treks up Kilimanjaro and in Nepal, hiking at high altitude gives you a unique and unforgettable look at some of the most desolate places in the world.

Like any extreme adventure, while you’re picking out the perfect camera to bring and dreaming of your quintessential summit sunrise, you’ll need to prepare accordingly and remember these tips for a successful high altitude hike.

The truth is, there’s no real way to train for high altitude other than being there yourself. So above all else, make sure you have the chance to acclimate, hydrate, and prepare for the time of your life.

img_4141

1) Understand the risks of high-altitude hiking

Do some general research on the differences between Acute Mountain Sickness (AMS), High Altitude Pulmonary Edema (HAPE), and High Altitude Cerebral Edema (HACE). Understand what a “sick person” at altitude looks like, and be prepared to take action if you or members of your team experience these symptoms.

  • AMS is the most mild form of altitude sickness and unfortunately feels very similar to a hangover. You may experience a headache, nausea, or feel exhausted… If you notice any of these symptoms, heed warning that they could predict a larger risk to HAPE or HACE.
  • HAPE occurs when liquid seeps into your lungs, and feels like you just had the wind knocked out of you. You may also cough up a frothy foam, which means it’s time to turn around and descend as quickly as possible.
  • HACE causes confusion and incoordination. If your speech is slurring and you find yourself stumbling, you are close to death and an immediate descent is imperative.

img_3342

2) Fitness is key

Do your training hikes with a weighted pack. 40 lbs. at sea level is going to feel a lot heavier (try double) once you venture above 10,000 feet. You’ll be giving yourself a break in the long run if you stuff your backpack with water, weights, or other heavy objects when you train at home.

Run stairs and hills. The calf-burners and glute-tearers you feel when hiking and running work completely different muscle groups. Switch up your workouts by adding as much elevation as you can. Training in San Francisco? Do sprints up steep hills or staircases. Stuck in a flat desert with no uphill training ground? Hit the gym and spend some time on the stairmaster. No matter where you are, there’s no excuse to not having the right physical preparation.

Get as high as possible beforehand. If you have easy access to a mountain range, slowly build your body up to higher elevations, gaining 1,000 ft. each training weekend. Starting small is also fine, too – doing aerobic exercises above 3,000 ft. will still adjust your body to working with less oxygen in your blood.

img_3466

3) Fuel yourself

It may be difficult to remind yourself, but you’ll need to be prepared to eat and drink more than usual at high altitude. Your muscles are burning energy more quickly, and your body will need more calories and H2O to properly function. This is no environment for diets: Load your pack up with sugar and carbohydrate-loaded snacks like jerky, chocolate, hard candies, and other high-calorie treats.

4) Prepare to brave the elements

Naturally prone to sunburns? Then don’t skimp on the SPF when you’re at high altitude. Sunshine, wind, and temperature reach their extremes up high. Bring the right gear and prepare to pack total face protection from the sun, wind-resistant and waterproof clothing, and extra hand warmers, thermal gloves, and wool socks to guard your body against the inhospitable mountain environment.

5) Bring first aid backups

It’s impossible to predict how your body will be affected by high altitude before you go. If it’s your first time ascending thousands of vertical feet, play it safe and carry along an altitude aid. One of the most popular altitude medications, Diamox, is commonly prescribed for treks above 8,000 ft. Be sure to also pack ibuprofen, cough drops, and over-the-counter indigestion pills in case things get less than pleasant.

img_3374

6) Know your limits

Visit your doctor before embarking on a trek in the mountains. Make sure you don’t have any lingering illnesses or undiscovered ailments that may hinder your success up high. Most importantly, be prepared to turn around if you’re not feeling well. An annoying headache or minor chest pain could be the symptom of something much worse, and you don’t want to test your body’s ability to self-preserve when you’re miles far and meters high away from safety.

7) Take it slow

Don’t rush your way out of a successful trip. Your body will naturally feel slower at high altitude, so go along with it. Nothing can truly prepare your body for the thin mountain air other than actually being there – so when you do get your chance – take your time and enjoy the adventure.

img_3878

10 Extreme Summertime Experiences in the Chamonix Valley You Can’t Miss

Chamonix is the world’s capital of extreme sports. It is the birthplace of mountaineering. And it is full of crazy, adventuresome people who are drawn to its vibrant and eclectic culture from around the globe.

If you’re planning a trip to the Alps, don’t miss these 10 things to do in the Chamonix Valley.

img_5728

1) Take the Aiguille du Midi Cable Car to Stunning Heights

Ascend this world-famous cable car to the highest museum on earth at 12,605 feet. According to the official Chamonix Tourism website, the Aiguille du Midi receives almost half a million visitors every year – and for good reason.

The Aiguille du Midi Station is also one of Chamonix’s popular starting points for multiple mountaineering routes, including those shooting for the summit of Mont Blanc (more info below).

img_5680

2) Rent a Bike and Cycle Chamonix

The stunning backdrop, challenging grades, and world-class accommodations make the Alps one of the most popular places for road biking in the world. Chamonix in particular caters to cyclists with limitless rental and gear shops, not to mention its draw for the Tour de France every year. One of the most popular and accessible routes for road biking is the Col des Montets route, a half-day excursion from Chamonix central.

If you’re looking for something a little more rugged, mountain biking in Chamonix is a must-do for adventure seekers. Most cable cars and ski lifts accommodate bikes, making it all the more easy to pick up a map and hit the trail.

3) Visit the Mer de Glace

Translated as “Sea of Ice,” the Mer de Glace is the largest and longest glacier in France and just a quick daytrip out of Chamonix using the Montenvers Train. From the train station, visitors can walk across the glacier, through an ice grotto, and even follow a trail all the way back to the valley floor. This is another popular place to practice mountaineering skills and climb all the way up to the cozy mountain house of Plan de l’Aiguille.

img_5697

4) Go paragliding

There isn’t quite a more thrilling way to see Chamonix than by flight. On a clear summer day you’ll see dozens of paragliders coasting along the valley walls above you.

Visit the Tourism Center for more information on paragliding. Or, if you’re brave and experienced enough, see what it’s like to paraglide off of the top of Mont Blanc.

img_5740

5) Try Out Ice Climbing, Rock Climbing, or Classic Mountaineering

Because of its convenient accessibility, guide options, and limitless routes, Chamonix is the perfect place for climbers of all experience levels to explore the mountains. Both beginners and avid alpine mountaineers will find high-altitude routes suited just for them.

If you’re interested in rock climbing, check out the Aiguilles Rouges range to the north of the valley (like the Aiguille du Crochues route). For a more intense ice climb or to enjoy a classic mountaineering experience, visit the south side of the valley on the Mont Blanc Massif (like the Aiguille du Midi-Plan route).

img_5586

6) Trek the Tour du Mont Blanc

If you have the time, completing the Tour du Mont Blanc is the ultimate way to experience trekking in the Alps while seeing the evolution of culture and scenery through France, Italy, and Switzerland.

Eat and drink your way through 3 countries, 100+ miles, and 33,000+ vertical feet over the course of 6-12 days. The wilderness alpine environment and cozy mountain villages create the perfect balance between an exhilarating outdoor adventure and a safe, enjoyable experience.

7) Enjoy Classic Savoyard Cuisine

This list wouldn’t be complete without a nod towards Chamonix’s famous gastronomical charms. Savoyard food is rich in potatoes and cheese, the staples for some of their most popular dishes of fondue, tartiflette, and of course, French onion soup. Pair with a glass (or liter) of Savoie wine for a truly deluxe experience.

img_5710

8) Hike to Lac Blanc

If you’re looking for a short hike to fill you time on a rest day between an adrenaline-fueled schedule, Lac Blanc can provide a relaxing and scenic break. At an elevation above 7,000 feet, this high-altitude lake sits in a picture-perfect position below skyscraping mountains and across from Mont Blanc for panoramic views of the entire valley. You won’t want to forget your camera on this trip.

9) Try a White Water Sport like Canyoning, Rafting, or Riverboarding

Jump, slide, and rope your way down waterfalls and through alpine pools on an epic canyoning trip like nothing you’ve seen before. Or try white water rafting in a mountainside Alps environment – glacial cold water included.

If neither of those get your heart racing, kick it up a notch and don a wetsuit, flippers, and a helmet for the ultimate white water extreme sport: Riverboarding (known as hydrospeed in Europe). Having difficulty picturing this? Click here.

img_5800

10) Climb Mont Blanc

Chamonix-Mont-Blanc bears the name of Western Europe’s tallest mountain for a reason. While not officially one of the Seven Summits, reaching the top of this peak is a noteworthy and challenging effort.

The Compagnie des Guides de Chamonix is the oldest, largest, and one of the most reputable guide companies in the world – let alone France. Trust them for your summit attempt and you’ll be in good hands.

South Sister Summit Hike (10,358 ft)

This is the mountain that started it all for me. Seven years ago my dad took me on a hike up Oregon’s third tallest peak and I was exhausted, drained, sore, sunburnt – and completely inspired. Yesterday, I returned with one of my best friends from high school to share this mountain with what would be her first-ever significant summit.

img_6433

Not only is South Sister a stunning image and visible from hundreds of miles throughout Central Oregon, but it is a great beginner climb to introduce hikers to high altitude mountain life. As long as you’re mentally prepared, have good physical endurance, and pack right, there’s no reason why this mountaintop should be out of reach.

Getting there is simple and accessible for any type of city vehicle. The primary route begins at Devil’s Lake Trailhead, which is 26 miles west of Bend off of the Cascade Lakes Highway. You’ll pass Mt. Bachelor and eventually see a sign on your left that leads you to the campground. To start, walk to the very end of the parking lot and follow the unmarked trail past the bathrooms. You’ll cross the main highway (some people will park alongside the highway here too) and come across a sign that says “South Sister Climbers Trail 36.” Fill out a Wilderness Permit at the kiosk and begin your ascent.

The hike begins in a lush forest that stays green year-round. Elevation gain is moderate, and in 1.5 miles you will emerge onto a sandy plain and see a four-way crossing. Pass by the turn off for Moraine Lake and continue up Wikiup Plain, following signs for South Sister Summit. The trail across the plain is soft, flat, and leads you right up to the base of the mountain.

img_6432

Enjoying the flat bit of Wikiup Plain before taking off on the REAL ascent.

Cairns mark the way on this next section and lead you up through rocky ridges to the saddle of Lewis Glacier, where you’ll see a small brilliantly-blue alpine lake. It seems like some people dump their backpacks here before heading to the summit – but I highly discourage that. You still have a few hours round-trip before you make it back to this point and you’re about the encounter the toughest and most exposed part of the climb. Be sure to carry adequate food, water, and sun protection with you.

img_6438

Lewis Glacier saddle + lake.

Leave the lake and follow the ridge up and to your right – the route should be obvious. You will be walking entirely on deposited lava and cinder rock now. This entire trail that leads you to the summit is wide, packed, and very defined. Compared to my first summit seven years ago, there is considerably less scree and potential for sliding. When my dad and I first went up this mountain, I remember both of us begrudgingly sliding one step backwards for every two we took forwards. That being said, Brooke and I did fall on our butts once or twice on the descent.

img_6445

Volcanic ash + scree ridge leading up to the false summit.

This volcanic ridge leads you to the false summit, where you can find manmade wind blocks and stop to catch your breath and fuel up. But don’t fret; the true summit is visible just across a large snowfield, and is just a short, flat, gradual walk ahead. Follow the climber’s trail to the right around the snowfield (which becomes Teardrop Pool when melted out).

img_6450

Final few steps to the summit.

img_6452

img_6476

Brooke standing on the summit.

You’ll find a tall summit rock marked with a small metal pole and a piece of pink ribbon wrapped around it. As tempting as it is to jump around up here, be careful – lava rock is sharp and unforgiving. Enjoy the views of Mt. Bachelor to your south and Middle Sister, North Sister, Mt. Jefferson, and more to your north. Return the way you came and remember; you’re only halfway done. In almost all mountaineering cases, the bulk of accidents happen on the descent.

I’m writing this article after one of the most dangerous seasons that South Sister has ever had. More and more people are climbing the mountain, but more and more are inadequately prepared (either in physical condition or with gear), and an alarming number of hikers have had to be rescued – sometimes waiting overnight for mountain personnel. Be careful, be safe, and if it’s your first time up here – never hike alone.

img_6469

img_6470

For this climb I can’t recommend enough that you choose proper footwear and use a pair of tall hiking boots. Almost the entire trail on the actual mountain consists of sandy scree that will flood your tennis shoes, and sharp rocks that could twist an unsupported ankle. Tennis shoes will not just be uncomfortable – they could be dangerous.

It’s also important to remember weather fluctuations at this altitude. Below the Lewis Glacier Lake you may feel warm, even hot, and want to ditch your extra layers – but fight that urge and be sure to carry up all of your supplies to the summit. It’s considerably more windy and chilly on the summit ridge, and a lot can change in two hours.

img_6475

Views of Broken Top on the descent.

Hike Broken Top Crater for the Best Sunset View of the Three Sisters

Central Oregon’s limitless trail systems can take seasoned hiking mavens and first-time trail goers through miles and miles of beautiful, pristine wilderness. Choosing a hike or trail run is no easy task, if only for the sheer number of possibilities. Fortunately, my friend Dane and I found what I proudly call the #1 best sunset view of the Three Sisters and beyond.

img_6268

Approach hike takes you straight towards Broken Top Mountain.

Between taller and more strenuous summits, and lengthier hikes in low elevation that wouldn’t grant us views of the mountains – we were stumped. We wanted to see as much of the mountains as possible, but we definitely didn’t want to be stuck up in the cold and dark once the sun retreated. Finally, we landed on Broken Top Crater.

This slow, gradual hike covers a little over 4 miles one way for a total 8.4 mile trip. Elevation gain is 1,300 ft. – but be warned, the trail tops out at 8,200 ft., so you’ll definitely feel the altitude on your way up.

img_6273

Perfect views of Bachelor to the south on your approach hike.

To get there, follow Cascade Lakes National Scenic Byway past the Mt. Bachelor ski areas and turn off towards the Todd Lake trailhead. The dirt and rugged Road 370 continues past Todd Lake for a few miles that will take between 15-25 minutes of slow, bumpy moving. Use a high-clearance 4WD vehicle on this road. Eventually you’ll come to a flat, round parking space at the Crater Ditch Trailhead where you’ll start your hike. You need a NW Forest Pass to park here.

Starting off, you’ll join a trail that comes up from Todd Lake trailhead and follow it to your left (if your vehicle isn’t rugged enough for Road 370, you can start this hike from Todd Lake, though it’ll up your mileage to 14 and nearly double your elevation gain). The first third of your hike follows a high bank alongside a stream where you’ll walk straight towards Broken Top Mountain in clear view.

img_6270

Intersection that leads to Green Lakes.

Two paths fork in the road and you’ll veer right towards Broken Top, its opposite direction leading to Green Lakes – another superb hike in Central Oregon. From here, you gain most of your elevation, and slowly climb up around the east side of Broken Top to end up on the north ledge of the crater. After following a rocky moraine up a stream, you’ll top out at one of the most jaw-dropping, crystal clear glacier lakes in the Three Sisters Wilderness.

img_6286

img_6340

Continue on up the same path to a lookout point where you’ll be rewarded with the best sunset view in Central Oregon. From south to north, you’ll see South Sister, Middle Sister, North Sister, Mt. Washington, Three Fingered Jack, Mt. Jefferson, and Black Butte.

img_6290

It’s important to remember that this lookout is perched above 8,000 ft. – so as soon as the sun goes down, the wind will pick up and the temperature will drop. Pack appropriately and be prepared for anything. The entire trail is smooth and somewhat wide, and Dane and I found it pretty easy to navigate our way down in the dark. Just don’t forget your headlamp!

img_6299

img_6335

Photo (c) Dane Tomseth

Believe it or not, there is intermittent cell phone reception around the area, so rest assured you’ll be able to have the real wilderness experience without feeling completely cut off from your navigation system or emergency contacts.

img_6330

Photo (c) Dane Tomseth

Hike East Peak (9,380 ft) in the Wallowa Mountains

The Wallowa Mountains are one of the Seven Wonders of Oregon – and rightfully so. Also dubbed the “Oregon Alps,” this range has over 30 mountains over 9,000 ft. in elevation. While Central Oregon gets more visitors and credit for its massive volcanoes, the Wallowas are a truly stunning sight and well worth the trip to the state’s isolated Northeast corner.

img_6152

Lake Wallowa

The largest and most popular town to visit the Wallowas is Joseph, Oregon, which is actually less than a 4 hour drive from Boise, ID, and a 5.5 hour drive from Portland. This hike starts out of Joseph, and more specifically, utilizes the Wallowa Lake Tramway that takes visitors from the valley floor at 4,450 ft. up to the summit of Mt. Howard at 8,150 ft.

img_6157

To get to East Peak, you’ll take an unmaintained climber’s trail that is not part of the Tramway map or trail system. Don’t worry, the trail itself is very well-defined and nearly impossible to get lost on. To begin, start hiking uphill from the tramway exit on the designated trail. After an eighth of a mile you’ll see an unmarked trail at a T-intersection stem off slightly downwards through some sparse trees. Looking up, you’ll see a meadow and East Peak beyond.

If a Tramway employee is available, it would be in your best interest to be walked to this intersection since it is unmarked. One man was more than happy to volunteer to walk us up and point us in the right direction.

Follow the trail all the way up the ridge, pass over a couple of false summits, and you’ll find yourself standing over one of the best views of the Wallowa Mountains! Look down towards McCully Basin and Aneroid Lake, and out across a sea of 9k+ peaks. You can continue hiking along the ridge to the close-by Hidden Peak (9,460 ft), or if you’re feeling ambitious, keep on going another 3 miles along the ridge to reach Aneroid Mountain (9,701 ft).

img_6167

View from the East Peak Summit

img_6159

There’s another route described on Summitpost (link here) that begins from the valley floor, avoiding the tramway, and ascends past Anderoid Lake.

No need to pack heavy in the snack department. The food in the Summit Grill at the top of the tramway serves a delicious lunch with alcoholic beverages for those who’d like to indulge – you’ve earned it!

Travel with Purpose: Why You Should Trek Through Langtang Valley This Fall

As seen on The Outbound Collective.

Nepal is the gateway to the Himalayas, home of the tallest mountains in the world. For decades the country has attracted global attention for its magnificent beauty, rich culture, and welcoming communities. However, the last year has cast a different type of spotlight on this third-world country that encourages foreigners to visit for new reasons.

The earthquake that devastated Nepal in April of 2015 did more than just take lives and damage buildings; it ruined the tourism industry in many remote village who depend on foreign visitors to maintain their livelihood. The Langtang Valley experienced some of the worst of this impact because of its position between two skyrocketing mountain ranges, and what was once one of the top destinations in the country, quickly became one of the least visited. Nepal isn’t looking for volunteers or Peace Corps members; they need your business as a trekker.

img_4474-2

Rockfall plummeted down both sides of the valley during the earthquake, leaving many buildings irreparable and eventually abandoned.


Nepal’s most popular trekking season is from September through December, when the temperature is moderate, precipitation is minimal, and the views are crystal-clear. Here’s why you should pack your bags and plan a trip to the high hills this fall.


Nepal is one of the world’s top destinations for epic trekking. That’s because of its…

  • Accessibility: Most of Nepal’s trails are easily accessed, and more importantly, they’re friendly to both beginner and experienced hikers. Visitors have the opportunity to shorten or lengthen their trek based on their personal skill and preference.
  • Affordability: Nepal is notoriously shoestring-budget-friendly, in that its lodging, food, and recreation prices are some of the lowest in the world. Plus, you can hire a local guide to escort you during your trek for just $10-20 per day.
  • Beauty: Nepal is the best way to discover and explore the earth’s highest peaks, while experiencing an incredibly vibrant and unique culture. It’s truly the best of both worlds.
img_4482-1

Rebuilding and construction work begins before dawn and ends after dusk, through rain or shine.

The Langtang Valley offers an unparalleled glacial valley experience. You’ll want to see Langtang for its…

  • Proximity: The Langtang Valley is the closest trekking region to Kathmandu, reachable by public bus in five hours, or by a private car in half that time. Villages are close to one another, so you’ll never go long without finding a restaurant or lodge for eating or sleeping.
  • Flexibility: Unlike the difficult-to-reach Annapurna and Khumbu regions, Langtang treks can be completed in as little as 3 to 5 days for travelers with a short time limit.
  • A Community in Need: The Langtang region is open for business, but much of the outside world doesn’t know this yet. Earlier this year gaps of communication left Kathmandu city-goers with the impression that the entire valley was still under construction – but in truth, they’ve been open all along. Lodge owners are desperate for the tourism they’ve built their livelihoods on, and they need your business now more than ever.

img_4478-1

How you can help…

  • Hire Local Guides: From the hustle and bustle of Kathmandu to the smallest villages perched beneath a mountain pass, there are always local guides ready and willing to assist you with your journey. For a small price, you’ll get advice, direction, and support from a person who knows the trails best.
  • Take the Road Less Traveled: Western culture teaches us to stick with the crowds – but in Nepal, it’s better to visit the less-populated establishments. Eat at an empty restaurant, or purchase goods from the shop nobody is going to. You could be the only customer a diner receives all day; and you will be thanked and remembered for that.
  • Give: Spend your money and time with lodge owners, buy an extra cup of tea or one of the pieces of jewelry that your host mother is selling. Nepal is by and far more inexpensive than your life back home; you can afford to treat yourself.

img_4479

The April 2015 earthquake was devastating, no doubt, but one of the most important takeaways I’ve seen firsthand is the resilience and genuine happiness the Nepalese have in the face of tragedy. Lodge owners, construction workers, and even students band together to rebuild their communities and livelihoods. It’s the people – not the mountains – that keep recurring visitors coming back, and who make this country one of the top destinations for tourists worldwide.

Go and see for yourself.