This is the mountain that started it all for me. Seven years ago my dad took me on a hike up Oregon’s third tallest peak and I was exhausted, drained, sore, sunburnt – and completely inspired. Yesterday, I returned with one of my best friends from high school to share this mountain with what would be her first-ever significant summit.

Not only is South Sister a stunning image and visible from hundreds of miles throughout Central Oregon, but it is a great beginner climb to introduce hikers to high altitude mountain life. As long as you’re mentally prepared, have good physical endurance, and pack right, there’s no reason why this mountaintop should be out of reach.
Getting there is simple and accessible for any type of city vehicle. The primary route begins at Devil’s Lake Trailhead, which is 26 miles west of Bend off of the Cascade Lakes Highway. You’ll pass Mt. Bachelor and eventually see a sign on your left that leads you to the campground. To start, walk to the very end of the parking lot and follow the unmarked trail past the bathrooms. You’ll cross the main highway (some people will park alongside the highway here too) and come across a sign that says “South Sister Climbers Trail 36.” Fill out a Wilderness Permit at the kiosk and begin your ascent.
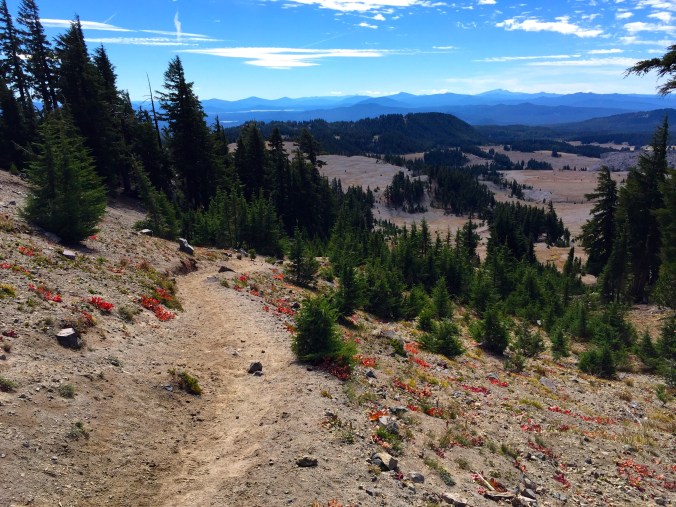
The hike begins in a lush forest that stays green year-round. Elevation gain is moderate, and in 1.5 miles you will emerge onto a sandy plain and see a four-way crossing. Pass by the turn off for Moraine Lake and continue up Wikiup Plain, following signs for South Sister Summit. The trail across the plain is soft, flat, and leads you right up to the base of the mountain.
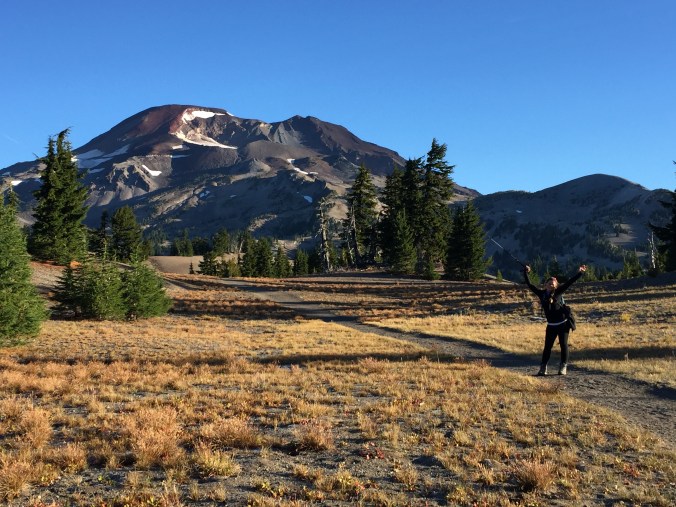
Enjoying the flat bit of Wikiup Plain before taking off on the REAL ascent.
Cairns mark the way on this next section and lead you up through rocky ridges to the saddle of Lewis Glacier, where you’ll see a small brilliantly-blue alpine lake. It seems like some people dump their backpacks here before heading to the summit – but I highly discourage that. You still have a few hours round-trip before you make it back to this point and you’re about the encounter the toughest and most exposed part of the climb. Be sure to carry adequate food, water, and sun protection with you.
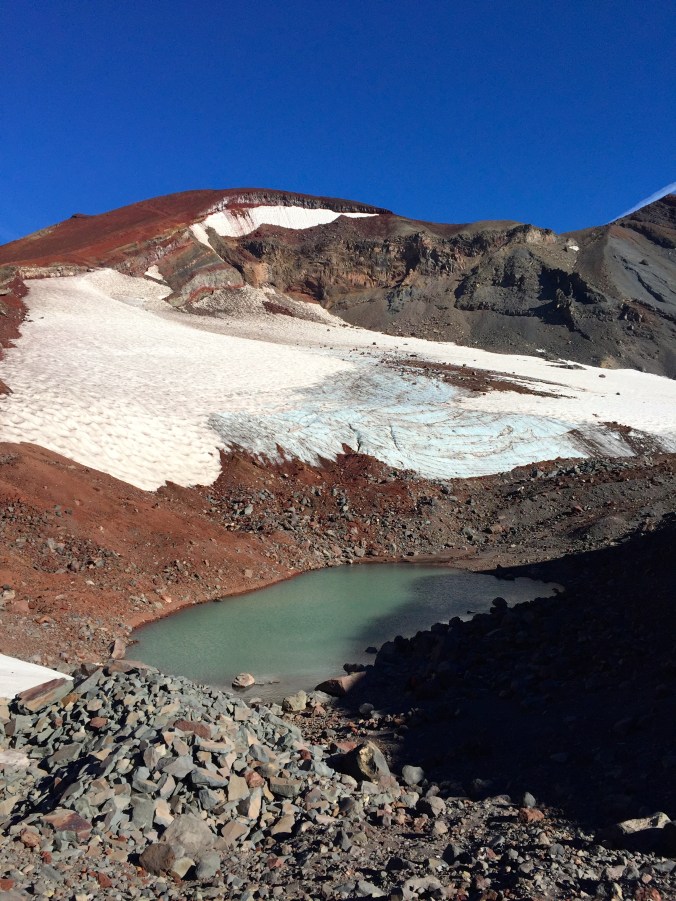
Lewis Glacier saddle + lake.
Leave the lake and follow the ridge up and to your right – the route should be obvious. You will be walking entirely on deposited lava and cinder rock now. This entire trail that leads you to the summit is wide, packed, and very defined. Compared to my first summit seven years ago, there is considerably less scree and potential for sliding. When my dad and I first went up this mountain, I remember both of us begrudgingly sliding one step backwards for every two we took forwards. That being said, Brooke and I did fall on our butts once or twice on the descent.
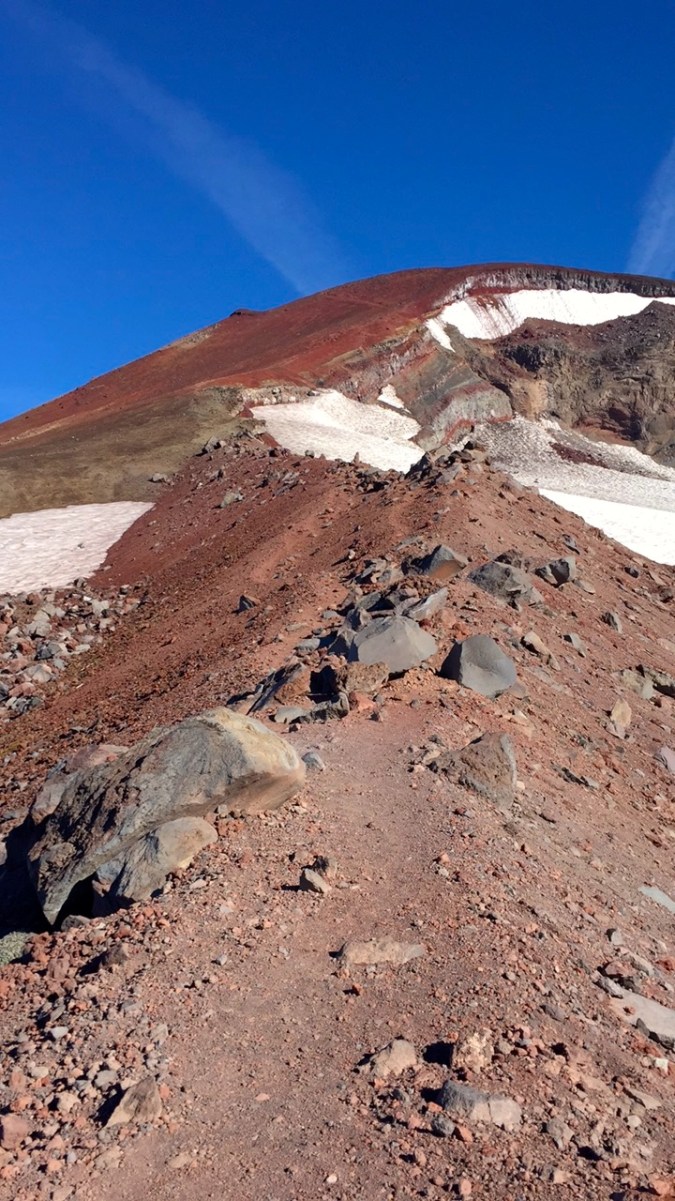
Volcanic ash + scree ridge leading up to the false summit.
This volcanic ridge leads you to the false summit, where you can find manmade wind blocks and stop to catch your breath and fuel up. But don’t fret; the true summit is visible just across a large snowfield, and is just a short, flat, gradual walk ahead. Follow the climber’s trail to the right around the snowfield (which becomes Teardrop Pool when melted out).

Final few steps to the summit.

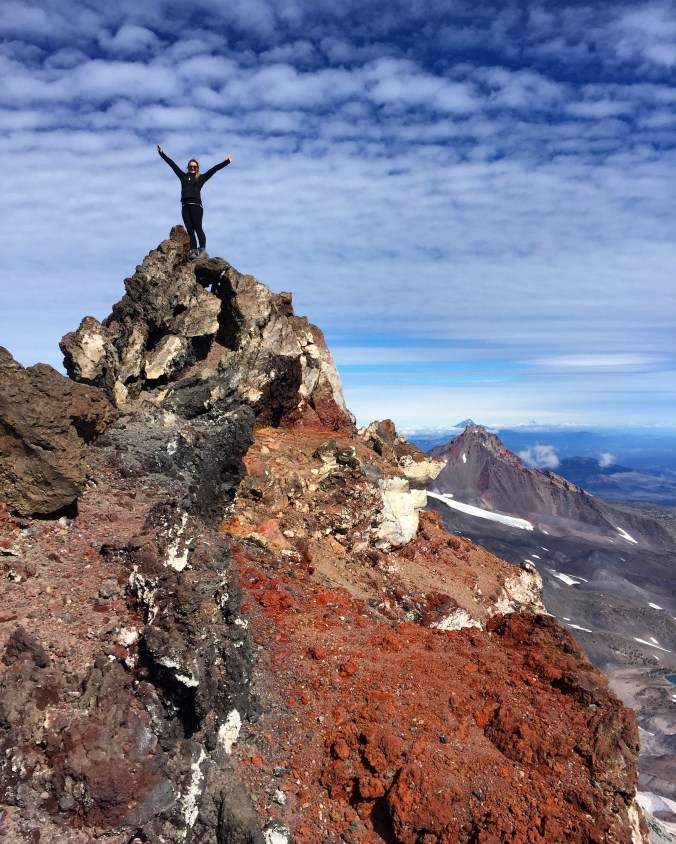
Brooke standing on the summit.
You’ll find a tall summit rock marked with a small metal pole and a piece of pink ribbon wrapped around it. As tempting as it is to jump around up here, be careful – lava rock is sharp and unforgiving. Enjoy the views of Mt. Bachelor to your south and Middle Sister, North Sister, Mt. Jefferson, and more to your north. Return the way you came and remember; you’re only halfway done. In almost all mountaineering cases, the bulk of accidents happen on the descent.
I’m writing this article after one of the most dangerous seasons that South Sister has ever had. More and more people are climbing the mountain, but more and more are inadequately prepared (either in physical condition or with gear), and an alarming number of hikers have had to be rescued – sometimes waiting overnight for mountain personnel. Be careful, be safe, and if it’s your first time up here – never hike alone.

For this climb I can’t recommend enough that you choose proper footwear and use a pair of tall hiking boots. Almost the entire trail on the actual mountain consists of sandy scree that will flood your tennis shoes, and sharp rocks that could twist an unsupported ankle. Tennis shoes will not just be uncomfortable – they could be dangerous.
It’s also important to remember weather fluctuations at this altitude. Below the Lewis Glacier Lake you may feel warm, even hot, and want to ditch your extra layers – but fight that urge and be sure to carry up all of your supplies to the summit. It’s considerably more windy and chilly on the summit ridge, and a lot can change in two hours.
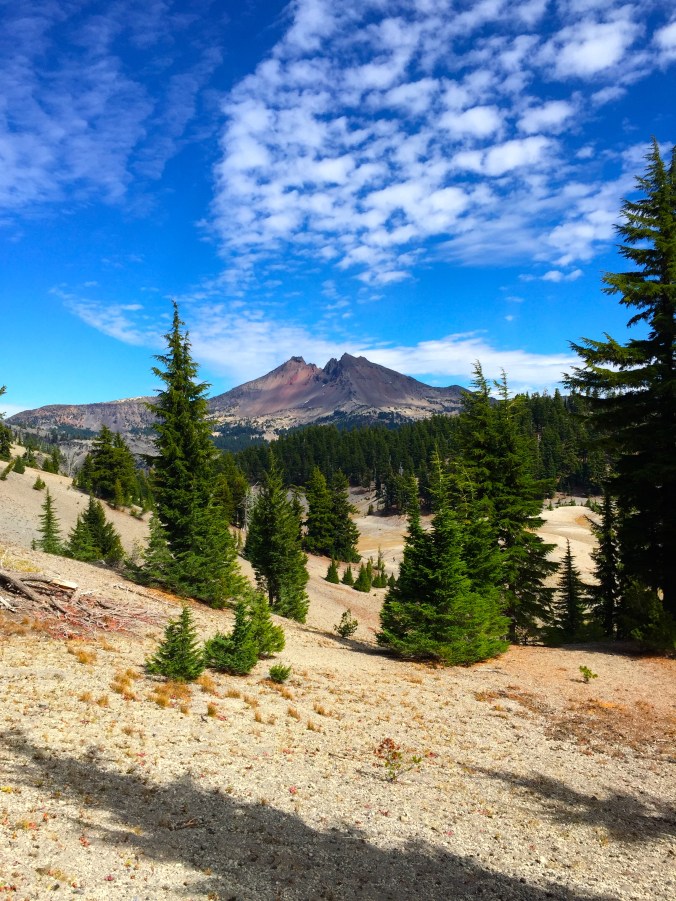
Views of Broken Top on the descent.
