Circumnavigating Volcanoes: Trail Running the Three Fingered Jack Loop

Challenging grades, sparkling alpine lakes, and jaw-dropping views that take you around the entire Three Fingered Jack mountain massif in Central Oregon. Over half of this trail was obliterated by a wildfire 13 years ago, but the burn area just means more opportunity for mountain views.

img_6515

Overview: 22.8 miles, ~4,500 elevation gain, 1-3 days

While Three Fingered Jack is still high on my list of Central Oregon summits, I’m dedicating all of my free time in the next few weeks to preparing for my Circumnavigation of Mt. Hood via the Timberline Trail (~40 miles, 9k elevation). So this morning I traded my trekking poles in for trail runners and set out on one of the area’s most popular hiking loops.

Most people will complete the Three Fingered Jack loop during a 2-3 day backpacking trip, and I did read of some hiking the entire trail in one day. However, I didn’t see any reports about how this route would feel as a trail run, so I decided to test it out for myself.

Note: This route takes you around Jack Lake, Wasco Lake, and onto the western ridgeline of Three Fingered Jack. It does not go down into the popular Canyon Creek Meadows; read this article, this article, or this article for directions to Canyon Creek.

I chose to complete this trail counterclockwise so that I would have the sun on my side; it was 38 degrees the morning I began and having sunlight to warm me up was tantamount to my success, and enjoyment, of this run. There’s plenty more shade on the west side of the mountain than the east side, so you should have no problem cooling down in the afternoon.

img_6506

You’ll start your route out at the Santiam Pass access to the Pacific Crest Trail, right off of Highway 20, almost impossible to miss. Make sure you bring your NW Forest Pass for the parking lot, and fill out a wilderness permit at the trailhead.

Distance breakdown:

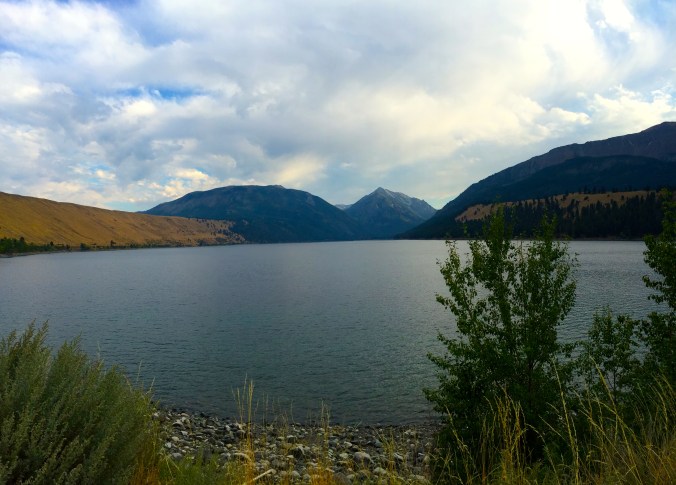
  • Santiam Pass Trailhead to Booth Lake: 4.2
  • Booth Lake to Jack Lake Trailhead: 6 miles
  • Jack Lake Trailhead to Wasco Lake: 3 miles
  • Wasco Lake to Santiam Pass Trailhead via PCT: 9.6 miles

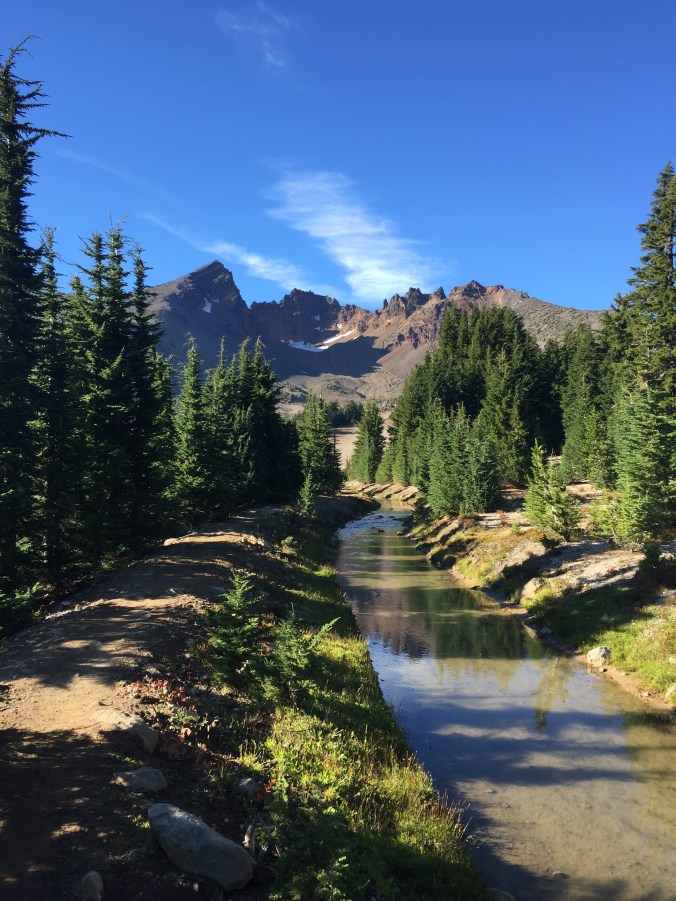
Start out on the PCT at Santiam Pass for about .2 miles before you hit a junction and turn right to follow Summit Trail #4014. This trail will take you all the way past Square Lake, Booth Lake, Jack Lake, and up to Wasco Lake.

img_6513

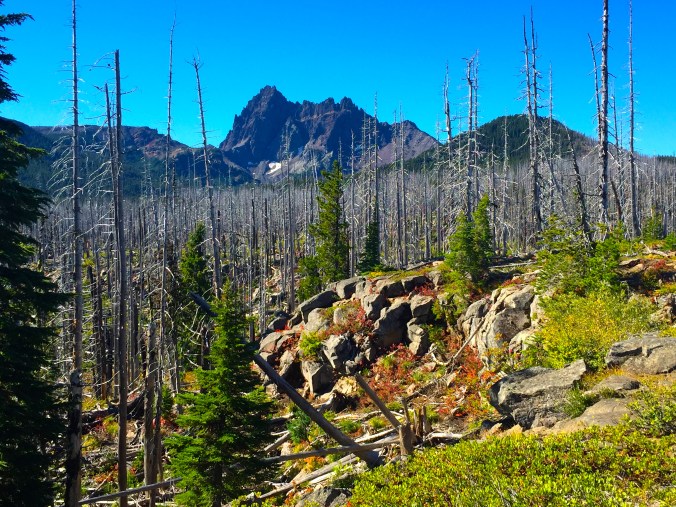
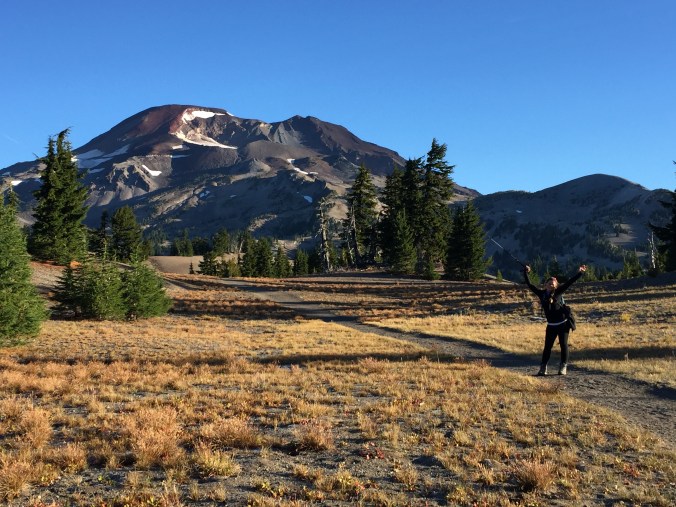
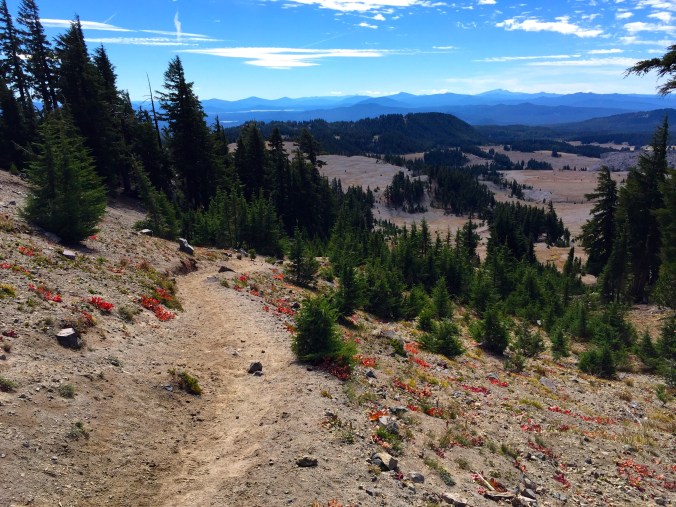
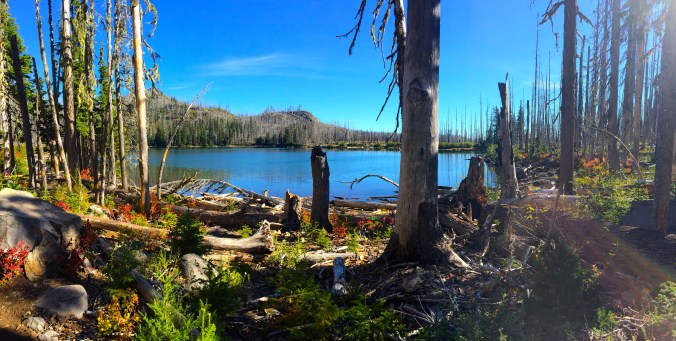
Massive burn areas all along this trail means you’ll have more opportunity to admire the mountain.

The undulating Trail #4014 passes through an incredible burn area that gives you views of the Three Sisters, Mt. Jefferson, Black Butte, and more. You’ll spend the first half of your day dashing above alpine lakes and wooded campsites before you reach the busy trailhead at Jake Lake. Here you’ll find picnic benches, a restroom, and lots of day hikers – follow the trail towards Wasco Lake to continue the loop.

[Note of warning: Once you reach Jack Lake, the trail #s disappear and are replaced by names of landmarks. If you’re looking to follow the popular Trail #4010 to cut off a couple extra miles on this loop, follow signs to Canyon Creek Meadows.]

img_6509

At the opposite end of Wasco Lake, you’ll run into a trail junction. The path ahead of you has an “unmaintained trail” sign; you’ll turn left here up a short steep path that takes you to the PCT. This intersection is marked with the faintest, oldest sign that reads P.C.N.S.T. – when I saw this, already sure I was lost, all I could do was cross my fingers and hope that this stood for “Pacific Crest North South Trail.” Guess I got lucky.

The aforementioned short steep path will take you to the top of Minto Pass where you’ll ignore Trail #3437 going straight and turn left instead. Once you hit the PCT and head south (there’s also a sign pointing the way to Santiam Pass), it’s just a straight shot to the parking lot. You have 9.6 miles of rocky ridges, soft sandy trail, and unbeatable views of Central Oregon ahead of you.

img_6510

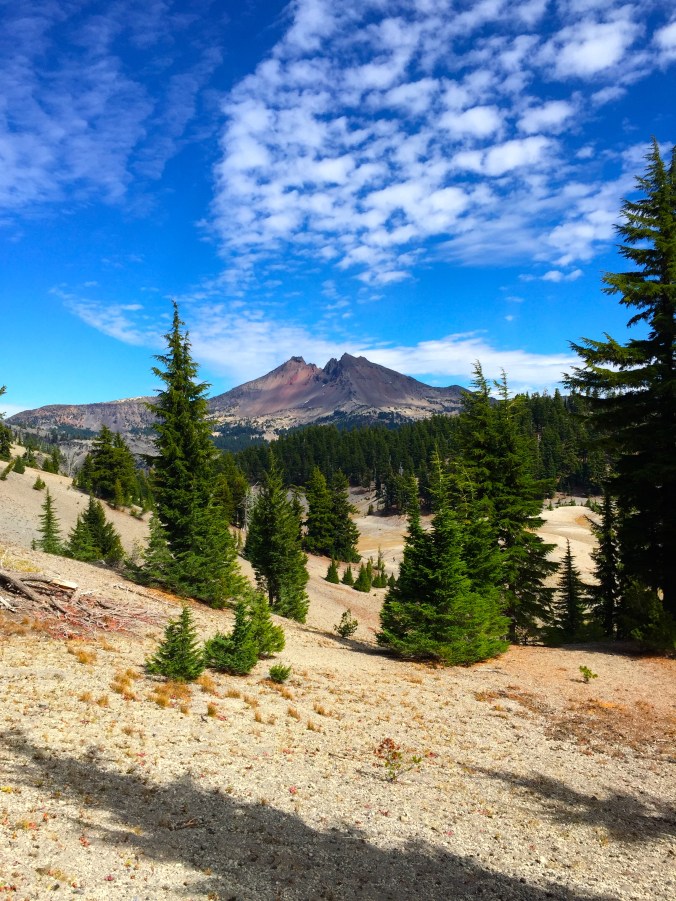
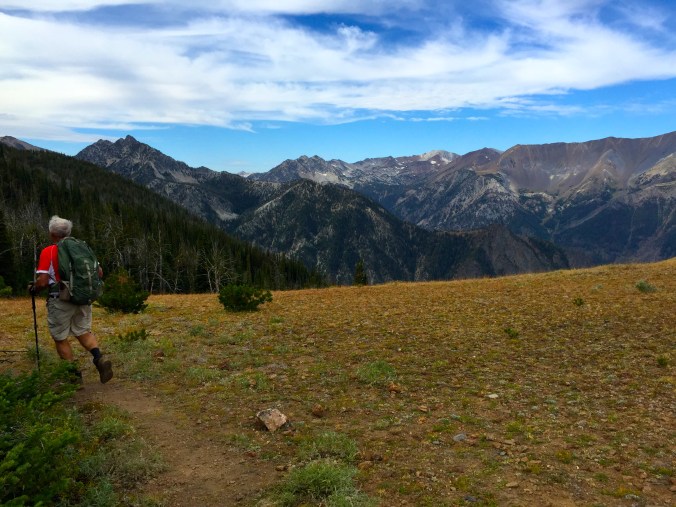
Heading up Minto Pass towards the Three Fingered Jack massif.

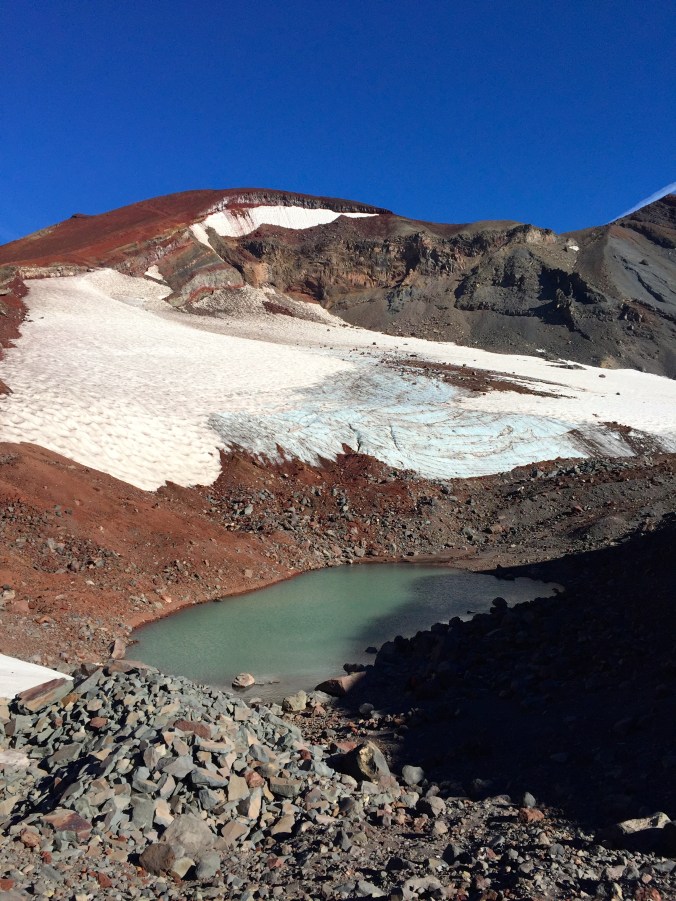
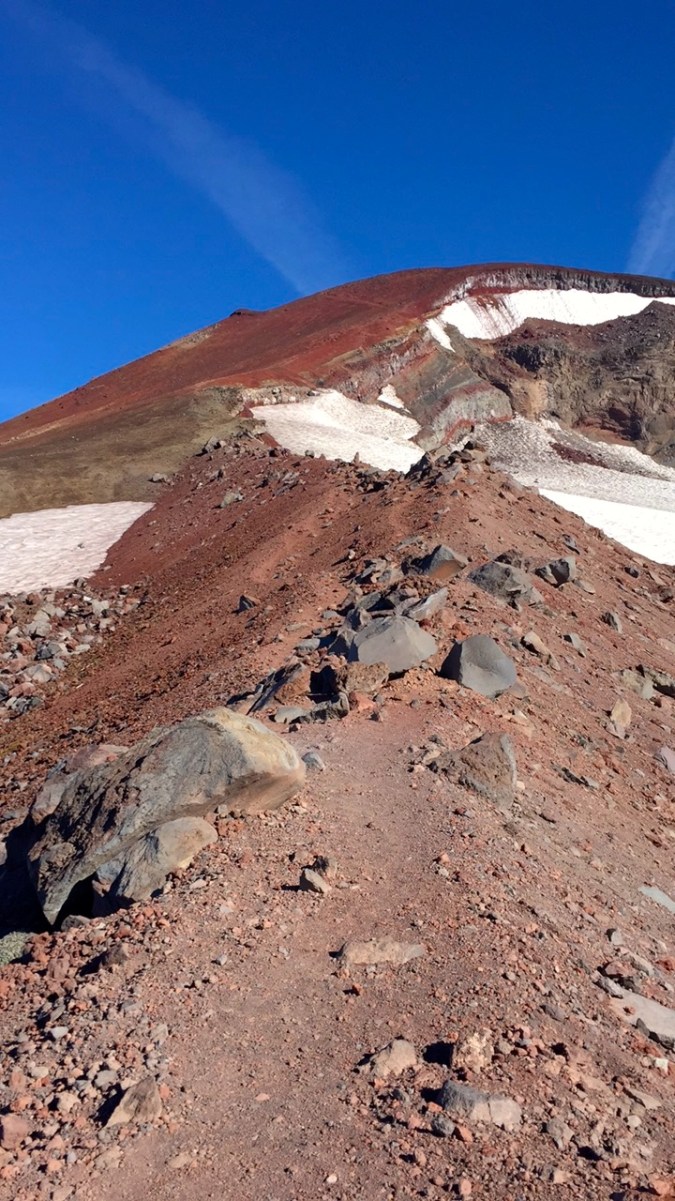
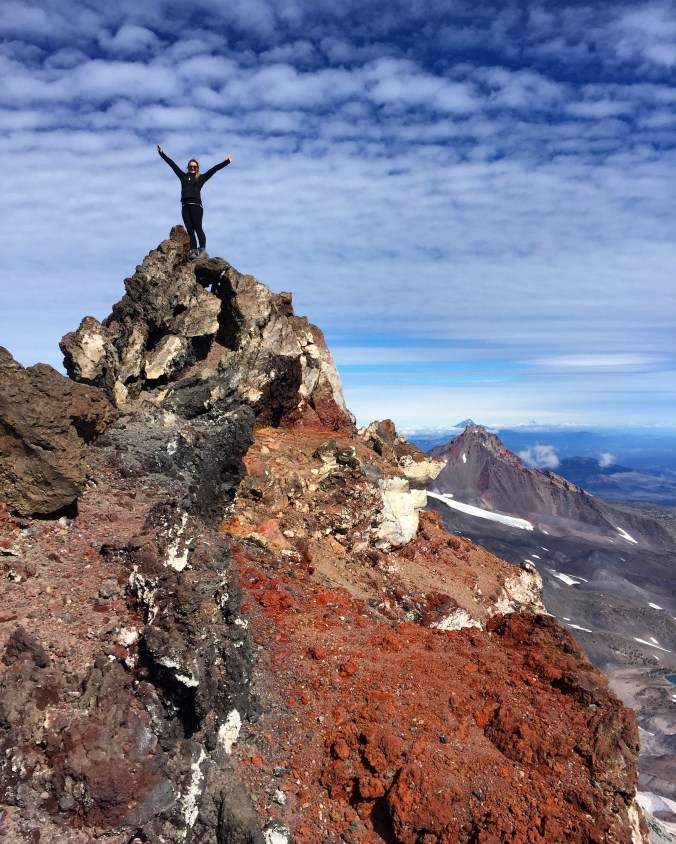
Your first 2 miles on the PCT take you through a burn area that allows you to see your entire approach up to the western ridge of Three Fingered Jack. The trail gradually approaches Porcupine Peak (6,510 ft.), the highpoint of your route today, and provides you with absolutely jaw-dropping views of Canyon Creek Meadows down to your left and the northern face of Three Fingered Jack looming down at you from your front.

Once you cross over this highpoint, you can look forward to a long, undulating 7.6 miles of descent straight back to Santiam Pass. The area just to the west of the mountain is covered in rockfall and rocky moraines that will slow you down a bit while you watch your step, but the rest – first through a thick forest and later into another burn area – is gradual, scenic, and an enjoyable way to end a long day.

img_6517

With plenty of distance to cover, and enough elevation gain to give your glutes a good burn, the Three Fingered Jack loop makes for an awesome trail run. This is an even better route for endurance runners or people training for a high-altitude event, since the trail maintains an elevation between 4,816 ft. (Santiam Pass lowpoint) and 6,510 ft. (Porcupine Peak highpoint).

Packing List:

  • Northwest Forest Parking Pass
  • 2+ liters water
  • Iodine or filter to treat water, plenty of running water sources
  • Food depending on length of trip
  • Tennis shoes, hiking shoes, whichever you prefer – the trail is in superb condition
  • Sun glasses + sun protection – burn area means more exposure to sun

South Sister Summit Hike (10,358 ft)

This is the mountain that started it all for me. Seven years ago my dad took me on a hike up Oregon’s third tallest peak and I was exhausted, drained, sore, sunburnt – and completely inspired. Yesterday, I returned with one of my best friends from high school to share this mountain with what would be her first-ever significant summit.

img_6433

Not only is South Sister a stunning image and visible from hundreds of miles throughout Central Oregon, but it is a great beginner climb to introduce hikers to high altitude mountain life. As long as you’re mentally prepared, have good physical endurance, and pack right, there’s no reason why this mountaintop should be out of reach.

Getting there is simple and accessible for any type of city vehicle. The primary route begins at Devil’s Lake Trailhead, which is 26 miles west of Bend off of the Cascade Lakes Highway. You’ll pass Mt. Bachelor and eventually see a sign on your left that leads you to the campground. To start, walk to the very end of the parking lot and follow the unmarked trail past the bathrooms. You’ll cross the main highway (some people will park alongside the highway here too) and come across a sign that says “South Sister Climbers Trail 36.” Fill out a Wilderness Permit at the kiosk and begin your ascent.

The hike begins in a lush forest that stays green year-round. Elevation gain is moderate, and in 1.5 miles you will emerge onto a sandy plain and see a four-way crossing. Pass by the turn off for Moraine Lake and continue up Wikiup Plain, following signs for South Sister Summit. The trail across the plain is soft, flat, and leads you right up to the base of the mountain.

img_6432

Enjoying the flat bit of Wikiup Plain before taking off on the REAL ascent.

Cairns mark the way on this next section and lead you up through rocky ridges to the saddle of Lewis Glacier, where you’ll see a small brilliantly-blue alpine lake. It seems like some people dump their backpacks here before heading to the summit – but I highly discourage that. You still have a few hours round-trip before you make it back to this point and you’re about the encounter the toughest and most exposed part of the climb. Be sure to carry adequate food, water, and sun protection with you.

img_6438

Lewis Glacier saddle + lake.

Leave the lake and follow the ridge up and to your right – the route should be obvious. You will be walking entirely on deposited lava and cinder rock now. This entire trail that leads you to the summit is wide, packed, and very defined. Compared to my first summit seven years ago, there is considerably less scree and potential for sliding. When my dad and I first went up this mountain, I remember both of us begrudgingly sliding one step backwards for every two we took forwards. That being said, Brooke and I did fall on our butts once or twice on the descent.

img_6445

Volcanic ash + scree ridge leading up to the false summit.

This volcanic ridge leads you to the false summit, where you can find manmade wind blocks and stop to catch your breath and fuel up. But don’t fret; the true summit is visible just across a large snowfield, and is just a short, flat, gradual walk ahead. Follow the climber’s trail to the right around the snowfield (which becomes Teardrop Pool when melted out).

img_6450

Final few steps to the summit.

img_6452

img_6476

Brooke standing on the summit.

You’ll find a tall summit rock marked with a small metal pole and a piece of pink ribbon wrapped around it. As tempting as it is to jump around up here, be careful – lava rock is sharp and unforgiving. Enjoy the views of Mt. Bachelor to your south and Middle Sister, North Sister, Mt. Jefferson, and more to your north. Return the way you came and remember; you’re only halfway done. In almost all mountaineering cases, the bulk of accidents happen on the descent.

I’m writing this article after one of the most dangerous seasons that South Sister has ever had. More and more people are climbing the mountain, but more and more are inadequately prepared (either in physical condition or with gear), and an alarming number of hikers have had to be rescued – sometimes waiting overnight for mountain personnel. Be careful, be safe, and if it’s your first time up here – never hike alone.

img_6469

img_6470

For this climb I can’t recommend enough that you choose proper footwear and use a pair of tall hiking boots. Almost the entire trail on the actual mountain consists of sandy scree that will flood your tennis shoes, and sharp rocks that could twist an unsupported ankle. Tennis shoes will not just be uncomfortable – they could be dangerous.

It’s also important to remember weather fluctuations at this altitude. Below the Lewis Glacier Lake you may feel warm, even hot, and want to ditch your extra layers – but fight that urge and be sure to carry up all of your supplies to the summit. It’s considerably more windy and chilly on the summit ridge, and a lot can change in two hours.

img_6475

Views of Broken Top on the descent.

Hike Broken Top Crater for the Best Sunset View of the Three Sisters

Central Oregon’s limitless trail systems can take seasoned hiking mavens and first-time trail goers through miles and miles of beautiful, pristine wilderness. Choosing a hike or trail run is no easy task, if only for the sheer number of possibilities. Fortunately, my friend Dane and I found what I proudly call the #1 best sunset view of the Three Sisters and beyond.

img_6268

Approach hike takes you straight towards Broken Top Mountain.

Between taller and more strenuous summits, and lengthier hikes in low elevation that wouldn’t grant us views of the mountains – we were stumped. We wanted to see as much of the mountains as possible, but we definitely didn’t want to be stuck up in the cold and dark once the sun retreated. Finally, we landed on Broken Top Crater.

This slow, gradual hike covers a little over 4 miles one way for a total 8.4 mile trip. Elevation gain is 1,300 ft. – but be warned, the trail tops out at 8,200 ft., so you’ll definitely feel the altitude on your way up.

img_6273

Perfect views of Bachelor to the south on your approach hike.

To get there, follow Cascade Lakes National Scenic Byway past the Mt. Bachelor ski areas and turn off towards the Todd Lake trailhead. The dirt and rugged Road 370 continues past Todd Lake for a few miles that will take between 15-25 minutes of slow, bumpy moving. Use a high-clearance 4WD vehicle on this road. Eventually you’ll come to a flat, round parking space at the Crater Ditch Trailhead where you’ll start your hike. You need a NW Forest Pass to park here.

Starting off, you’ll join a trail that comes up from Todd Lake trailhead and follow it to your left (if your vehicle isn’t rugged enough for Road 370, you can start this hike from Todd Lake, though it’ll up your mileage to 14 and nearly double your elevation gain). The first third of your hike follows a high bank alongside a stream where you’ll walk straight towards Broken Top Mountain in clear view.

img_6270

Intersection that leads to Green Lakes.

Two paths fork in the road and you’ll veer right towards Broken Top, its opposite direction leading to Green Lakes – another superb hike in Central Oregon. From here, you gain most of your elevation, and slowly climb up around the east side of Broken Top to end up on the north ledge of the crater. After following a rocky moraine up a stream, you’ll top out at one of the most jaw-dropping, crystal clear glacier lakes in the Three Sisters Wilderness.

img_6286

img_6340

Continue on up the same path to a lookout point where you’ll be rewarded with the best sunset view in Central Oregon. From south to north, you’ll see South Sister, Middle Sister, North Sister, Mt. Washington, Three Fingered Jack, Mt. Jefferson, and Black Butte.

img_6290

It’s important to remember that this lookout is perched above 8,000 ft. – so as soon as the sun goes down, the wind will pick up and the temperature will drop. Pack appropriately and be prepared for anything. The entire trail is smooth and somewhat wide, and Dane and I found it pretty easy to navigate our way down in the dark. Just don’t forget your headlamp!

img_6299

img_6335

Photo (c) Dane Tomseth

Believe it or not, there is intermittent cell phone reception around the area, so rest assured you’ll be able to have the real wilderness experience without feeling completely cut off from your navigation system or emergency contacts.

img_6330

Photo (c) Dane Tomseth

Hike East Peak (9,380 ft) in the Wallowa Mountains

The Wallowa Mountains are one of the Seven Wonders of Oregon – and rightfully so. Also dubbed the “Oregon Alps,” this range has over 30 mountains over 9,000 ft. in elevation. While Central Oregon gets more visitors and credit for its massive volcanoes, the Wallowas are a truly stunning sight and well worth the trip to the state’s isolated Northeast corner.

img_6152

Lake Wallowa

The largest and most popular town to visit the Wallowas is Joseph, Oregon, which is actually less than a 4 hour drive from Boise, ID, and a 5.5 hour drive from Portland. This hike starts out of Joseph, and more specifically, utilizes the Wallowa Lake Tramway that takes visitors from the valley floor at 4,450 ft. up to the summit of Mt. Howard at 8,150 ft.

img_6157

To get to East Peak, you’ll take an unmaintained climber’s trail that is not part of the Tramway map or trail system. Don’t worry, the trail itself is very well-defined and nearly impossible to get lost on. To begin, start hiking uphill from the tramway exit on the designated trail. After an eighth of a mile you’ll see an unmarked trail at a T-intersection stem off slightly downwards through some sparse trees. Looking up, you’ll see a meadow and East Peak beyond.

If a Tramway employee is available, it would be in your best interest to be walked to this intersection since it is unmarked. One man was more than happy to volunteer to walk us up and point us in the right direction.

Follow the trail all the way up the ridge, pass over a couple of false summits, and you’ll find yourself standing over one of the best views of the Wallowa Mountains! Look down towards McCully Basin and Aneroid Lake, and out across a sea of 9k+ peaks. You can continue hiking along the ridge to the close-by Hidden Peak (9,460 ft), or if you’re feeling ambitious, keep on going another 3 miles along the ridge to reach Aneroid Mountain (9,701 ft).

img_6167

View from the East Peak Summit

img_6159

There’s another route described on Summitpost (link here) that begins from the valley floor, avoiding the tramway, and ascends past Anderoid Lake.

No need to pack heavy in the snack department. The food in the Summit Grill at the top of the tramway serves a delicious lunch with alcoholic beverages for those who’d like to indulge – you’ve earned it!