Middle Sister Summit Climb (10,047 ft.) via Renfrew Glacier

If you’ve been anywhere near Central Oregon, you’ve seen the Three Sisters Mountains dominate the skyline. Each of these volcanoes exceeds 10,000 ft. and are some of the highest peaks in the state of Oregon. Though they are truly considered sister peaks to one another, each has unique climbing routes that require varying physical conditioning and gear.

Note: Some (crazy) people actually climb all three in one day. Check out this local man who completed the total traverse in 6 hours & 39 minutes.

Middle Sister is navigationally in the middle of the three, is the shortest of the three, and is quite literally in the middle in terms of difficulty of its North Sister and South Sister counterparts. This route requires good knowledge of route-finding and backcountry travel as the bulk of the day requires off-trail traversing and good navigational instincts.

img_5842-version-2

This post describes a western approach from the Obsidian Trailhead (for a good description of the eastern approach, check out this article on Summitpost). This trailhead is easy to find, right off of the historic Highway 242, just plug it into Google Maps. You need to acquire an Obsidian Limited Entry Area Permit before you go – only 30 hikers/day allowed on this trail. Call, email, or visit the McKenzie Ranger Station to do so.

Background: I’ve been up this mountain three times now (summiting once) and still don’t know which precise route I’d recommend. It’s all up to personal preference and interpretation. There are camping opportunities available at Glacier Creek and other areas along the PCT, but we chose to complete this in a one-day trip.

img_5872

You have a couple options starting out on the Obsidian Trail (#3528).

First option: Take a left after about 3.5 miles at Glacier Way (#4336), which will take you right to the start of an “unmaintained climber’s trail” sign and up the Collier Glacier.

Second option: Take Obsidian Trail all the way to a T-junction at the Pacific Crest Trail.

  • Go left (north) here to reach the “unmaintained climber’s trail” sign and continue towards the Collier Glacier on your right (our ascent).
  • Go right (south) here and follow a dry stream bed up a colorful, flowered valley towards the Renfrew Glacier on your left (our descent).

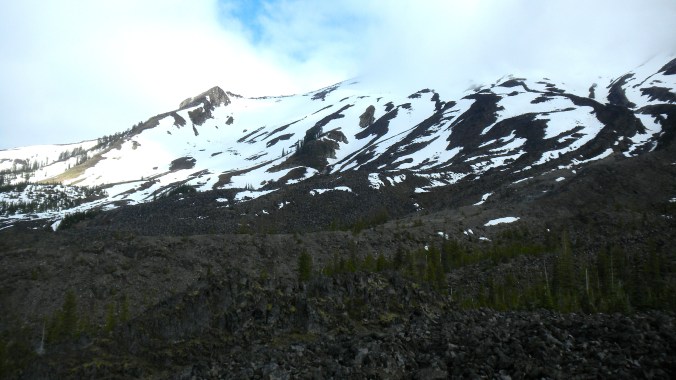
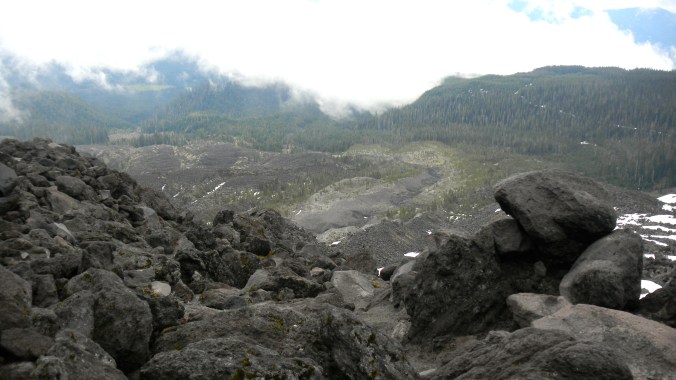
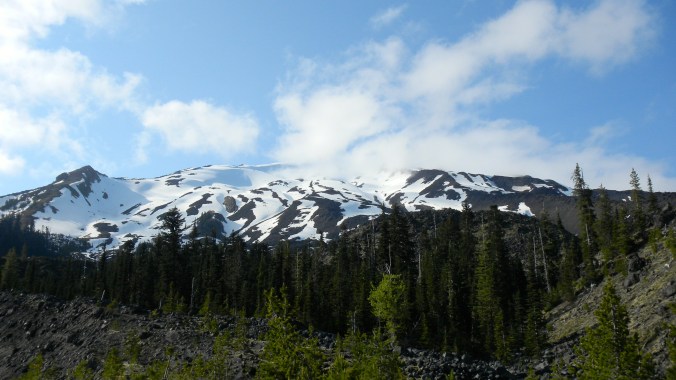
Whichever way you go, you’ll be directly facing both North Sister (to your left) and Middle Sister (on your right). Aim for the saddle between the two.

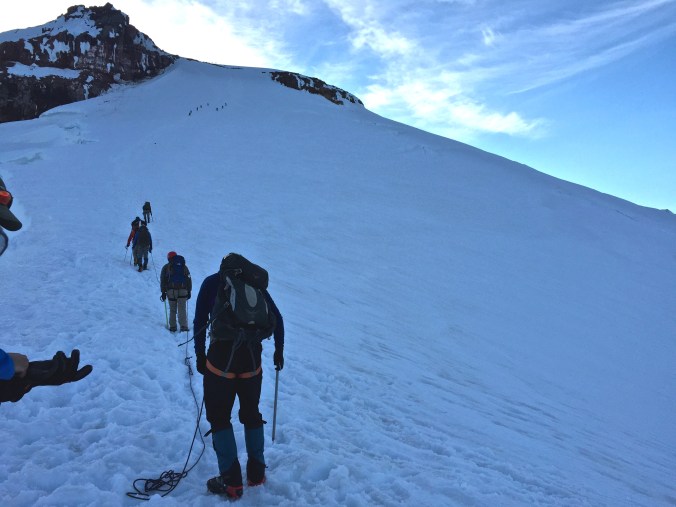
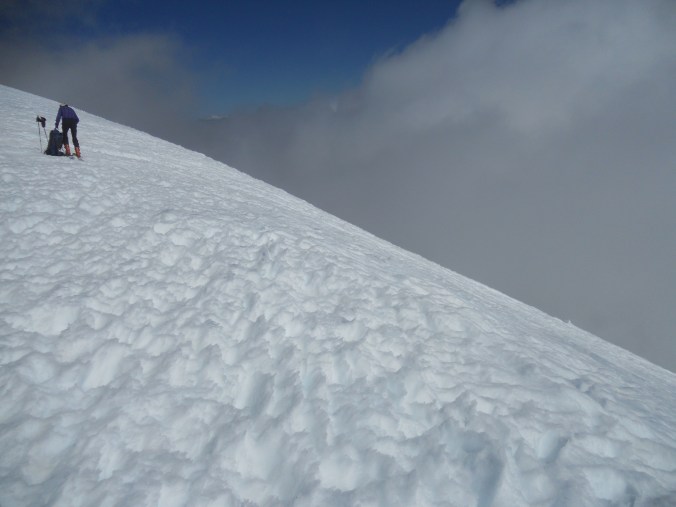
Pro tip: Use your crampons early on. The rock is incredibly difficult to navigate; you’ll save a lot of time by doing as much snow + glacier travel as possible (take it from this guy and this guy).

img_5843

Some people complete both mountains in one climb, often camping overnight in the saddle between the two, but it should be noted that North Sister’s summit requires difficult class-4 climbing where a rope and helmet are mandatory. Furthermore, North Sister is infamous in Cascade climbing for its rotten and crumbly rock – you should expect plenty of loose rock and rockfall should you attempt this climb.

Once you reach the saddle between North and Middle, continue to your right by scrambling and bouldering over razor-sharp volcanic rock. Once you reach Middle’s ridge, you should find a faint climber’s trail that leads you up the final 800 feet to the summit. Parts of this climb are super sketchy with vertigo-inducing exposure. Like the rest of the climb, it’s easy to get off-trail, so go slowly and think ahead when visually planning your route.

img_5844

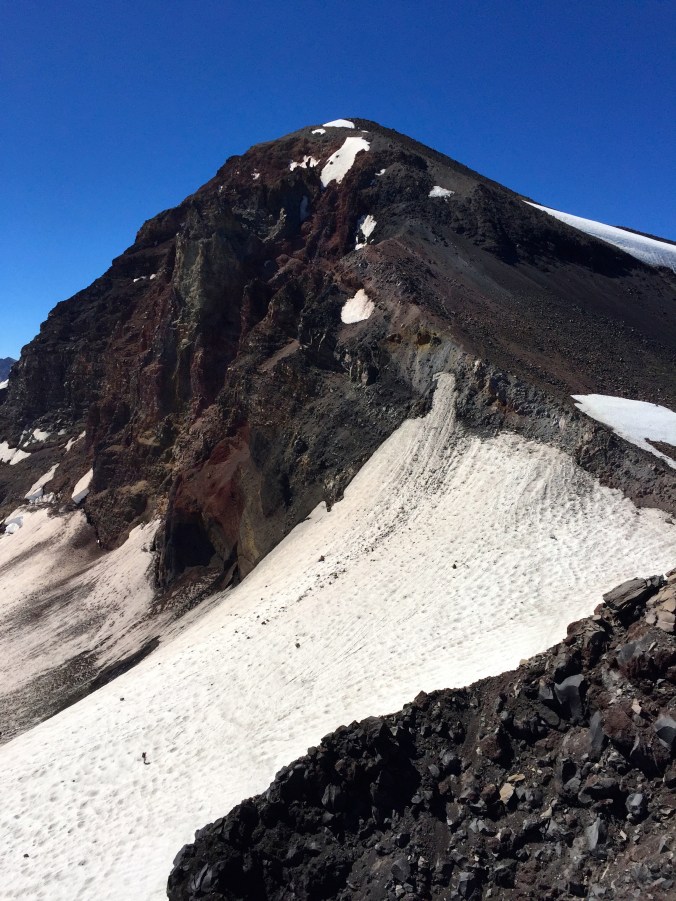
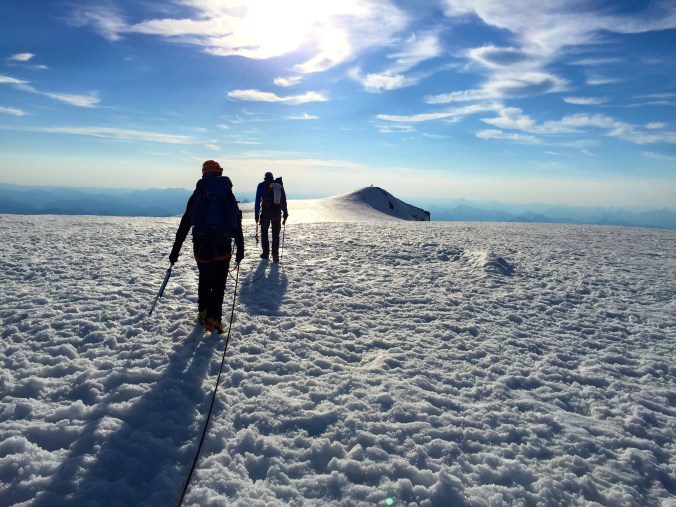
Looking up Middle Sister’s ridgeline to the summit. You can see a hiker coming up the snowfield on the left, which is the eastern approach.

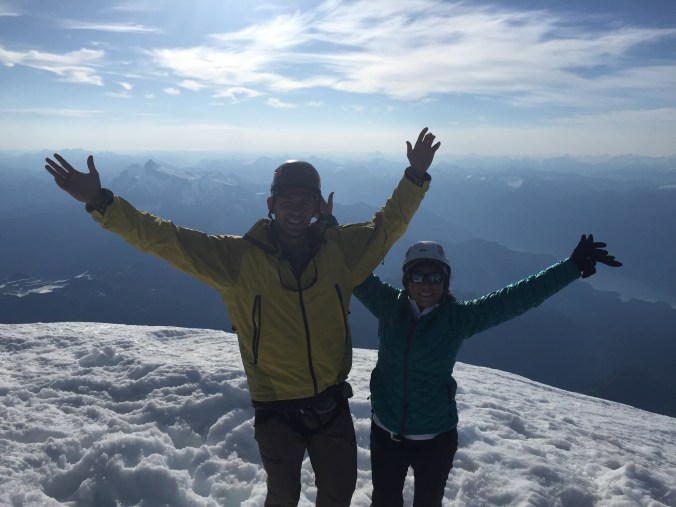
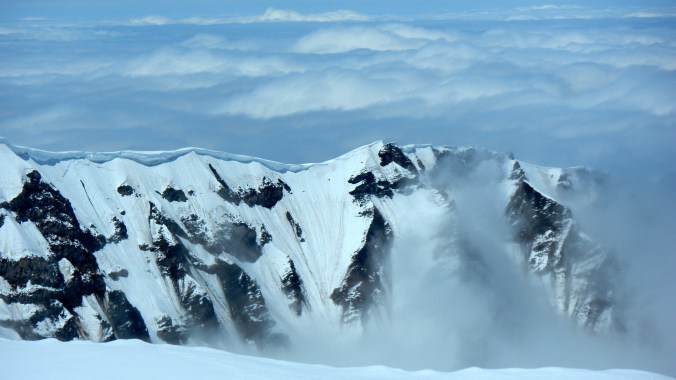
From the top you have close-up views of South Sister, Broken Top, and Mt. Bachelor to the north, and North Sister, Mt. Jefferson, and Mt. Washington to the south.

img_5848

After ascending the Collier Glacier (slightly right looking down), we decided to descend via the Renfrew Glacier (directly below Middle Sister’s summit ridge). We wore our crampons down until the snowfield ended, and followed a large natural gully for a few miles until we eventually hit the PCT again. It was tough to find our location, even with compass and map, but we turned right and in under 2 miles joined up with the Obsidian Trail intersection again. Bear left, and continue 5.5 miles to the trailhead parking lot.

img_5874

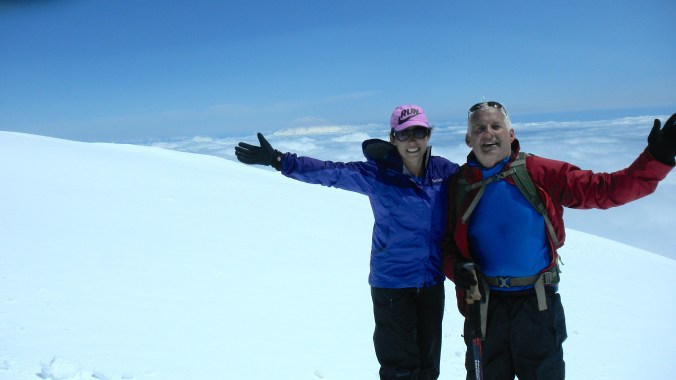
Overall: Incredibly strenuous day, mostly due to boulder-hopping and route-finding, but an awesome and exhilarating undertaking for the truly adventurous.

Climb Mt. Baker (10,781 ft.) via the Easton Glacier Route

Summit the third-highest mountain Washington at 10,781 ft., the most heavily glaciated peak of the Cascade Range volcanoes after Mt. Rainier.

img_0429_2

Overview: 16 miles roundtrip, 7,600 ft. elevation gain

The Easton Glacier route is one of the mountain’s most popular and likewise, most crowded. Check out Mt. Baker’s Squak Glacier route or Coleman Deming Glacier route for an alternative climb with similar difficulty.

You’ll start out at Schreibers Meadow Trailhead (3,200 ft.). To get there, exit off of I-5 north of Mount Vernon, head east on Highway 20, and turn left on Baker Lake Road. Follow this past Rocky Creek Bridge, taking a left on Forest Road 12 and a right on Forest Road 13. The parking lot is huge – but will still fill up during summer weekends. There’s plenty of roadside parking leading up to the TH. Don’t forget your NW Forest Pass parking permit!

img_0400_2

Hiking up Railroad Grade.

Start your hike out on Railroad Grade trail, and after a couple miles, keep right to continue up Railroad Grade itself. (We missed this turnoff and had a fun scramble up a creek bed to meet the trail – might have been more fun without our overnight camping gear.) Railroad Grade itself is a rocky moraine that looks and feels like a ridge. Follow the clearly-defined trail up to a huge area of flat camping spots, around 6,500 ft. In busy season this will look like a tent city, there must have been 50-75 people when we were there in late June.

img_0402_2

Superb North Cascade camping views.

Above the campsites you’ll start your glacier travel on Easton Glacier, and at this point the route will vary depending on time of year and snow season. You’ll likely cross a few snow bridges across the larger crevasses; I’ve never heard of ladder crossings being used on this route. Since Mt. Baker is the second most heavily glaciated peak of all the Cascade volcanoes, there are huge crevasse dangers on summit day. Stay roped up to your team and make sure everybody has had training on crevasse rescue techniques.

img_0407_2

Keep northwest towards the Crater Rim at 9,750 ft., where you’ll smell the “rotten egg” sulphur gas coming from the crater. The last 1,000 ft. are the most difficult of the day and take you up a combination of icy rock and snow to the base of The Roman Wall: the crux of your climb – both equally intimidating and thrilling. Ascend carefully up this steep grade, which can be 40-45 degrees and often icy.

img_0408_2-version-2

Heading up the Roman Wall.

Once you’ve breached the top of the wall, you’ll have a clear view of the Grant’s Peak – the true summit – just across a long plateau. Take your time making it to the top and soak in the views of Glacier Peak and the North Cascades stretching out below you.

img_0411_2

Summit plateau towards Grant’s Peak, Mt. Baker’s official summit name.

img_0419_2

As always, begin early (alpine start ~ midnight to 2am) so you have the advantage of hard, frozen snow for your crampons to grip into. On your descent, be aware of crevasse dangers and wary of any snow bridges that might have melted out from the sun.

Surprisingly, there are no permits required to climb Mt. Baker, but I recommend one person in your party to fill out a trail registration at the trailhead.

Packing List:

  • Northwest Forest Pass Trailhead Parking Permit
  • Trekking poles
  • Ice axe
  • Crampons
  • Crampon-compatible mountaineering boots
  • Helmet
  • Alpine harness, rope, ice tools
  • Overnight snow camping gear (tent, stove, cookware, sleeping bag, etc.)
  • Headlamp + extra batteries
  • Navigational gear
  • 2+ liters of water
  • Means to boil or treat water with iodine
  • Plenty of food
  • Blue bags for human waste
  • First aid kit, emergency GPS spotter
  • Emergency bivvy or shelter
  • Sun protection, storm protection, plenty of layers!

Mt. St. Helens Summit Climb

Photos from Mt. St. Helens, May 29, 2014 with Dad.

  • Length: 10 miles (give or take, we got lost)
  • Elevation gain: 5,500 ft.
  • Summit: 8,366 ft.
  • Time: 7:15 am – 6:30 pm
  • Total time: 11.5 hours

dscn0921

First look at the mountain, coming up out of the tree line.

dscn0926

Majority of this route consists of lava rocks from the 1980 explosion. Lots of fun climbing up over and traversing these to find the trail.

dscn0924

dscn0925

dscn0927

Conditions so foggy, I could barely see 10 feet in front of me.

dscn0932

Breathtakingly steep grades became more visible when we breached the clouds.

dscn0938

Met some fellow climbers on the summit.

dscn0944

Close-up of the west-side of the crater of the mountain’s surrounding rim.

dscn0945

Neighboring Mt. Adams visible above the clouds to the east.

dscn0948

Summit smiles!

dscn0949

Peeking over the summit into the crater that was blown from the 1980 explosion.

dscn0959

Got a little lost on our traverse back to the trailhead…

dscn0961

Mt. Adams Summit Climb

Photos from Mt. Adams, August 19, 2011 with Dad.

  • Length: 11.5 miles
  • Elevation gain: 6,676 ft.
  • Summit: 12,276 ft.
  • Time: 4:45 am – 7:15 pm
  • Total time: 14.5 hours

dscn1388

Under dressed: Part 1.

dscn1390

Barely any snow on the lower half of the mountain from being later in the season.

dscn1391

Under dressed: Part 2.
Before we owned trekking poles, and before I owned gloves that weren’t cotton.

dscn1394

dscn1400_2

Our first climb with crampons.

dscn1402

dscn1406

dscn1411_2

Under dressed: Part 3.
We like to look back at these photos and laugh at ourselves for donning all-cotton outfits in these conditions.

dscn1412

At the false summit with Mt. St. Helens in the background.

dscn1419

On top of the true summit. We met our now-friend Brian partway up the mountain, and he took me up the last 700 ft.

dscn1421

Finding a good glissade path down.

dscn1428

dscn1429