Summitting Mt. Kilimanjaro (19,341′) via the Rongai Route

Reach the Roof of Africa, Mt. Kilimanjaro (19,341’), on this high-altitude Tanzanian adventure, on the easiest non-technical climb of the world’s Seven Summits. Expect to spend 6-7 days hiking on the Rongai route.

Overview: 6 days, 43.8 miles, 12,945 ft. elevation gain

img_2658

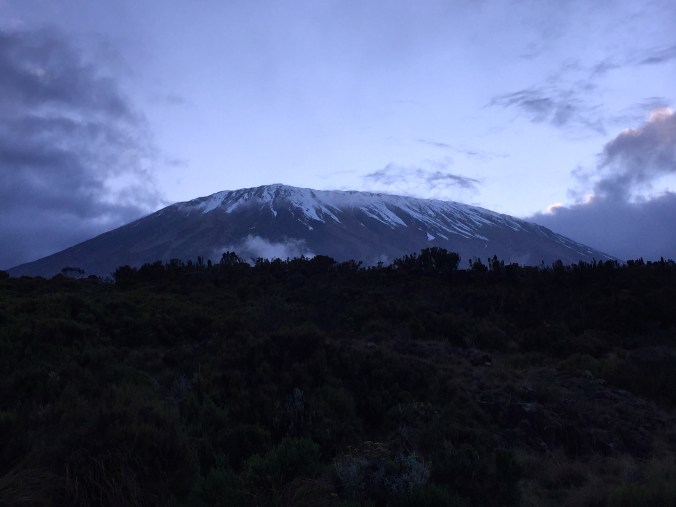
Kilimanjaro is the highest free-standing mountain in the world since it stands alone from any mountain range, making its size and height all the more impressive. Because of its reputation, ease of accessibility, and Tanzania’s affordability, this is an incredibly popular mountain to climb and therefore laden with lots of red tape. It is required to organize this climb through a licensed mountain operator, as well as follow one of the official climbing routes – so be sure to do your due diligence and research the right route for you!

The Rongai Route is one of the least traveled ways up Africa’s tallest peak, allowing a more remote hiking experience. Unlike the southern routes, Rongai is a moorland or high-altitude desert climate, with far less precipitation than rainforest routes. The Rongai route meets the Marangu route on the final night to follow this trail to the summit.

Most, if not all, of the routes up the mountain begin in the town of Arusha, Tanzania, accessed by the Kilimanjaro International Airport (JRO). For this particular itinerary, you’ll head to the northeastern side of the mountain along the border of Kenya, about a five hour drive from Arusha. Expect to spend 6-7 days hiking on the Rongai route.

img_2717

Day 1: Nale Moru (1,950 m/6,400 ft.) + Simba Camp (2,650 m/8,700 ft.)

  • Walking distance: 6.5km/4 miles
  • Elevation gain: 700m/2,300 ft.

Today is the start of it all, beginning at the Rongai Gate in Nale Moru. After registering with park officials and finalizing the last of your packing, your hike starts through fields and a few small villages. You’ll spend the night at Simba Camp, close to the First Cave, overlooking the Kenyan plains.

Day 2: Kikelewa Caves (3,600 m/11,810 ft.)

  • Walking distance: 9 km/5.6 miles
  • Elevation gain: 950m/3,110 ft.

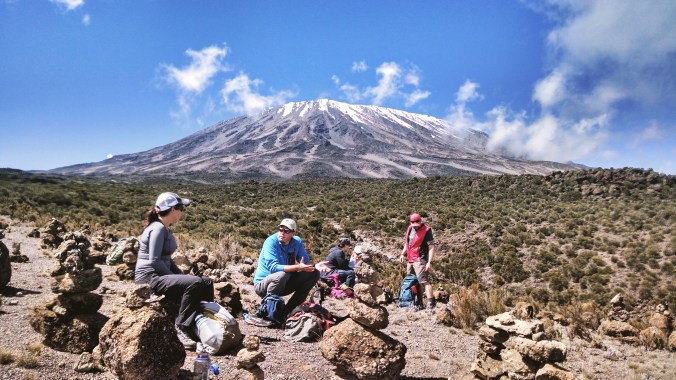
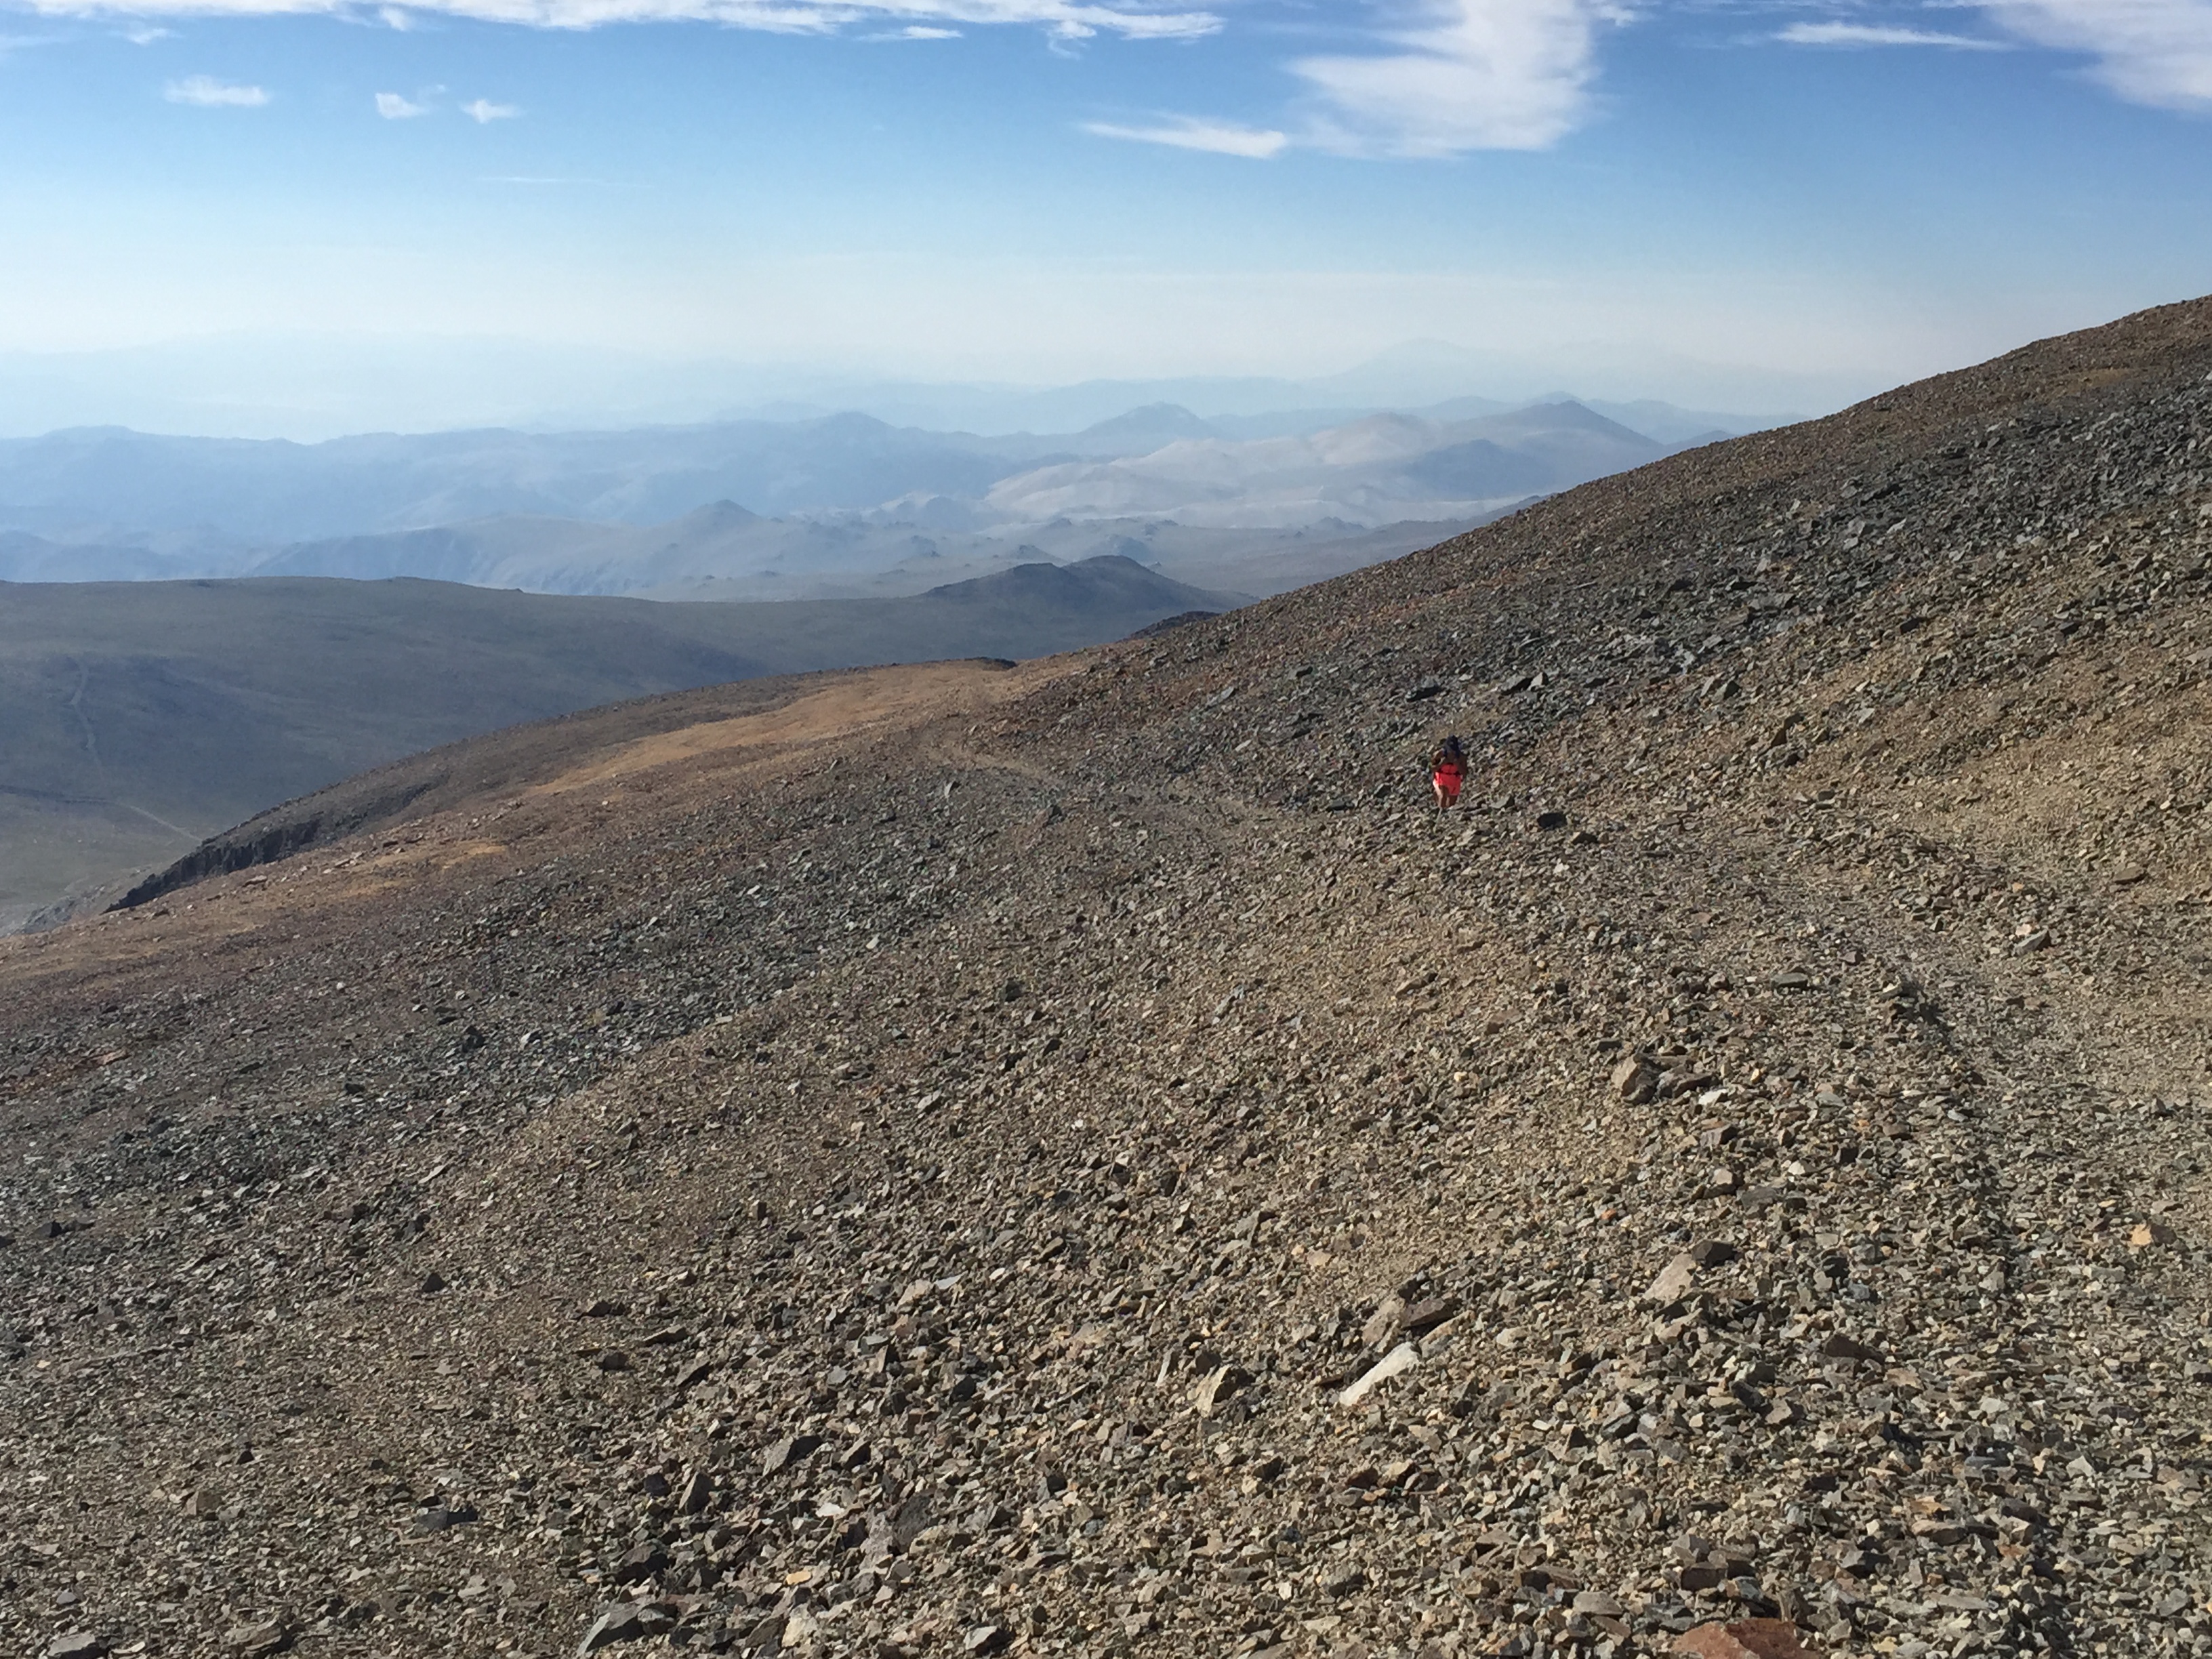
On the second day, vegetation grows thinner and you’ll enter into a truly high-alpine desert biosphere. Pass by the Second Cave (where you might stop for lunch) and end your day at Kikelewa Camp, next to the Kikelewa Cave.

img_2707

Day 3: Mawenzi Tarn (4,330m/14,210 ft.)

  • Walking distance: 6km/3.7 miles
  • Elevation gain: 730m/2,400 ft.

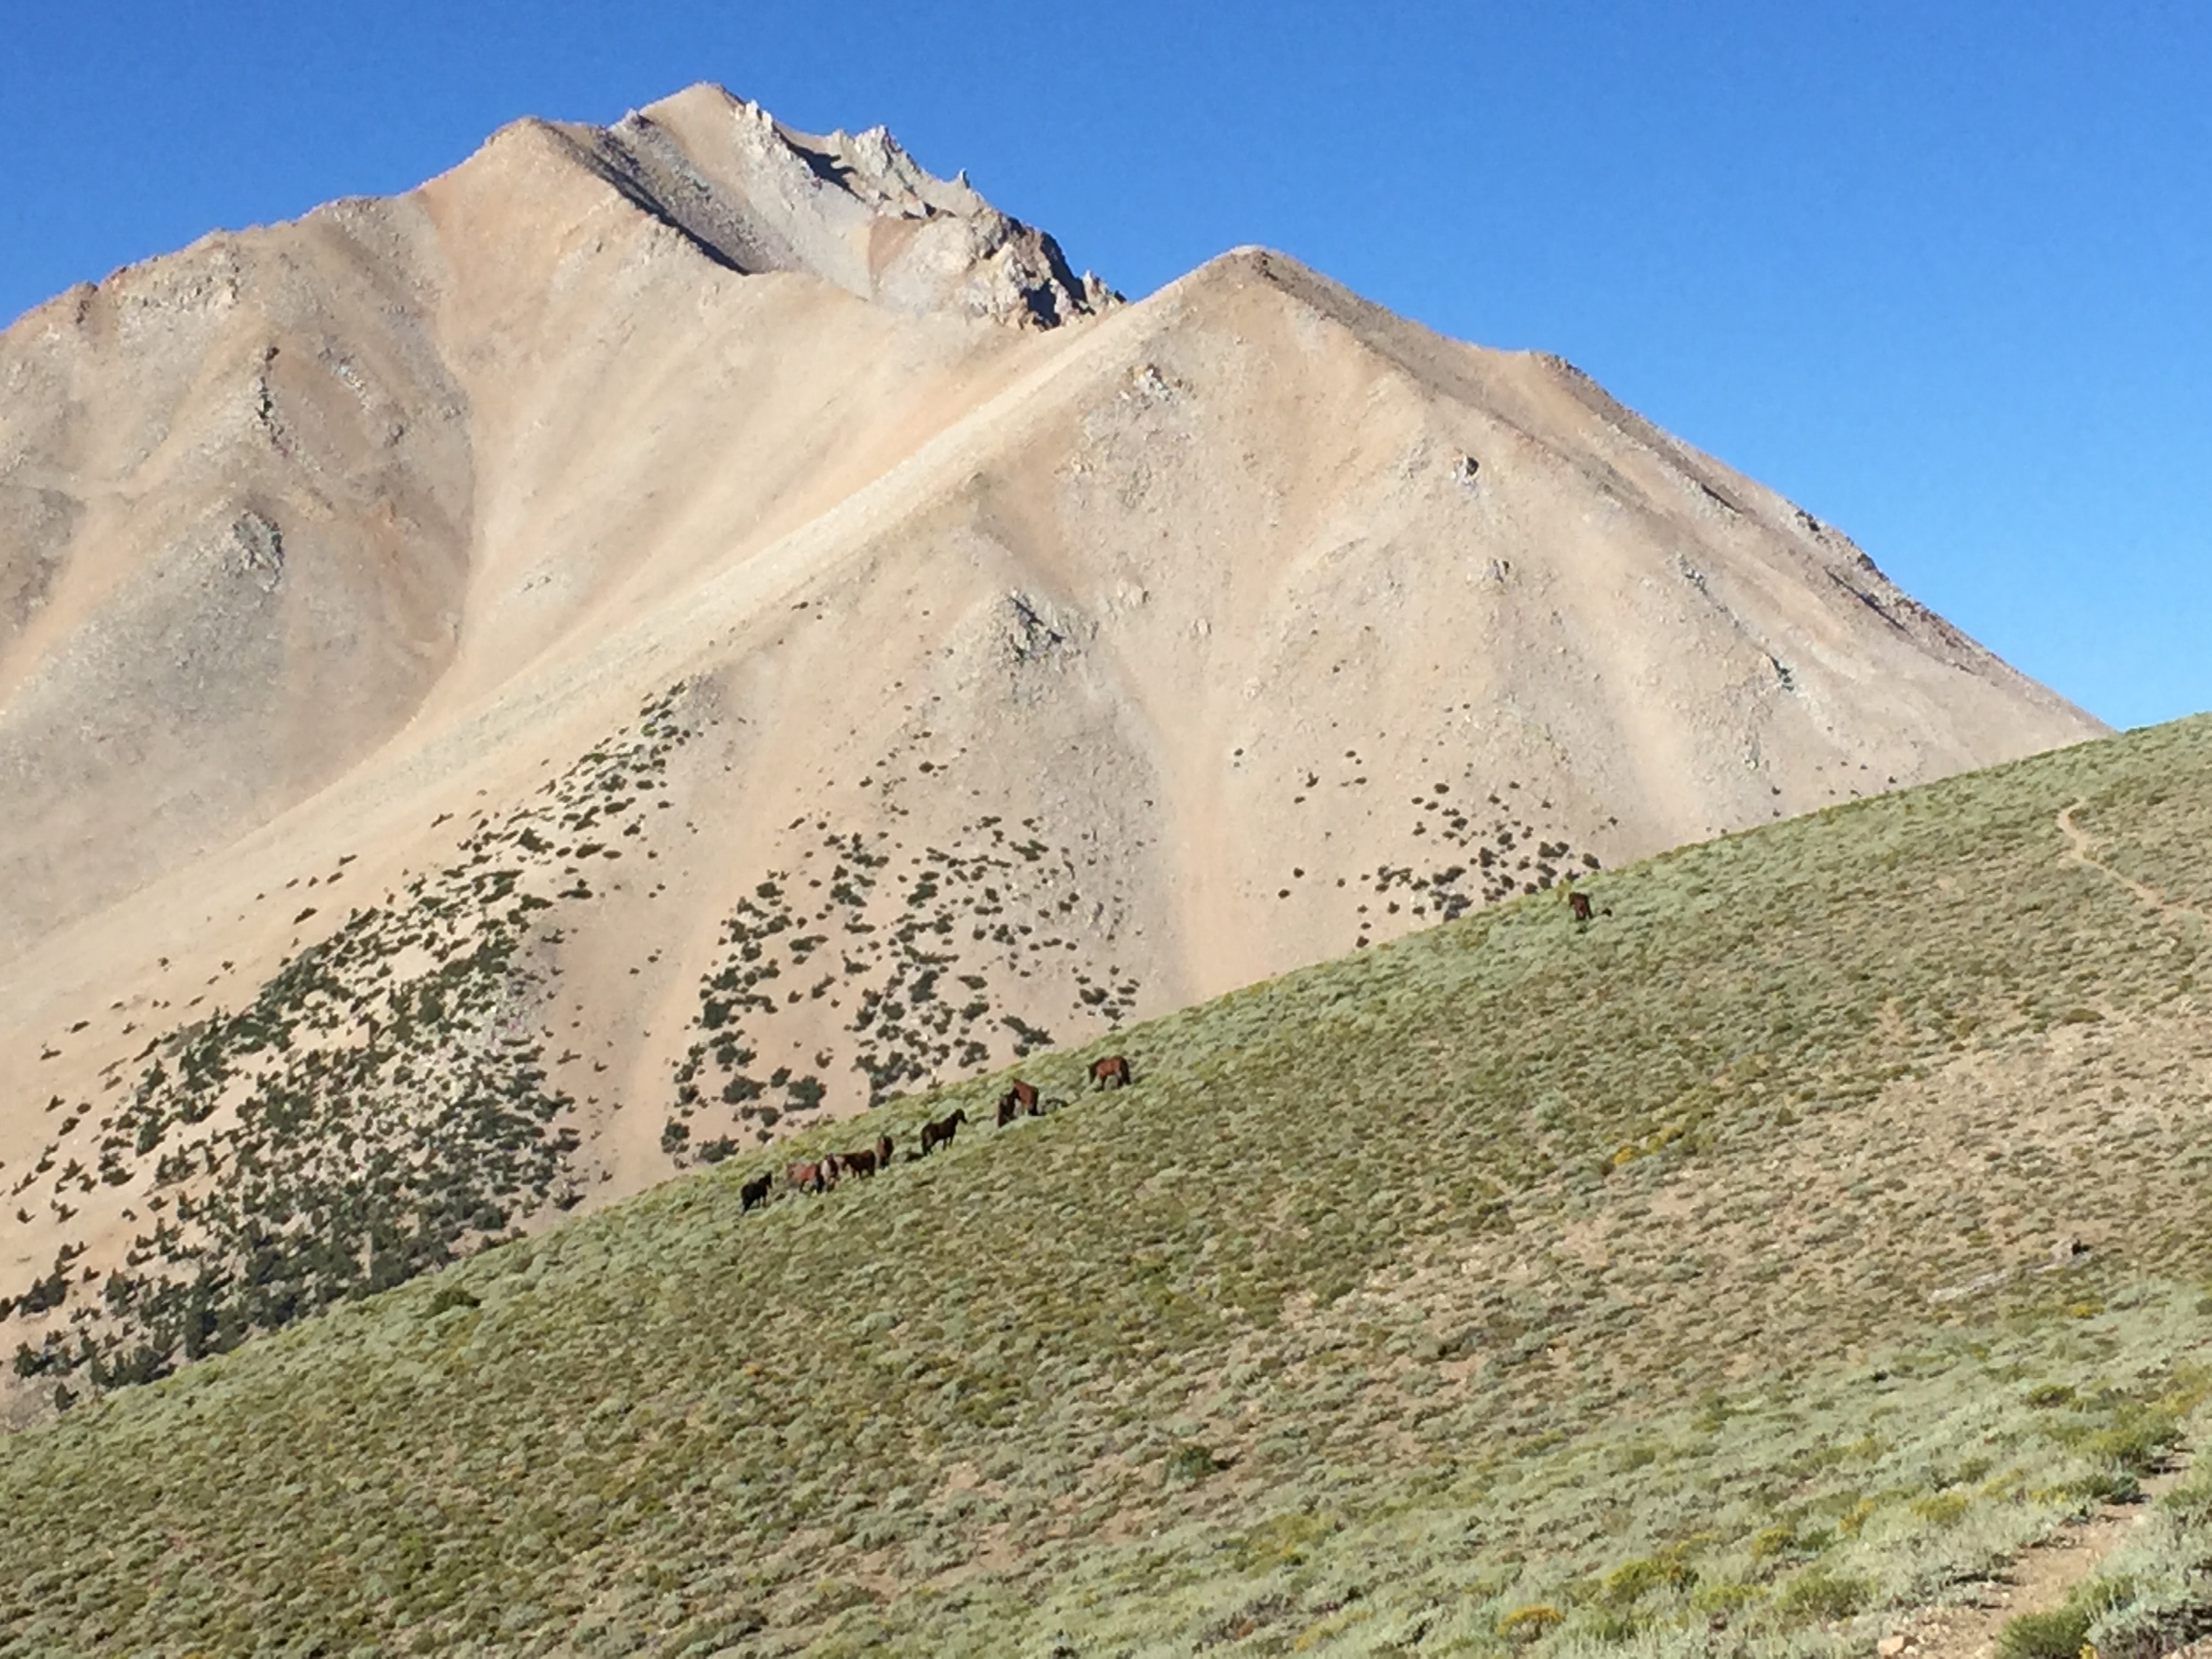
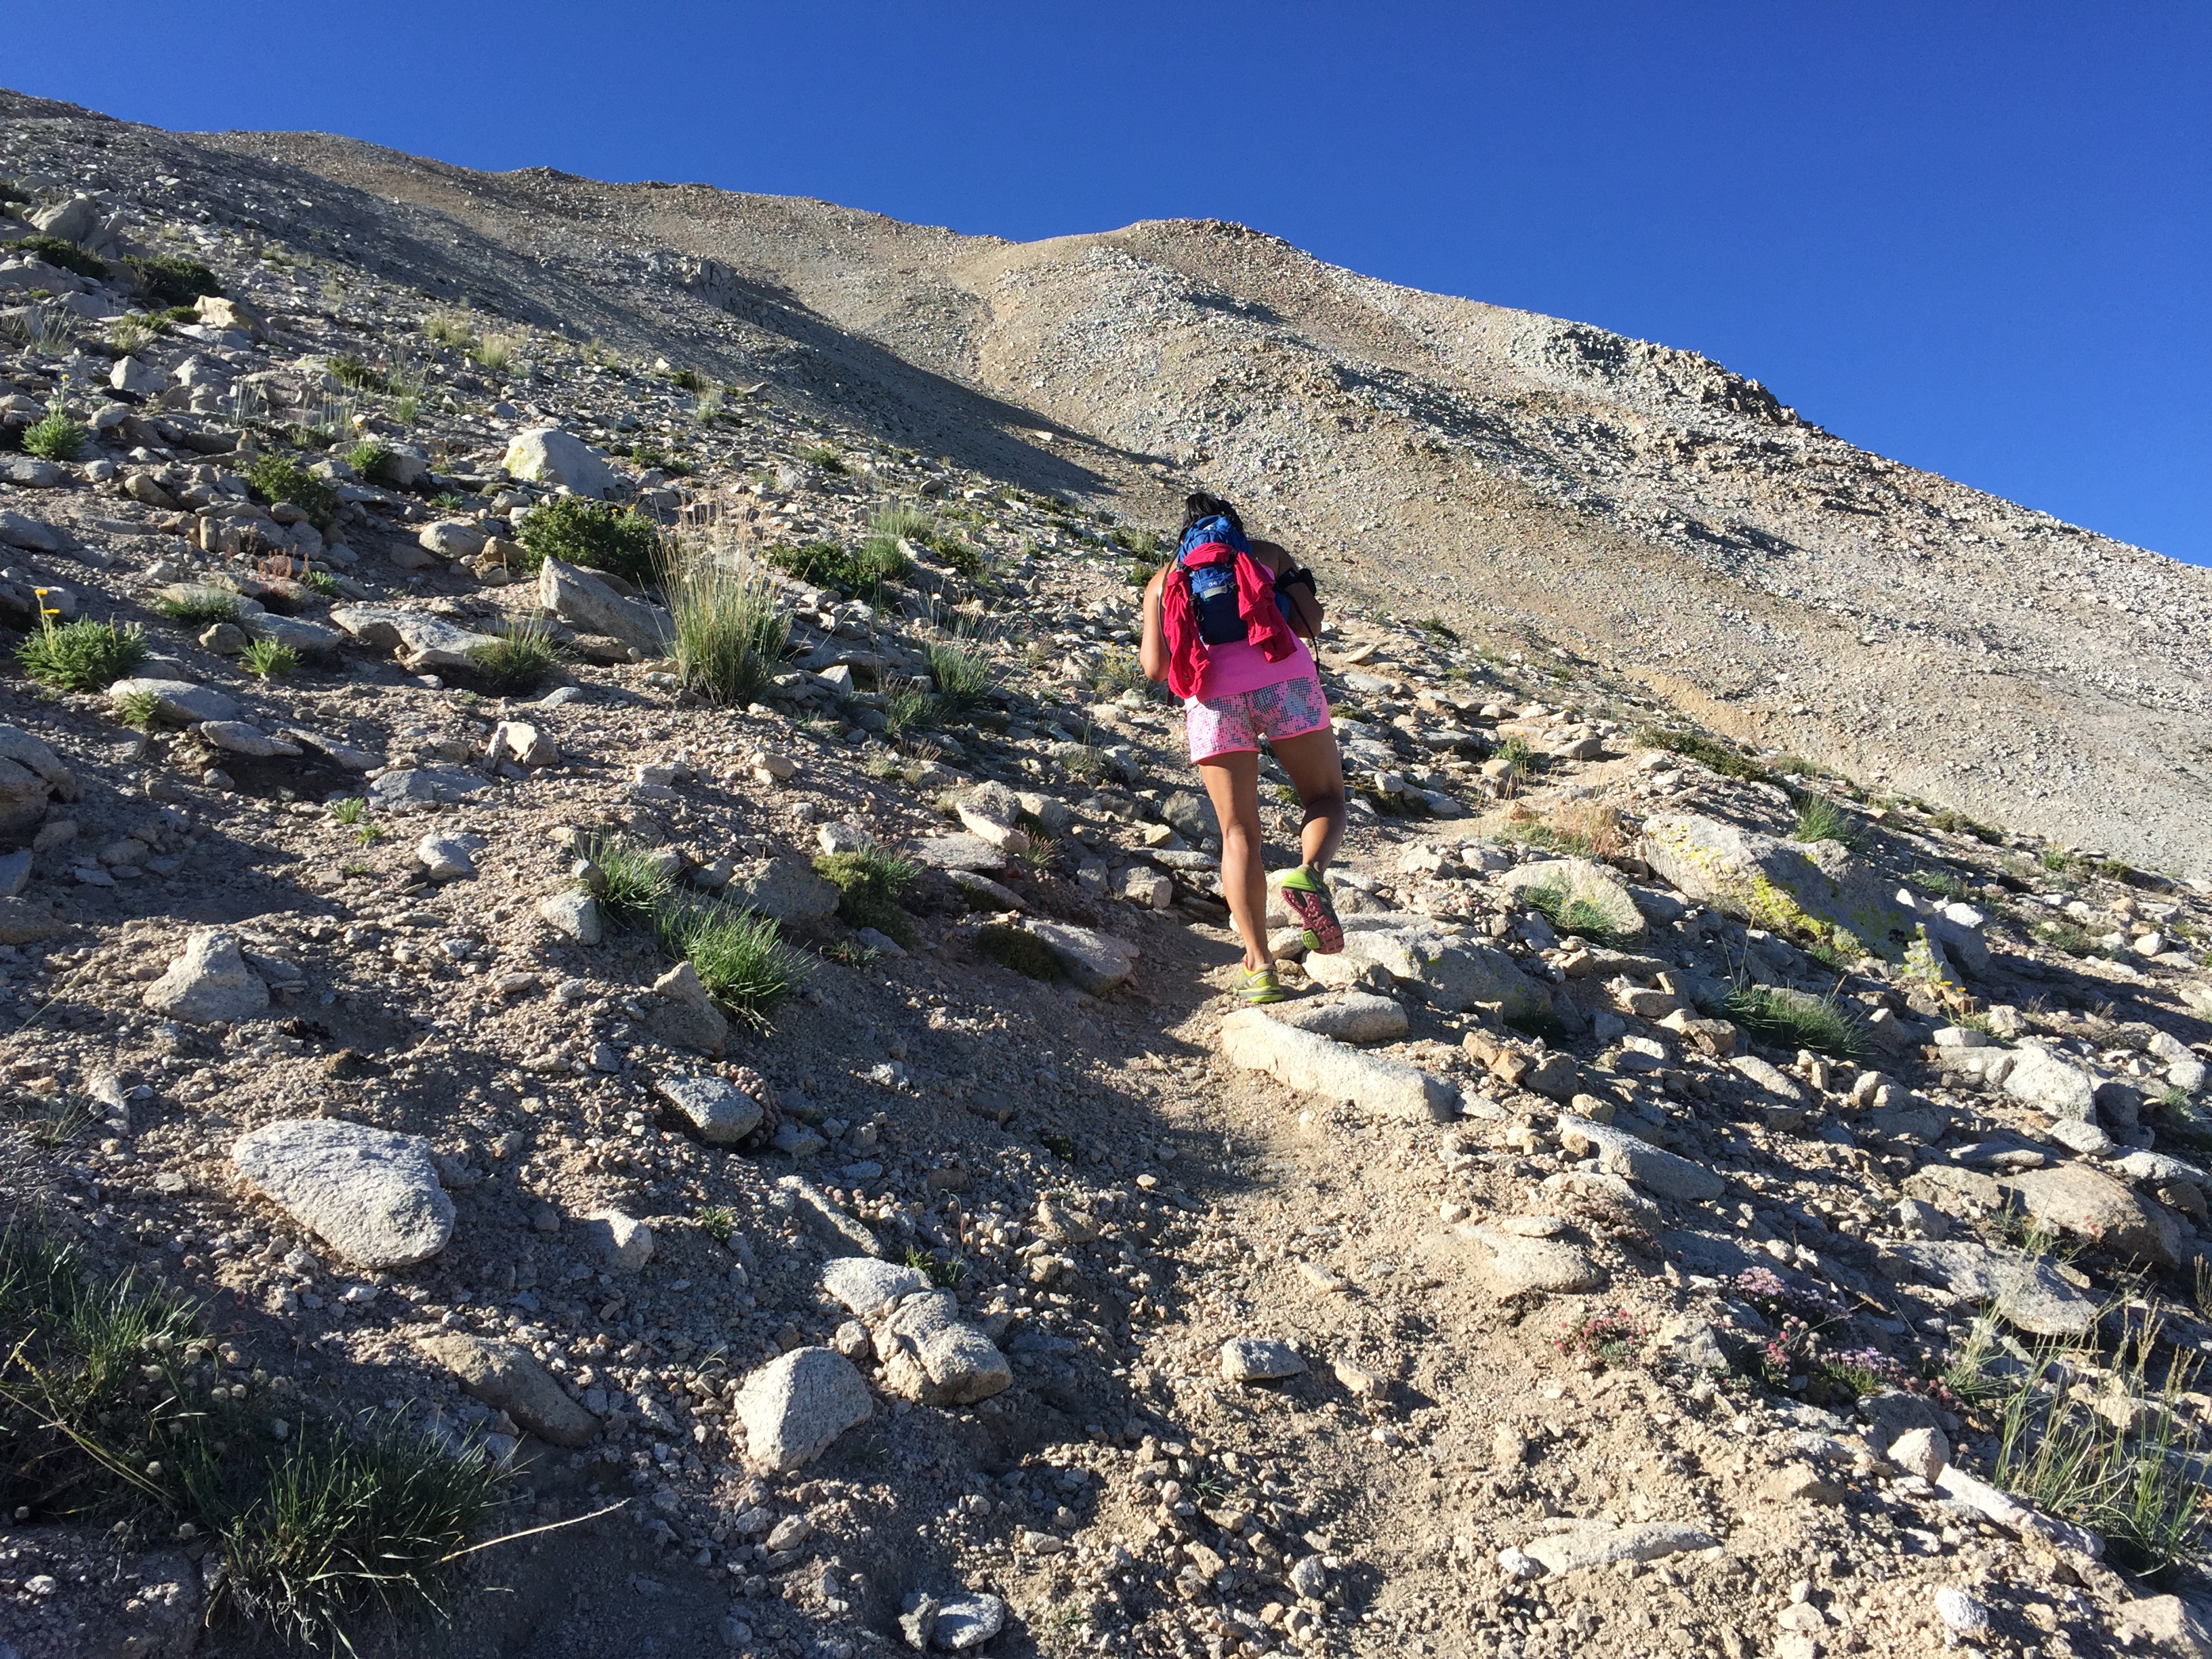
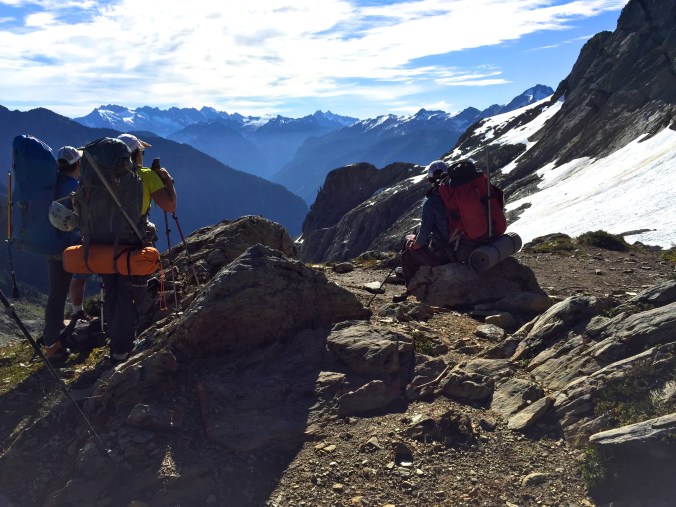
As the week progresses, your days grow shorter, and this hike to Mawenzi Tarn should only take a couple hours as your body adjusts to the higher elevations. This is when proper hydration and a slow pace (pole, pole, as the Tanzanians would say) play a huge part in your successful acclimatization. You’ll spend this night at Mawenzi Tarn and have plenty of time in the afternoon to explore the plains and rocky outcrops in this vast area.

Day 4: Kibo Huts (4,330 m/15,420 ft.)

  • Walking distance: 9km/5.6 miles
  • Elevation gain: 370m/1,215 ft.

This is the point where the Rongai Route meets up with the Marangu Route for your final summit push. You’ll want to leave Mawenzi Tarn early this morning so that you have plenty of time to rest and prepare for your summit bid later in the night. The Kibo Huts are a little like a semi-permanent village, with huge crowds from both routes and plenty of noise and excitement.

img_2677

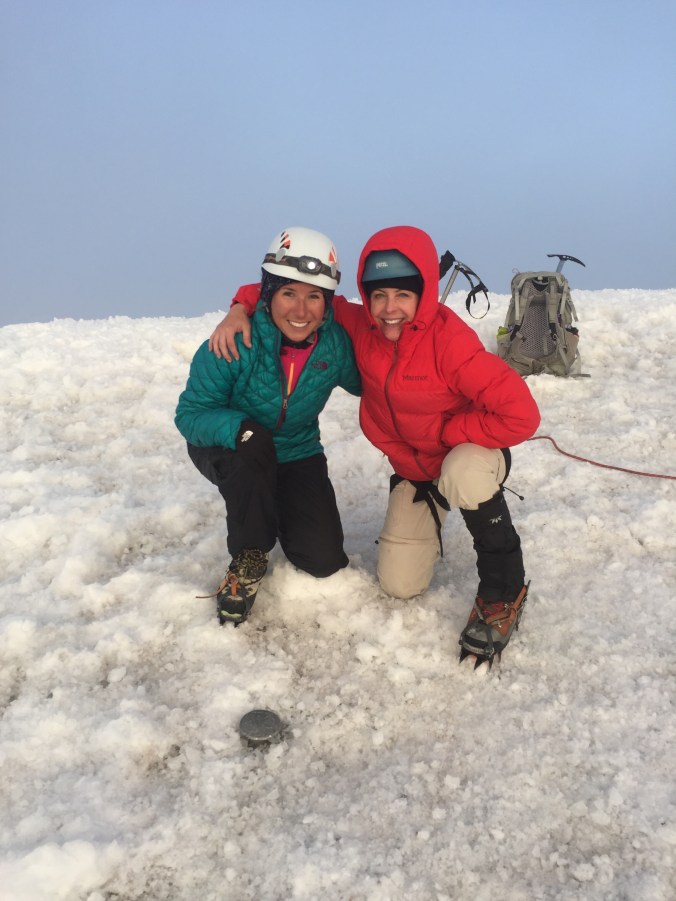
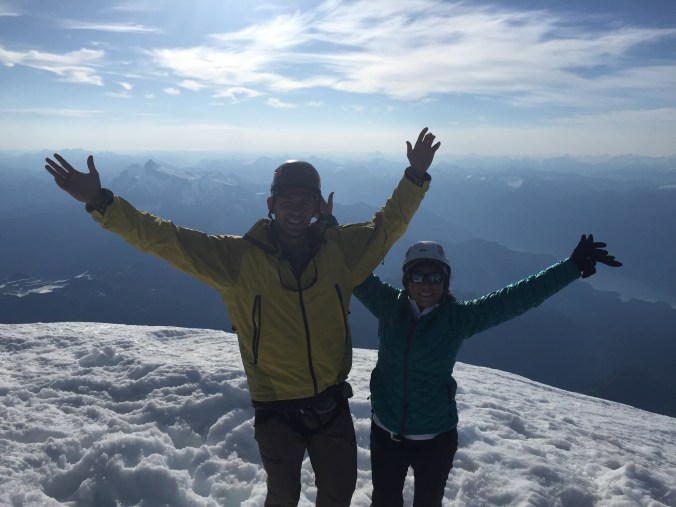
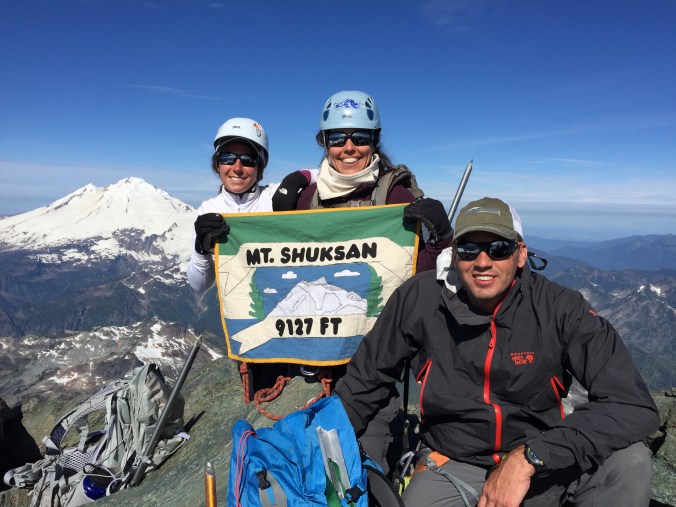
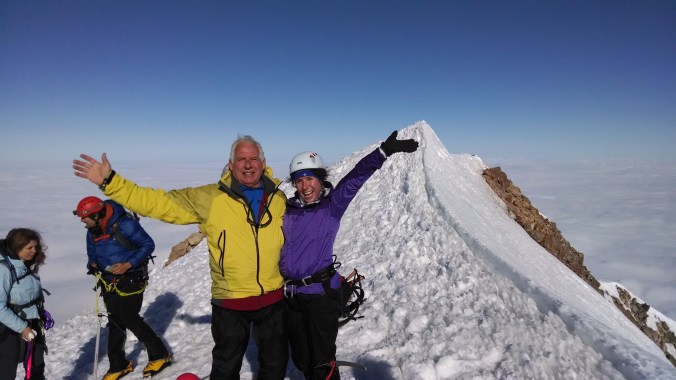
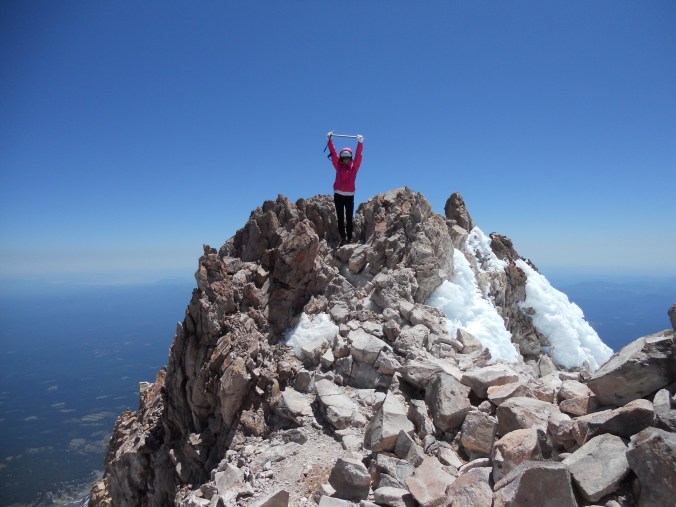
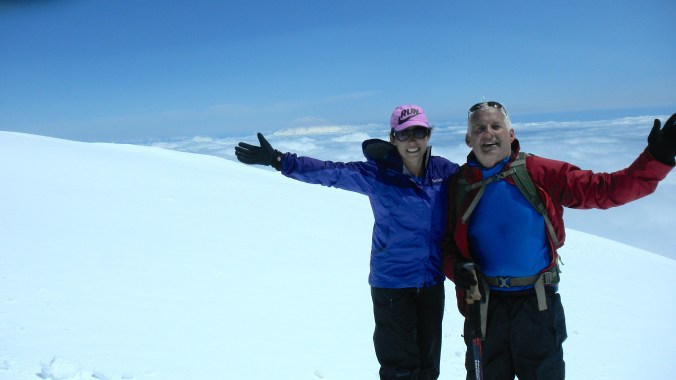
Dancing at the summit of Uhuru Peak, Kilimanjaro.

Day 5: Summit via Gilman’s Point to Uhuru Peak (5,895m/19,340 ft.) to Horombo Huts (3,700m/12,200 ft.)

  • Walking distance: 5km/3.1 miles ascent + 15km/9.3 miles descent
  • Elevation gain: 1,195m/3,920 ft.
  • Elevation loss: 2,195m/7,200 ft.

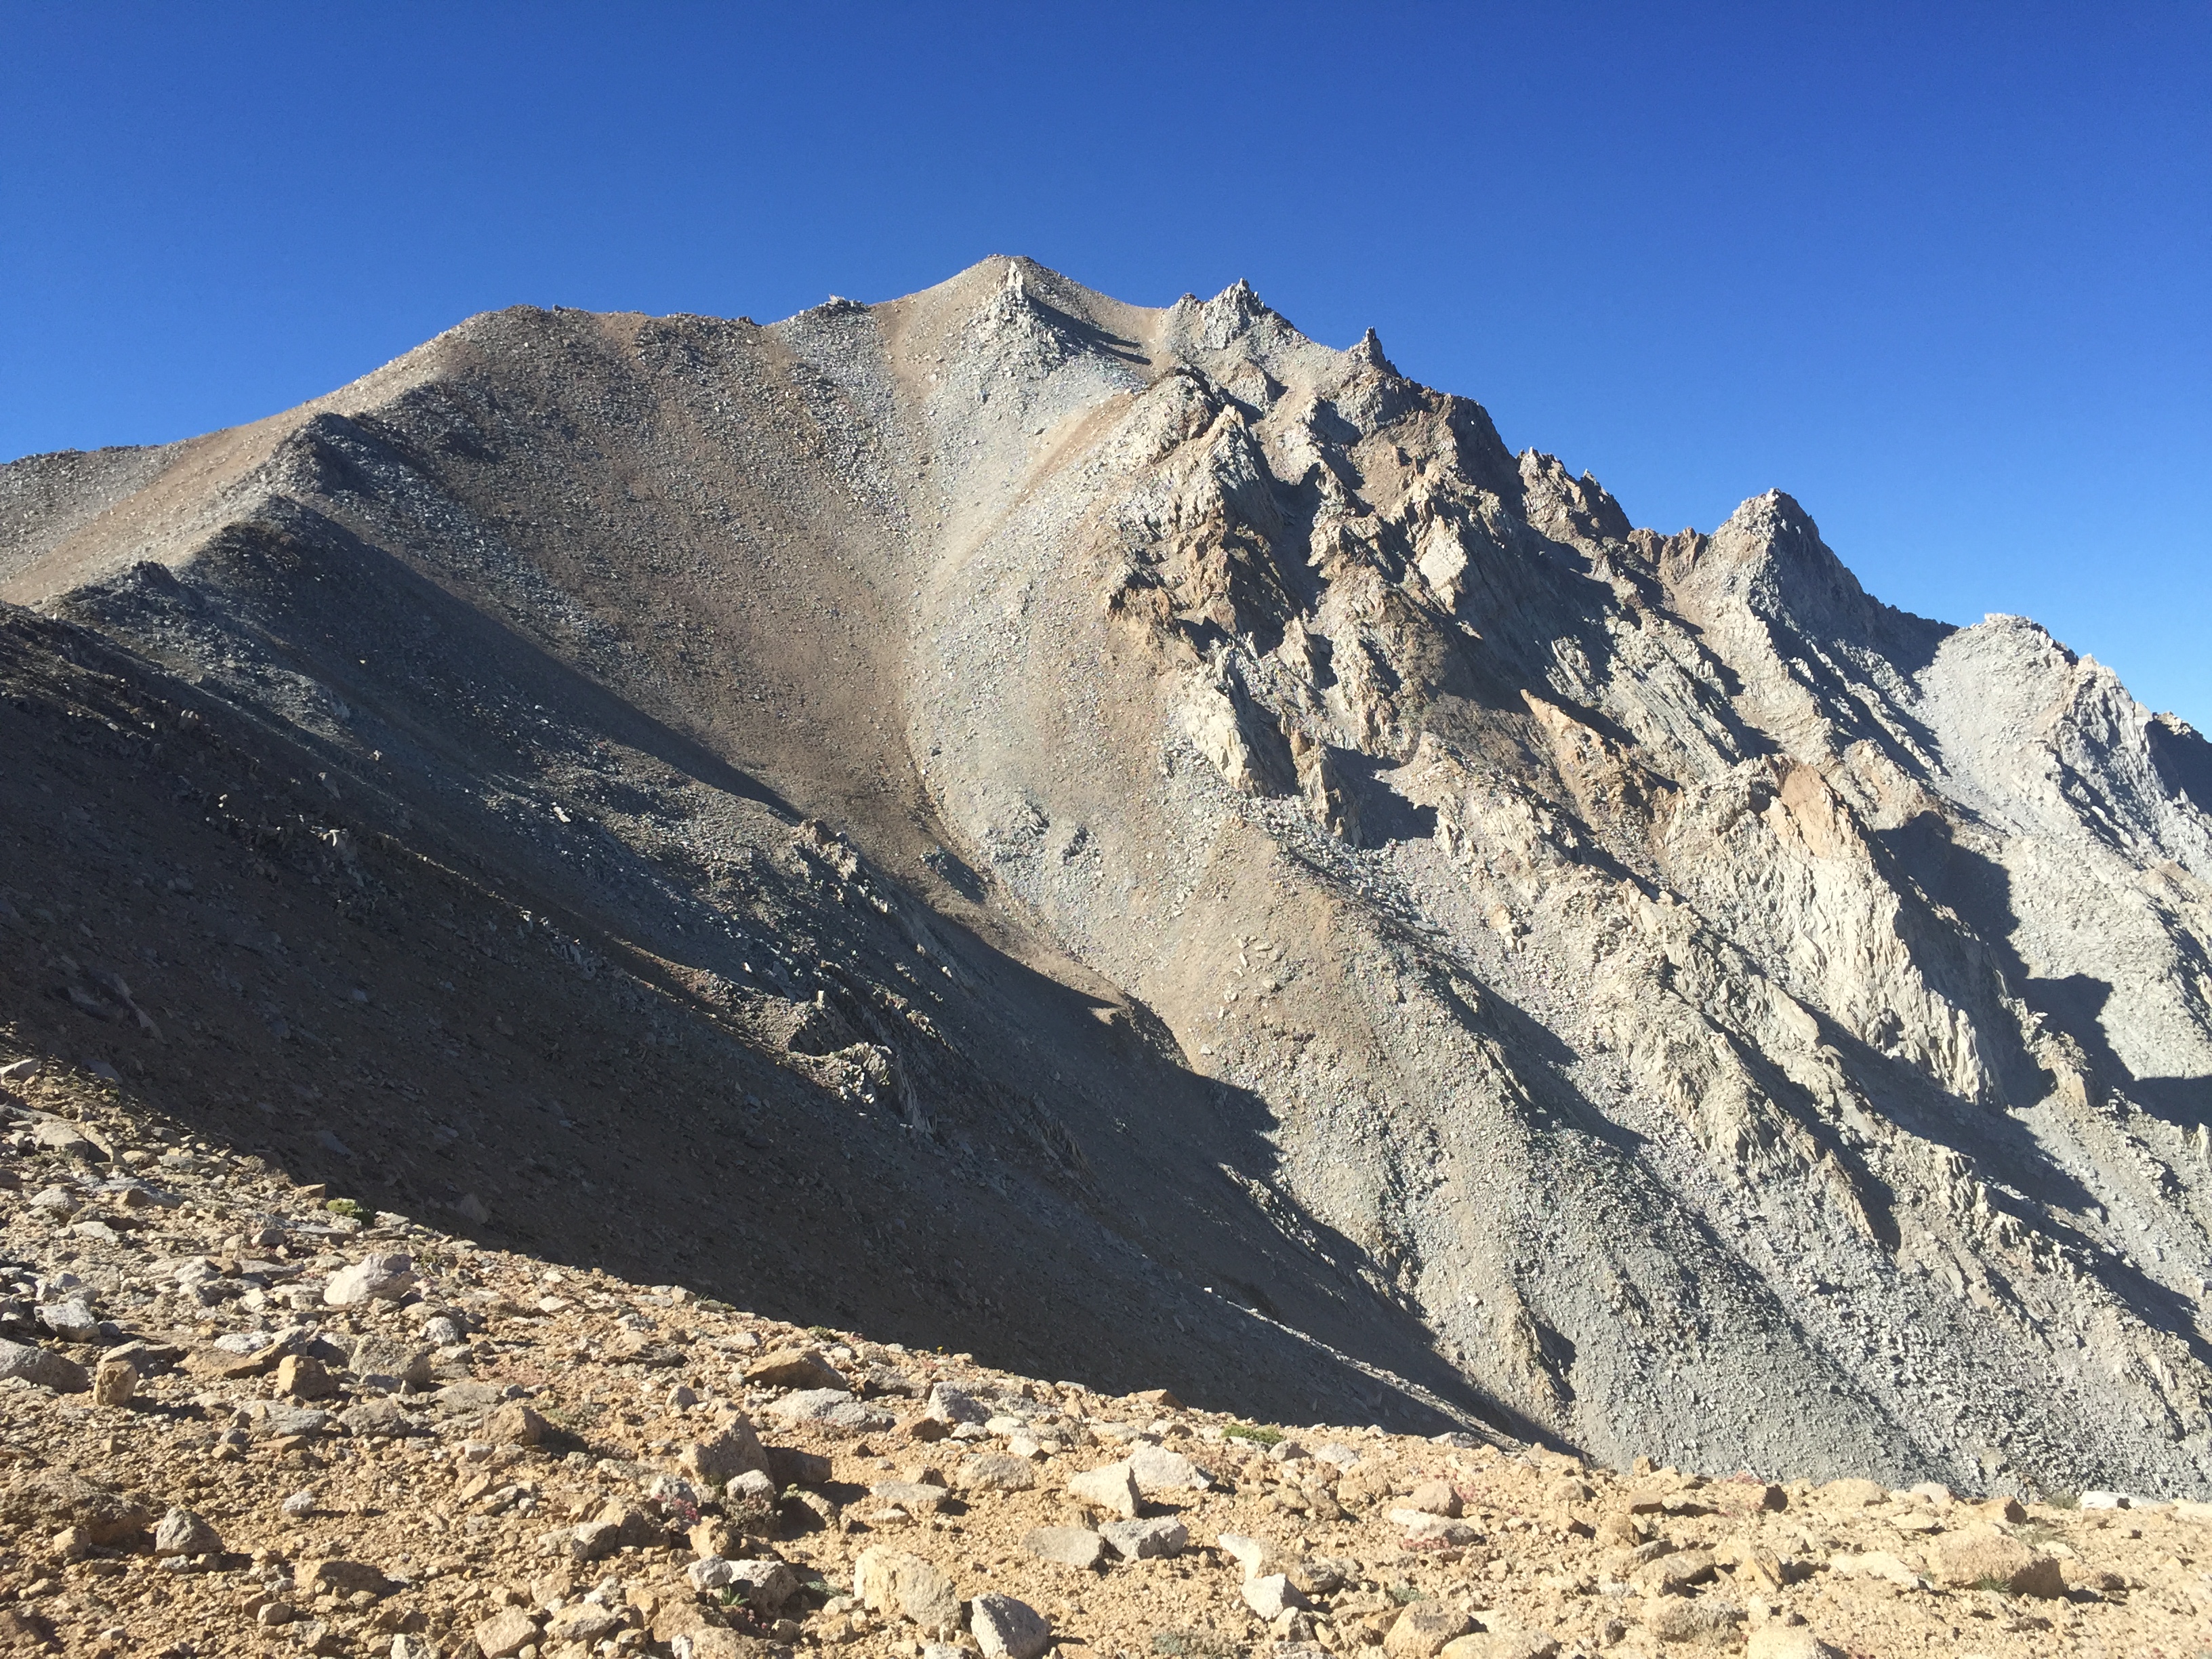
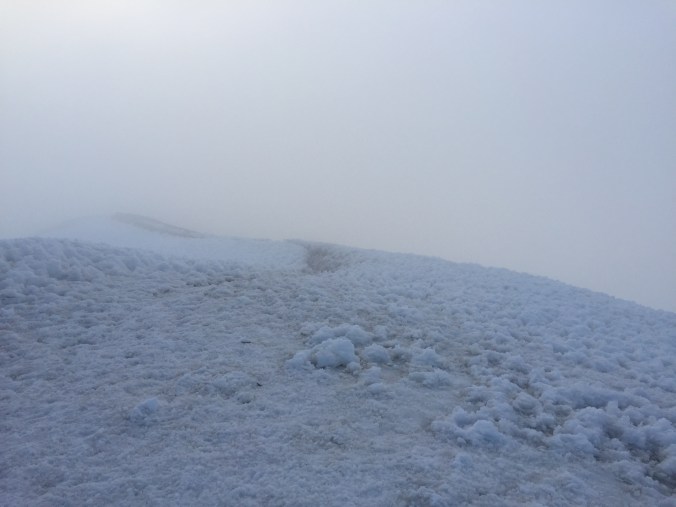
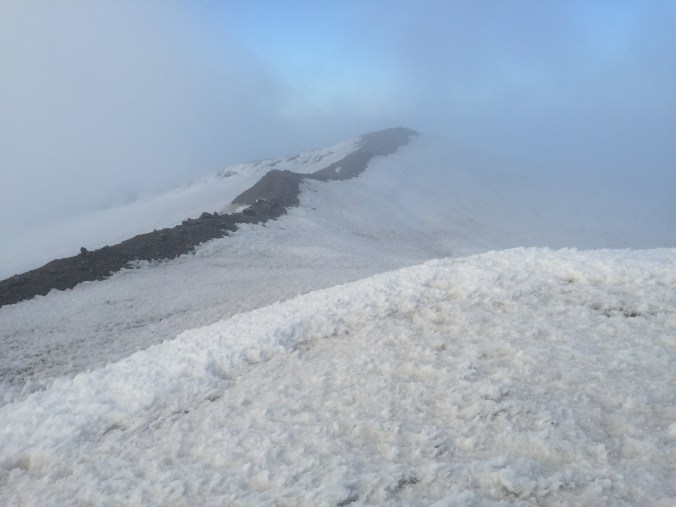
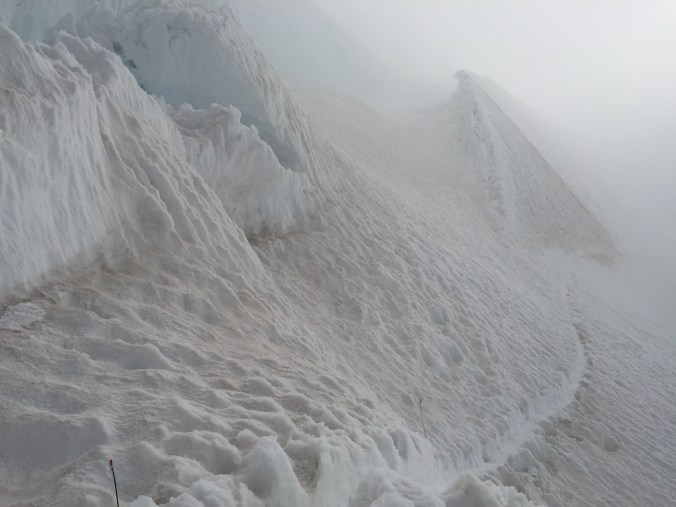
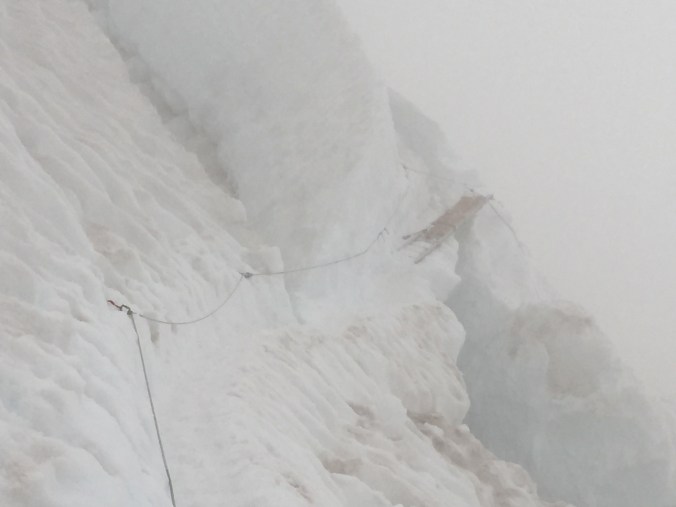
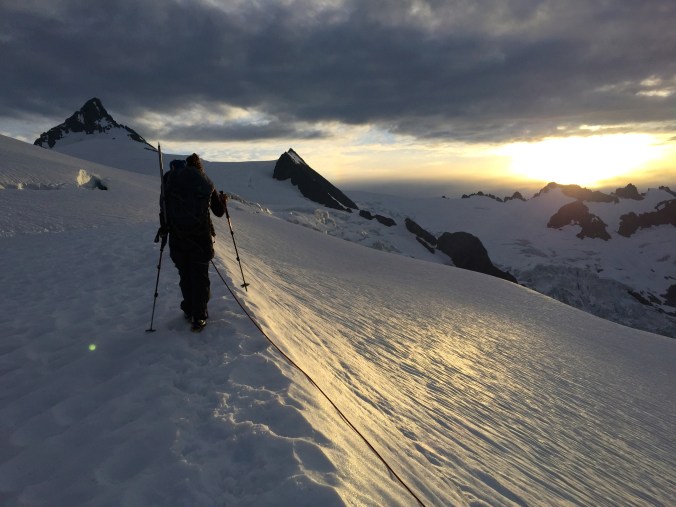
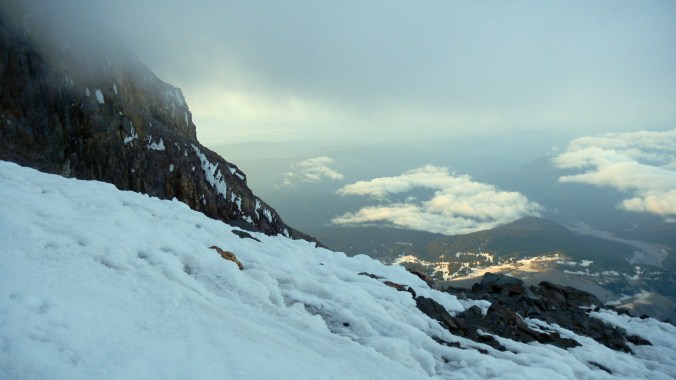
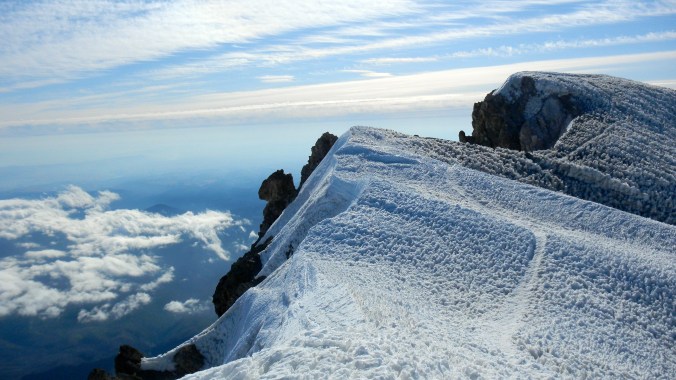
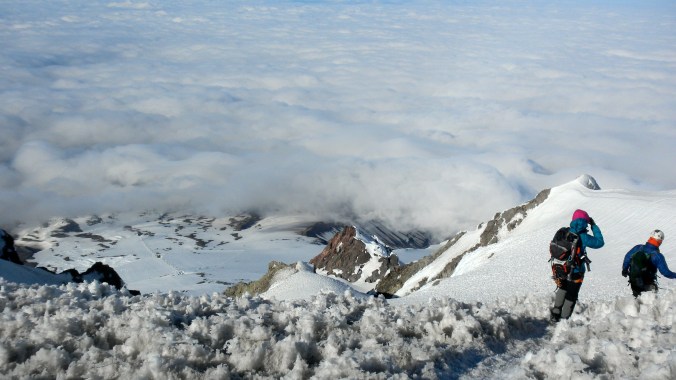
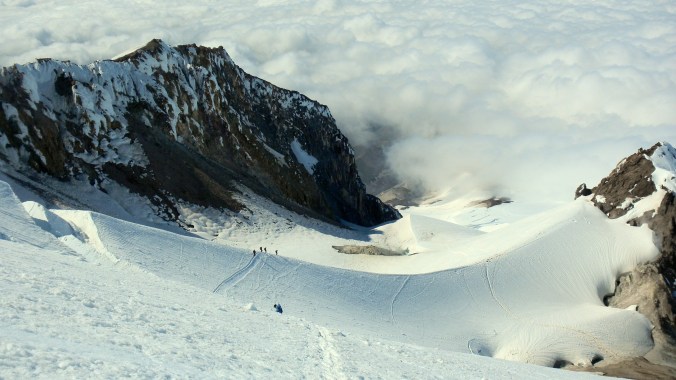
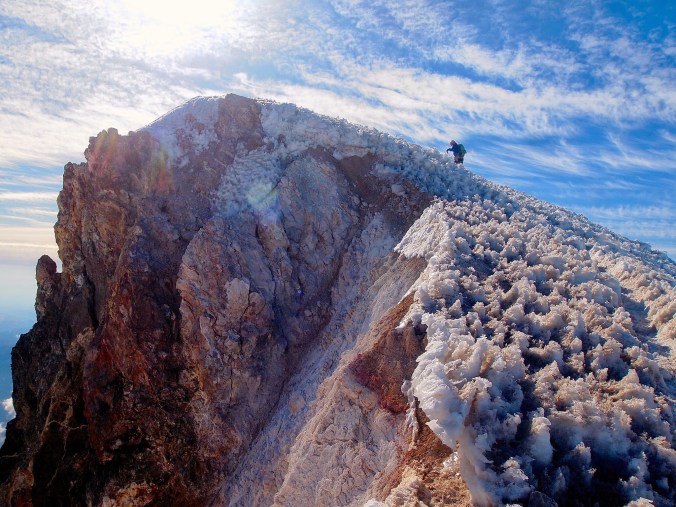
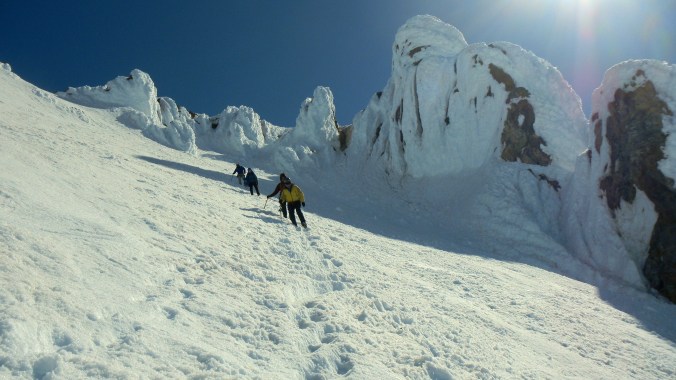
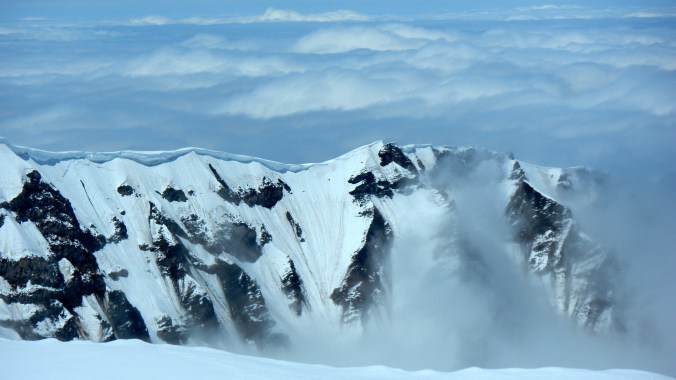
Day 5 begins late night of Day 4, waking, eating, and heading out of camp by midnight for your summit bid. The first half of your early-morning leading up to Gilman’s Point (5,700m/18,700 ft.) will be full of undulating switchbacks that may be made more brutal by biting cold and harsh winds, as we were. From Gilman’s Point you’ll get to look into the huge volcanic crater and surrounding ice caps, with the true summit just ahead. The crater rim to your left leads you all the way to Uhuru Peak with the famous summit sign of Kilimanjaro.

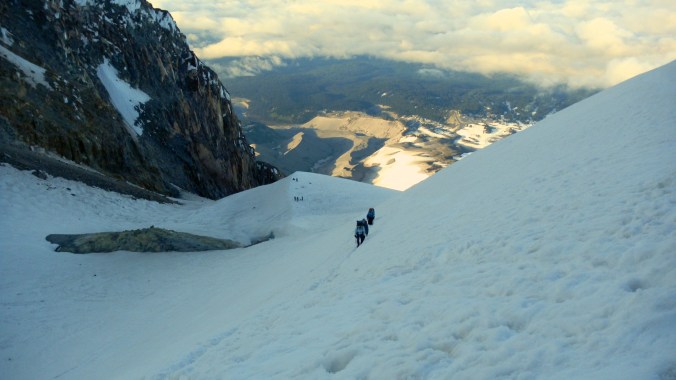
Unfortunately this last push is where hikers are most likely to feel the full affects of altitude sickness, and we saw lots of folks being ushered or even carried down the mountain at this point. That’s why it’s all the more important to limit your time at the top and descend quickly, back to the Kibo Huts for some fuel and a short break, before you’ll continue on to the Horombo Huts.

Day 6: Marangu Gate (1,860m/6,102 ft.)

  • Walking distance: 20km/12.5 miles
  • Elevation loss: 1,840m/6,040 ft.

After all of the climbing you’ve accomplished, this hike out should feel like a piece of cake. Descending on the southside, you’ll be immersed in a beautiful rainforest as well as the infamous crowds you avoided to the north heading up for their chance at the summit. Take your time, enjoy the scenery, and give yourself a huge high-five once you’ve reached the final Marangu Gate.

img_2709-version-2

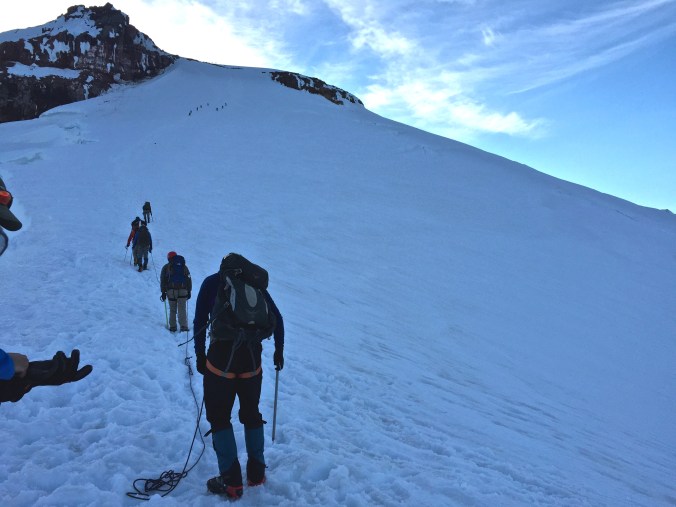
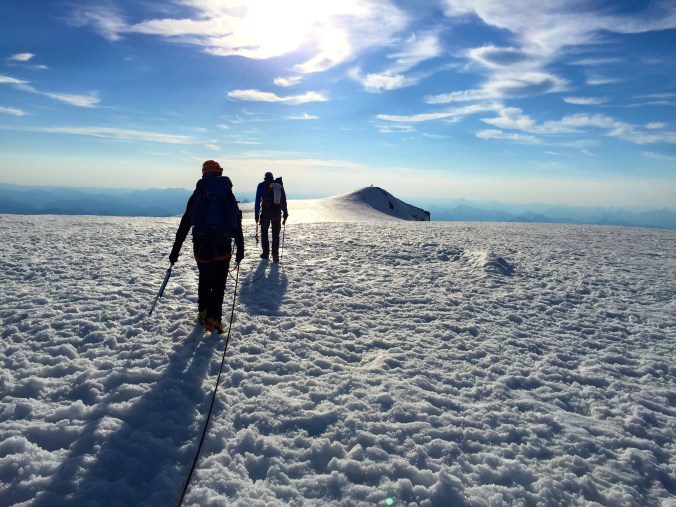
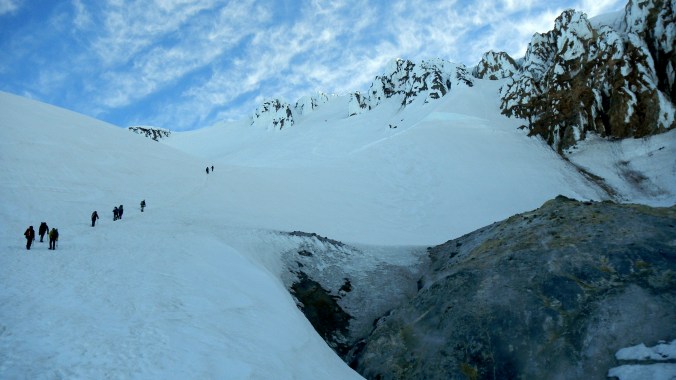
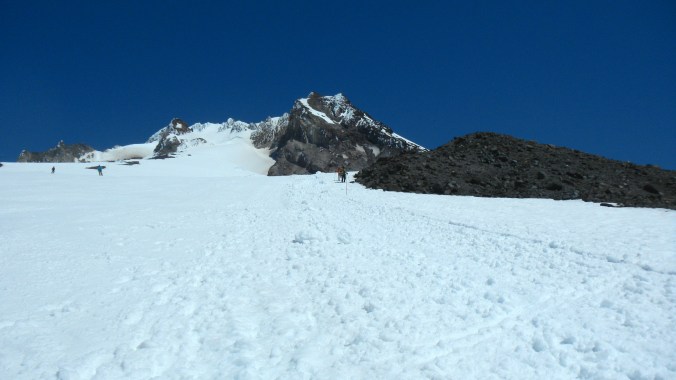
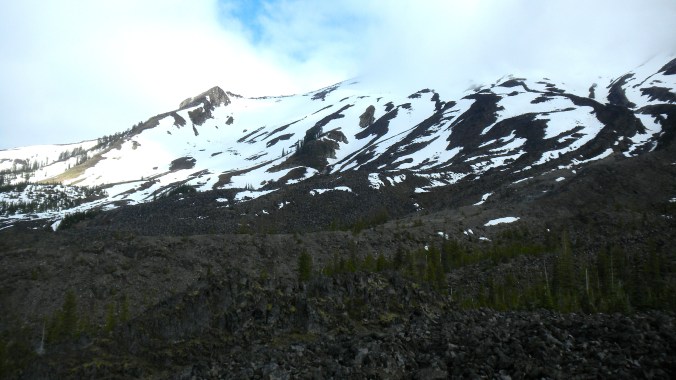
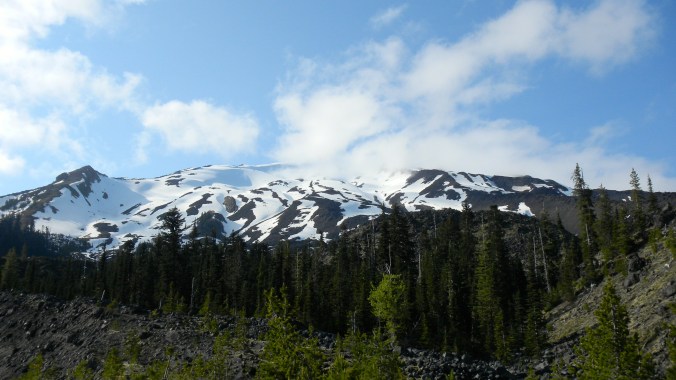
The final crater rim walk up to Uhuru Peak from Gilman’s Point.

While this climb is truly non-technical and often described as “easy” or a simple “walk-up,” proper planning and packing is essential to any climber’s success. Freak weather storms, freezing temperatures, and debilitating altitude sickness can occur at any time without warning. Pack for everything, and be prepared for anything.

Packing List

  • Wool hat + sun hat
  • Sunglasses
  • Sunscreen, +SPF chapstick
  • Heavyweight gloves
  • 3+ upper body layers – shirts, fleece, long underwear
  • Hardshell rain jacket
  • Down jacket
  • 2+ lower body layers – trekking pants, long underwear
  • Hardshell waterproof pants
  • Gaiters
  • 6+ pairs wool socks
  • Sturdy hiking boots
  • Trekking poles
  • Headlamp + extra batteries
  • 40+ liter backpack
  • Sleeping bag + sleeping pad
  • 2+ liter water bottles
  • Iodine or other water treatment
  • First aid kit
  • Deck of cards, journal, or charming humor for afternoons spent acclimatizing at camp

White Mountain Peak via Barcroft Station; Third-highest Peak in California

White Mountain Peak (14,252′) stands above every other highpoint in Mono County, the White Mountains, and is just 250′ shorter than Mt. Whitney, the tallest peak in the contiguous United States at 14,505′. Its claims are impressive, but the climb isn’t as demanding or romantic as some of its Sierra neighbors. In fact, the most popular route takes hikers up a gravel 4WD road straight to the summit.

Sunrise over the White Mountains.

Sunrise over the White Mountains.

Neither of us were completely prepared for the drive in to the White Mountain Peak unofficial trailhead. We’d slept at the cozy climbing-themed Hostel California in Bishop the night before, and took off towards Big Pine at 4:45am. Heading south on US-395, we turned left (east) onto US-168, which is a windy two-lane road that ascends into the White Mountains. After 13 miles on this highway, we found the clearly-marked White Mountain Road on our left (north). This road starts off nicely paved, continuing for 9.5 miles to Schulman Grove, where the pavement ends and a 17-mile 4WD gravel road begins.

Now, for contrast’s sake, the National Forest Service declares the 6-mile road leading to the Queen Mine route of Boundary Peak to be a 2WD road – but we found the White Mountain Road to be in much better shape and much more passable than Boundary’s (you can read that blog post to get a better idea of what we put my Jeep Liberty through). Either way, those 17 miles on gravel stretched out a lot farther than we initially expected, and we didn’t reach the parking area at Barcroft gate until 6:30am – making our total travel time from Bishop 1 hour & 45 minutes.

Far-off views of the long, windy 17-mile road that takes you to Barcroft gate.

Far-off views of the long, windy 17-mile road that takes you to Barcroft gate.

Our first view of White Mountain Peak in the distance.

Our first view of White Mountain Peak in the distance.

Nina and I had just climbed Boundary Peak (13,140′) the day before we took off to White Mountain, so we were feeling strong and acclimatized. The “trailhead” begins at the Barcroft gate, about 1.6 miles below the facility (despite the sign reading 2 miles), at 11,670′. This means you only have about 2,600′ total elevation gain to look forward to, though the rising and falling slopes leading to the base of the mountain add a few hundred feet to this total.

Barcroft gate; the official start of the White Mountain Peak climb.

Barcroft gate; the official start of the White Mountain Peak climb.

Here’s a breakdown of our timing:

  • 4:45am: Left Bishop, CA.
  • 6:30am: Arrived at trailhead (1:45 travel time).
  • 6:40am: Departed trailhead.
  • 9:15am: Arrived at White Mountain Peak summit.
  • 9:25am: Descended from summit.
  • 11:15am: Arrived back at the car.

Barcroft Station - Check out that white sedan, if he can make it, I'd guess nearly any car could!

Barcroft Station – Check out that white sedan, if he can make it, I’d guess nearly any car could!

Like I’d mentioned above, hikers follow this gravel road for 7.5 miles all the way up to the summit. The elevation gain trailhead to summit is around 2,500′, but because the trail slopes up and down throughout, our total elevation gain was about 3,500′. There is a more challenging route up the West Ridge described by Summitpost, but this entails gaining 9,000′ of elevation in just 10 miles. Nina and I had neither the time, nor desire, to take on that endeavor.

Nina making her way up the last couple hundred feet to the summit.

Nina making her way up the last couple hundred feet to the summit.

We made a few extra shortcuts on the last few hundred feet to the summit. While the gravel road continues to wind in steep traverses, there are some crude hiker trails that are easy to follow, and large enough rocks for scrambling.

The White Mountain Peak summit cabin.

The White Mountain Peak summit cabin.

Before we knew it, we were on top! Most notably, we were impressed that it wasn’t as cold on the summit as we expected. Everyone we’d passed throughout the day (3 different groups) were bundled up in pants and jackets, while we skipped along in hot pink shorts and tank tops. We were lucky enough to have a thin cloud coverage all day, so we were shaded from the 100 degree heat infecting the valley.

Nina and I on self-timer at the summit of White Mountain Peak.

Nina and I on the summit of White Mountain Peak.

“Descending” the long approach that leads to White Mountain.

We were up there!

We were up there!

Like many descents, this one flew by, and before we knew it we were back at the Barcroft station mid-morning. Because Nina’s a badass climbing machine, she suggested we trail run the last few miles that gradually descended back to our car, which saved us some extra time. We said goodbye after a successful high-altitude weekend and promised to reconnect over another 13er or 14er soon.

QUICK STATS

  • Length: 15 miles
  • Trailhead: 11,670′
  • Summit: 14,246′
  • Elevation gain: 2,576′ (3519′ total with up & down slopes according to Nina’s Runkeeper)
  • Time: 5.5 hours

A few resources I found helpful before this climb…

Boundary Peak via Queen Mine; Highpoint of Nevada

Nina and I met in June while climbing Mt. Baker and immediately bonded over this shared ambition to explore the highest peaks of the west coast. Just a month after exchanging contact information we put together a plan to meet halfway between San Francisco and Orange County to hike up the tallest mountain in Nevada, Boundary Peak (13,140′).

And actually, two days before we were meeting, we decided to tack White Mountain Peak (14,252′) onto our travel plans for a 13er and 14er two-fer weekend.

Let’s talk about getting there. You’ll find the beginning of a gravel road 9 miles east of Benton off of Highway 6, on your right (south) side of the road, just across from an abandoned ranch (see Summitpost for more detailed directions). I realize now that many of the sites I was using as a reference were as many as a dozen years old, and the 6.2 mile gravel road between Highway 6 and Queen Mine has severely deteriorated since then. I drive a 4WD Jeep Liberty Sports Edition, and sincerely doubted my car’s ability to get through the ruts and deep gouges that tore up this washed-out road. Maybe the conditions have worsened in just the last two years – a trip report I read from 2013 said this road was “easy peasy” in a 4×4 pickup.

In comparison, the following day we drove up the arduous 17-mile White Mountain Peak gravel path, which is labeled as a 4WD-only road by the National Forest Service, and we found this much more passable than the Queen Mine route. Either way, we were happy to get out of the car to start our climb.

We left my car at Queen Mine proper, an obviously large flat area next to a couple of open mine shafts. There was about 700 vertical feet, 1 mile, of road walking until we reached the trailhead register at Kennedy Point and our real hike began.

The Queen Mine trailhead register.

The Queen Mine trailhead register.

This first part of the hike was steep, and I could feel the altitude at 10,000 ft. sucking at my lungs. It didn’t take too long to ascend this first ridge, which flattens out after just a thousand feet into a nice sloping meadow where you can see wild horses, deer, and marmots. The Trail Canyon saddle slopes down to the left of this ridge and is unofficially “marked” with a pile of rocks and logs that created a perfect morning break spot to fuel up and hydrate before tackling the peak.

Here’s an overall breakdown of our timing:

  • 7:00am: Left Queen Mine trailhead
  • 8:30am: Took a break at the Trail Canyon saddle
  • 10:15am: Reached the summit of Boundary Peak
  • 11:00am: Departed the summit
  • 12:30pm: Took a second break at the Trail Canyon saddle
  • 1:45pm: Arrived back at the car
Our first views of Boundary Peak, a little less than a thousand feet above the trailhead... with wild horses!

Our first views of Boundary Peak, a little less than a thousand feet above the trailhead… with wild horses!

These first views were quite intimidating, but it was really only from this point that we could see the entire mountain. As soon as we descended to the Trail Canyon saddle, we could only see that first false-summit on the right. In fact, we’d forgotten about this image and believed that we were walking up to this first (much shorter) peak, to the actual summit.

Finally heading up the actual peak.

Finally heading up Boundary Peak.

You can see what we thought was the true summit here, when we really had an extra 1.5 hours and near a thousand vertical feet to gain still. The trail was reasonably sloped, covered in rocks and scree. It might’ve taken us just as much time to go up as it did to return since we were constantly slipping on the unstable conditions.

Looking down at Trail Canyon saddle. Farther to the right you can see the slightly uphill path that leads to Queen Mine.

Looking down at Trail Canyon saddle. Farther to the right you can see the slightly uphill path that leads to Queen Mine.

Our favorite view of Boundary Peak.

Our favorite view of Boundary Peak.

This was the “ah-hah” moment where we realized we were very, very miscalculated in our summit estimating. Overall, the trail was well-defined, and we never had too much of a problem finding the path once we’d wandered off. There were parts we chose to follow rock paths and bouldered up to avoid unnecessary elevation gain or loss, but the ridge was relatively easy to follow.

Looking across Nevada at the summit.

Looking across Nevada at the summit.

Reaching the summit felt like quite the accomplishment! We could see across Nevada and over to the Sierras and Yosemite region of California. On the top, Montgomery Peak (13,442′) loomed back at us from California. We speculated where the state border actually laid, and contemplated a second summit, but couldn’t spot a good trail and noted that the final 800 or so feet looked a little too sketchy.

Summit of Boundary Peak.

Summit of Boundary Peak, looking across to Montgomery Peak, a few hundred feet higher.

Looking down the ridge we ascended from the summit.

Looking down the ridge we ascended from the summit.

Returning down the way we came, we used the ridge above as a natural handrail and made our own path until we met with the Trail Canyon saddle again. We had run into 3 other groups during the day, and all 3 had also come from Queen Mine. Notably – we were also the only women we saw on the mountain that day (girl power!)

Returning through the meadow until dipping down to the left to Queen Mine.

Returning through the meadow until dipping down to the left to Queen Mine.

Looking down the valley from Queen Mine.

Looking down the valley from Queen Mine.

Below you can see where we chose to park – at the entrance to the abandoned Queen Mine. You can faintly see the road continuing up the ridge on steep switchbacks that take you 700′ up to Kennedy Point and the official trailhead. I never got a shot in the morning, but there was enough room for a few cars and tents with a firepit just to the right of my Jeep. By the time we arrived back at the car in the early afternoon, it was hot. The cool breeze that had kept us company at altitude disappeared once we’d reached the valley. Since this is one of the most remote desert hikes, and there are no sources of water along the trail, I’d highly recommend bringing three liters of water.

This is my recommended parking spot, next to the Queen Mine, before the super-rugged road conditions start to the traditional trailhead.

This is my recommended parking spot, next to the Queen Mine, before the super-rugged road conditions start to the traditional trailhead.

Leaving the trailhead, we were back in Bishop by 3:00pm… With just enough time to feed our hiker hunger and get ready for our ascent of White Mountain Peak in the morning.

QUICK STATS

  • Length: 10.4 miles
  • Trailhead: 9,200 ft.
  • Summit: 13,146 ft.
  • Elevation gain: 4,000 ft.
  • Time: 6:45 total, 6:00 moving

A few resources I found really helpful before this climb…

Mt. Rainier Summit Climb

Photos from Mt. Rainier, July 7-8, 2015 with Mountain Gurus.

  • Summit: 14,409 ft.
  • Elevation gain: 9,000+ ft.
  • Paradise to Camp Muir: 9:15am – 2:45pm (July 7)
  • Camp Muir to Summit: 11:30pm – 5:45am
  • Summit to Camp Muir: 6:00am – 10:15am
  • Camp Muir to Paradise: 11:30am – 4:00pm
  • Total time: 16.5 hours (July 8)

img_04921

Quarter mile into the hike from Paradise.

img_04951

img_04961

img_04971

img_04981

Threatening ice fall area that’s begun melting away in this summer’s high temps.

img_05001

Summit of Mt. Rainier at sunrise with little to no visibility.

img_05031

img_05111

Amy and I at the summit plaque.

img_05131

img_05141

Navigating one of the many crevasse ladders on the route.

img_05231

img_05301

There were 7 or 8 ladders along the route. More crevasses are opening up wider this year due to scorching temperatures in the Northwest, causing the glaciers to melt out rapidly.

img_05341

img_05411

img_05451

Climb Mt. Baker (10,781 ft.) via the Easton Glacier Route

Summit the third-highest mountain Washington at 10,781 ft., the most heavily glaciated peak of the Cascade Range volcanoes after Mt. Rainier.

img_0429_2

Overview: 16 miles roundtrip, 7,600 ft. elevation gain

The Easton Glacier route is one of the mountain’s most popular and likewise, most crowded. Check out Mt. Baker’s Squak Glacier route or Coleman Deming Glacier route for an alternative climb with similar difficulty.

You’ll start out at Schreibers Meadow Trailhead (3,200 ft.). To get there, exit off of I-5 north of Mount Vernon, head east on Highway 20, and turn left on Baker Lake Road. Follow this past Rocky Creek Bridge, taking a left on Forest Road 12 and a right on Forest Road 13. The parking lot is huge – but will still fill up during summer weekends. There’s plenty of roadside parking leading up to the TH. Don’t forget your NW Forest Pass parking permit!

img_0400_2

Hiking up Railroad Grade.

Start your hike out on Railroad Grade trail, and after a couple miles, keep right to continue up Railroad Grade itself. (We missed this turnoff and had a fun scramble up a creek bed to meet the trail – might have been more fun without our overnight camping gear.) Railroad Grade itself is a rocky moraine that looks and feels like a ridge. Follow the clearly-defined trail up to a huge area of flat camping spots, around 6,500 ft. In busy season this will look like a tent city, there must have been 50-75 people when we were there in late June.

img_0402_2

Superb North Cascade camping views.

Above the campsites you’ll start your glacier travel on Easton Glacier, and at this point the route will vary depending on time of year and snow season. You’ll likely cross a few snow bridges across the larger crevasses; I’ve never heard of ladder crossings being used on this route. Since Mt. Baker is the second most heavily glaciated peak of all the Cascade volcanoes, there are huge crevasse dangers on summit day. Stay roped up to your team and make sure everybody has had training on crevasse rescue techniques.

img_0407_2

Keep northwest towards the Crater Rim at 9,750 ft., where you’ll smell the “rotten egg” sulphur gas coming from the crater. The last 1,000 ft. are the most difficult of the day and take you up a combination of icy rock and snow to the base of The Roman Wall: the crux of your climb – both equally intimidating and thrilling. Ascend carefully up this steep grade, which can be 40-45 degrees and often icy.

img_0408_2-version-2

Heading up the Roman Wall.

Once you’ve breached the top of the wall, you’ll have a clear view of the Grant’s Peak – the true summit – just across a long plateau. Take your time making it to the top and soak in the views of Glacier Peak and the North Cascades stretching out below you.

img_0411_2

Summit plateau towards Grant’s Peak, Mt. Baker’s official summit name.

img_0419_2

As always, begin early (alpine start ~ midnight to 2am) so you have the advantage of hard, frozen snow for your crampons to grip into. On your descent, be aware of crevasse dangers and wary of any snow bridges that might have melted out from the sun.

Surprisingly, there are no permits required to climb Mt. Baker, but I recommend one person in your party to fill out a trail registration at the trailhead.

Packing List:

  • Northwest Forest Pass Trailhead Parking Permit
  • Trekking poles
  • Ice axe
  • Crampons
  • Crampon-compatible mountaineering boots
  • Helmet
  • Alpine harness, rope, ice tools
  • Overnight snow camping gear (tent, stove, cookware, sleeping bag, etc.)
  • Headlamp + extra batteries
  • Navigational gear
  • 2+ liters of water
  • Means to boil or treat water with iodine
  • Plenty of food
  • Blue bags for human waste
  • First aid kit, emergency GPS spotter
  • Emergency bivvy or shelter
  • Sun protection, storm protection, plenty of layers!

Mt. Shuksan (9,131 ft.) Summit Climb via Sulphide Glacier

Climb the Crown Jewel of the North Cascades up to 9,131 ft. for stunning mountain views, challenging rock and ice climbing, and vertigo-inducing heights.

img_0278_2

Approach hike, above Shannon Ridge.

Overview: 16 miles roundtrip, 6,600 ft. elevation gain

The Sulphide Glacier is the easiest and most popular route to the summit of Mt. Shuksan, and is a great beginner’s glacier + rock climb. More experienced climbers may enjoy the Fisher Chimneys route. The route described here makes for a very long two days because of its gradual, drawn-out approach (you’ll want trekking poles for this).

I joined Mountain Gurus for this climb and can’t recommend their services enough. As part of a 4-day Intro to Mountaineering Course, we spent each day learning the fundamentals of glacier travel, crevasse rescue training, ropes and rock climbing techniques, and general mountain safety guidelines.

img_0265_2

You’ll begin at Shannon Ridge Trailhead, which is pretty easy to find and accessible for any type of vehicle. To get there, exit I-5 at Burlington and head east on Highway 20. Turn onto Baker Lake Road and continue 23 miles until you reach Shannon Creek Campground. Turn left on Forest Road 1152, drive just past a 4 mile marker, and take a sharp right onto Forest Road 1152-014 to the very end of the road. The parking lot is wide and flat, as is the road leading there, no need for a high-clearance vehicle.

img_0271

To begin your hike, you’ll start out on an old road trail 2.5 miles up to Shannon Ridge, which will give you awe-inspiring views of the valleys and mountains around. Follow the ridge another 2 miles over a pass to your right, and continue on until you are at the southern wing of Mt. Shuksan with the summit pyramid in sight.

img_0355_2

We ended up making a higher camp than we were expecting, a little above 6,000 ft., because it was a low-snow year and couldn’t find access to running water lower down. In any event, plan to camp on the snow and to melt snow for water, though you should be able to find some runoff you can boil or treat. The campsite we chose was truly an amphitheater of the North Cascades National Park, surrounded by jagged peaks from every angle.

img_0312_2

On summit day you’ll slog across the (seemingly) never-ending Sulphide Glacier to the base of the rock pyramid, along the way passing the intersection of Fisher Chimneys on your left. You’ll want to be roped up to your team along the glacier as there are crevasse dangers on either side.

img_0330_2

The summit pinnacle is a 400 ft. tall rock pyramid that is pretty straightforward and decorated with numerous anchors and ropes from older expeditions. The easiest and most direct way up is through a class 3-4 gully that may be covered in snow or ice earlier in the season. Later in the season, this gully may become a “bowling alley” of loose rocks. Use your judgment and forego the summit if conditions seem unstable.

img_0342_2

Once you’ve made it to the top, take a few deep breaths and pat yourself on the back! Like so many places in the North Cascades NP, the higher you go, the more rewarding the views. A sea of peaks looks up at you from below the summit of Shuksan, and hidden from view until the top is Mt. Baker looming to the west.

img_0338_2

img_0356_2

As always, begin early (alpine start ~ 3 or 4am) so you have the advantage of hard, frozen snow for your crampons to grip into. This is a particularly popular climb so the later you begin, the more chances you have of running into a bottleneck up the summit gully or crowds at the top of the rock pinnacle.

Astonishingly, there is a pit toilet about 200 ft. downhill of the high camp overnight area. It is very exposed (both for the user and for audiences above), so be prepared to use your blue bags if necessary.

img_0361_2

Packing List:

  • North Cascades National Park Permit
  • Trekking poles
  • Ice axe
  • Crampons
  • Crampon-compatible mountaineering boots
  • Helmet
  • Alpine harness
  • Ice tool, snow pickets, ice screws, rope
  • Crevasse rescue kit
  • Headlamp + extra batteries
  • Overnight snow camping gear (tent, stove, cookware, sleeping bag, etc.)
  • Navigational gear
  • 2+ liters of water
  • Means to boil or treat water with iodine
  • Plenty of food
  • Blue bags for human waste
  • First aid kit, emergency GPS spotter
  • Emergency bivvy or shelter
  • Sun protection, storm protection, plenty of layers!

Mt. Hood Summit Climb

Photos from Mt. Hood, June 12, 2014 with Portland-based climbing group Mazamas.

  • Length: 8 miles
  • Elevation gain: 5,439 ft.
  • Summit: 11,239 ft.
  • Time: 12:30 am – 12:30 pm
  • Total time: 12 hours

dscn09661

First clear shot of the day, just as the sun is coming up. We can barely see the Palmer ski lift here, which we followed all the way up from Timberline Lodge after our midnight start.

dscn09671

dscn09681

Enjoying a break at sunrise, with the shadow of Mt. Hood visible over the valley.

dscn09741

The summit is nearly there, yet we still have at least a couple hours of climbing to ascend the final 700 feet.

dscn09751

dscn09761

Walking past Devils Kitchen, on the lower left. This is an active fumarole area that reeks of sulfur.

dscn09771

Looking up the Hogsback. Many climbers rope up on this section, depending on icy conditions. If one person falls off of the steep edge, the person they are roped to must jump off of the other side to balance the weight.

dscn09781

dscn09791

Final stretch to the summit over the icy trail.

dscn09821

dscn09861

Bundled up at the summit with Mt. St. Helens in the background.

dscn09901

Daunting view looking down back at the Hogsback, from the bergshrund.

dscn09911

OLYMPUS DIGITAL CAMERA

The whole Mazamas crew, at the summit.

OLYMPUS DIGITAL CAMERA

Pristine weather at Mt. Hood’s summit.

img_20140612_0806290631

Dad and I, celebrating our successful climb.

dscn09881

Rappeling down the Old Chute.

dscn09891

Descending from the summit, with the Pearly Gates shining over.

dscn09931

Halfway down, last view of the summit before we reach the trailhead at Timberline Lodge.

Mt. Shasta Summit Climb via Avalanche Gulch (14,179 ft.)

Mt. Shasta (14,180 ft.) is a spectacular beginner mountaineering experience. Great for serious hikers who want to take the next step into high-altitude alpine climbing.

Overview:

  • Length: 11 miles
  • Elevation gain: 7,300 ft.
  • Summit: 14,179 ft.
  • Time: 4:15 am – 5:30 pm
  • Total time: 13.25 hours

dscn0024

The Avalanche Gulch route is the second easiest, non-technical route to the summit of Mt. Shasta after the Clear Creek Route, but is by far the most popular. Many people complete this climb in one day from the trailhead, but you also have the opportunity to overnight at Horse Camp (7,950 ft.) or Helen Lake (10,400 ft.).

Begin at Bunny Flat Trailhead (6,940 ft.), off of Everitt Memorial Highway. This road and parking lot are snow plowed year-round and you’ll run into plenty of families using the area to sled, hike, or picnic in the summer. Follow the signs for 2 miles to Horse Camp where you’ll find a cabin and large, flat areas for camping.

Pro tip: If you’re lucky enough to stumble upon this place alone, the cabin makes for a great overnight shelter. There are long, wide benches great for sleeping, and a small wood stove that’s easy to use. Be sure you bring a sleeping pad – the benches absorb cold air and will leave you hypothermic without an extra layer between your bag and the wood. This is also a good place to leave extra gear (tent, stove, etc.) for your summit push.

dscn0043

Brian at daybreak, scoping out our route for the day.


Even if the trail is snowed over, from Horse Camp your route should be obvious. Staring up the southern flanks of Mt. Shasta, follow the natural channel of Avalanche Gulch all the way up to Helen Lake.

dscn0048

Looking up Avalanche Gulch, Helen Lake is the long horizontal shelf right in the middle.

Since this is a southern approach, depending on when you choose to begin in the morning, the sun will be blocked by the eastern Sargents Ridge and Green Butte Ridge. It’s important to do as much snow travel in the dark as possible so that your legs aren’t sinking into soft, melted snow on your ascent. I highly recommend an early alpine start (around 2am) if you’re beginning from the trailhead so that you can avoid the uncomfortable and harsh radiation that the sun will reflect from the snow.

Above Helen Lake, you’ll see a large rock formation called The Heart, and above this up on the ridge line, a protruding formation to The Heart’s right called Thumb Rock. Climb in between these two landmarks until you reach Red Banks (12,800 ft.). This photo and this photo should help you visualize this. You can also choose to approach Red Banks farther to the left up a steep chimney, the groups we saw doing this were roped up to one another.

dscn0050

Steep grades going up to Helen Lake in Avalanche Gulch.

dscn0069

Some groups are roped together towards the steepest part of the climb, up Red Banks.

dscn0067

dscn0078

Continue up the Red Banks ridgeline until you reach Misery Hill (13,800 ft.), a landmark that’s rightfully earned its name. It isn’t until the top of this hill that you can actually see the true summit for the first time. The summit pyramid is a rough pile of rock and ice that makes for an easy and fun scramble to the top of Mt. Shasta (14,180 ft.).

dscn0083

First view of the summit.

dscn0105

All smiles at the summit!

On your descent you may have the opportunity to glissade part of the gulch – pack an extra layer of pants or slick material that you don’t care about ripping up. Remember to take off your crampons and use your boots and ice axe as brakes as you glissade.

dscn0114

Be prepared for any typical mountain climate emergencies. Winds, storms, and whiteout conditions can occur on the mountain at any time and delay or completely stop an exit attempt. Because Mt. Shasta is an isolated volcano, solitary from any mountain range, it is more susceptible to these types of crises.

Be wary of AMS and descend at first signs of symptoms.

dscn0116

Mt. St. Helens Summit Climb

Photos from Mt. St. Helens, May 29, 2014 with Dad.

  • Length: 10 miles (give or take, we got lost)
  • Elevation gain: 5,500 ft.
  • Summit: 8,366 ft.
  • Time: 7:15 am – 6:30 pm
  • Total time: 11.5 hours

dscn0921

First look at the mountain, coming up out of the tree line.

dscn0926

Majority of this route consists of lava rocks from the 1980 explosion. Lots of fun climbing up over and traversing these to find the trail.

dscn0924

dscn0925

dscn0927

Conditions so foggy, I could barely see 10 feet in front of me.

dscn0932

Breathtakingly steep grades became more visible when we breached the clouds.

dscn0938

Met some fellow climbers on the summit.

dscn0944

Close-up of the west-side of the crater of the mountain’s surrounding rim.

dscn0945

Neighboring Mt. Adams visible above the clouds to the east.

dscn0948

Summit smiles!

dscn0949

Peeking over the summit into the crater that was blown from the 1980 explosion.

dscn0959

Got a little lost on our traverse back to the trailhead…

dscn0961