10 Extreme Summertime Experiences in the Chamonix Valley You Can’t Miss

Chamonix is the world’s capital of extreme sports. It is the birthplace of mountaineering. And it is full of crazy, adventuresome people who are drawn to its vibrant and eclectic culture from around the globe.

If you’re planning a trip to the Alps, don’t miss these 10 things to do in the Chamonix Valley.

img_5728

1) Take the Aiguille du Midi Cable Car to Stunning Heights

Ascend this world-famous cable car to the highest museum on earth at 12,605 feet. According to the official Chamonix Tourism website, the Aiguille du Midi receives almost half a million visitors every year – and for good reason.

The Aiguille du Midi Station is also one of Chamonix’s popular starting points for multiple mountaineering routes, including those shooting for the summit of Mont Blanc (more info below).

img_5680

2) Rent a Bike and Cycle Chamonix

The stunning backdrop, challenging grades, and world-class accommodations make the Alps one of the most popular places for road biking in the world. Chamonix in particular caters to cyclists with limitless rental and gear shops, not to mention its draw for the Tour de France every year. One of the most popular and accessible routes for road biking is the Col des Montets route, a half-day excursion from Chamonix central.

If you’re looking for something a little more rugged, mountain biking in Chamonix is a must-do for adventure seekers. Most cable cars and ski lifts accommodate bikes, making it all the more easy to pick up a map and hit the trail.

3) Visit the Mer de Glace

Translated as “Sea of Ice,” the Mer de Glace is the largest and longest glacier in France and just a quick daytrip out of Chamonix using the Montenvers Train. From the train station, visitors can walk across the glacier, through an ice grotto, and even follow a trail all the way back to the valley floor. This is another popular place to practice mountaineering skills and climb all the way up to the cozy mountain house of Plan de l’Aiguille.

img_5697

4) Go paragliding

There isn’t quite a more thrilling way to see Chamonix than by flight. On a clear summer day you’ll see dozens of paragliders coasting along the valley walls above you.

Visit the Tourism Center for more information on paragliding. Or, if you’re brave and experienced enough, see what it’s like to paraglide off of the top of Mont Blanc.

img_5740

5) Try Out Ice Climbing, Rock Climbing, or Classic Mountaineering

Because of its convenient accessibility, guide options, and limitless routes, Chamonix is the perfect place for climbers of all experience levels to explore the mountains. Both beginners and avid alpine mountaineers will find high-altitude routes suited just for them.

If you’re interested in rock climbing, check out the Aiguilles Rouges range to the north of the valley (like the Aiguille du Crochues route). For a more intense ice climb or to enjoy a classic mountaineering experience, visit the south side of the valley on the Mont Blanc Massif (like the Aiguille du Midi-Plan route).

img_5586

6) Trek the Tour du Mont Blanc

If you have the time, completing the Tour du Mont Blanc is the ultimate way to experience trekking in the Alps while seeing the evolution of culture and scenery through France, Italy, and Switzerland.

Eat and drink your way through 3 countries, 100+ miles, and 33,000+ vertical feet over the course of 6-12 days. The wilderness alpine environment and cozy mountain villages create the perfect balance between an exhilarating outdoor adventure and a safe, enjoyable experience.

7) Enjoy Classic Savoyard Cuisine

This list wouldn’t be complete without a nod towards Chamonix’s famous gastronomical charms. Savoyard food is rich in potatoes and cheese, the staples for some of their most popular dishes of fondue, tartiflette, and of course, French onion soup. Pair with a glass (or liter) of Savoie wine for a truly deluxe experience.

img_5710

8) Hike to Lac Blanc

If you’re looking for a short hike to fill you time on a rest day between an adrenaline-fueled schedule, Lac Blanc can provide a relaxing and scenic break. At an elevation above 7,000 feet, this high-altitude lake sits in a picture-perfect position below skyscraping mountains and across from Mont Blanc for panoramic views of the entire valley. You won’t want to forget your camera on this trip.

9) Try a White Water Sport like Canyoning, Rafting, or Riverboarding

Jump, slide, and rope your way down waterfalls and through alpine pools on an epic canyoning trip like nothing you’ve seen before. Or try white water rafting in a mountainside Alps environment – glacial cold water included.

If neither of those get your heart racing, kick it up a notch and don a wetsuit, flippers, and a helmet for the ultimate white water extreme sport: Riverboarding (known as hydrospeed in Europe). Having difficulty picturing this? Click here.

img_5800

10) Climb Mont Blanc

Chamonix-Mont-Blanc bears the name of Western Europe’s tallest mountain for a reason. While not officially one of the Seven Summits, reaching the top of this peak is a noteworthy and challenging effort.

The Compagnie des Guides de Chamonix is the oldest, largest, and one of the most reputable guide companies in the world – let alone France. Trust them for your summit attempt and you’ll be in good hands.

Circumnavigating Volcanoes: Trail Running the Three Fingered Jack Loop

Challenging grades, sparkling alpine lakes, and jaw-dropping views that take you around the entire Three Fingered Jack mountain massif in Central Oregon. Over half of this trail was obliterated by a wildfire 13 years ago, but the burn area just means more opportunity for mountain views.

img_6515

Overview: 22.8 miles, ~4,500 elevation gain, 1-3 days

While Three Fingered Jack is still high on my list of Central Oregon summits, I’m dedicating all of my free time in the next few weeks to preparing for my Circumnavigation of Mt. Hood via the Timberline Trail (~40 miles, 9k elevation). So this morning I traded my trekking poles in for trail runners and set out on one of the area’s most popular hiking loops.

Most people will complete the Three Fingered Jack loop during a 2-3 day backpacking trip, and I did read of some hiking the entire trail in one day. However, I didn’t see any reports about how this route would feel as a trail run, so I decided to test it out for myself.

Note: This route takes you around Jack Lake, Wasco Lake, and onto the western ridgeline of Three Fingered Jack. It does not go down into the popular Canyon Creek Meadows; read this article, this article, or this article for directions to Canyon Creek.

I chose to complete this trail counterclockwise so that I would have the sun on my side; it was 38 degrees the morning I began and having sunlight to warm me up was tantamount to my success, and enjoyment, of this run. There’s plenty more shade on the west side of the mountain than the east side, so you should have no problem cooling down in the afternoon.

img_6506

You’ll start your route out at the Santiam Pass access to the Pacific Crest Trail, right off of Highway 20, almost impossible to miss. Make sure you bring your NW Forest Pass for the parking lot, and fill out a wilderness permit at the trailhead.

Distance breakdown:

  • Santiam Pass Trailhead to Booth Lake: 4.2
  • Booth Lake to Jack Lake Trailhead: 6 miles
  • Jack Lake Trailhead to Wasco Lake: 3 miles
  • Wasco Lake to Santiam Pass Trailhead via PCT: 9.6 miles

Start out on the PCT at Santiam Pass for about .2 miles before you hit a junction and turn right to follow Summit Trail #4014. This trail will take you all the way past Square Lake, Booth Lake, Jack Lake, and up to Wasco Lake.

img_6513

Massive burn areas all along this trail means you’ll have more opportunity to admire the mountain.

The undulating Trail #4014 passes through an incredible burn area that gives you views of the Three Sisters, Mt. Jefferson, Black Butte, and more. You’ll spend the first half of your day dashing above alpine lakes and wooded campsites before you reach the busy trailhead at Jake Lake. Here you’ll find picnic benches, a restroom, and lots of day hikers – follow the trail towards Wasco Lake to continue the loop.

[Note of warning: Once you reach Jack Lake, the trail #s disappear and are replaced by names of landmarks. If you’re looking to follow the popular Trail #4010 to cut off a couple extra miles on this loop, follow signs to Canyon Creek Meadows.]

img_6509

At the opposite end of Wasco Lake, you’ll run into a trail junction. The path ahead of you has an “unmaintained trail” sign; you’ll turn left here up a short steep path that takes you to the PCT. This intersection is marked with the faintest, oldest sign that reads P.C.N.S.T. – when I saw this, already sure I was lost, all I could do was cross my fingers and hope that this stood for “Pacific Crest North South Trail.” Guess I got lucky.

The aforementioned short steep path will take you to the top of Minto Pass where you’ll ignore Trail #3437 going straight and turn left instead. Once you hit the PCT and head south (there’s also a sign pointing the way to Santiam Pass), it’s just a straight shot to the parking lot. You have 9.6 miles of rocky ridges, soft sandy trail, and unbeatable views of Central Oregon ahead of you.

img_6510

Heading up Minto Pass towards the Three Fingered Jack massif.

Your first 2 miles on the PCT take you through a burn area that allows you to see your entire approach up to the western ridge of Three Fingered Jack. The trail gradually approaches Porcupine Peak (6,510 ft.), the highpoint of your route today, and provides you with absolutely jaw-dropping views of Canyon Creek Meadows down to your left and the northern face of Three Fingered Jack looming down at you from your front.

Once you cross over this highpoint, you can look forward to a long, undulating 7.6 miles of descent straight back to Santiam Pass. The area just to the west of the mountain is covered in rockfall and rocky moraines that will slow you down a bit while you watch your step, but the rest – first through a thick forest and later into another burn area – is gradual, scenic, and an enjoyable way to end a long day.

img_6517

With plenty of distance to cover, and enough elevation gain to give your glutes a good burn, the Three Fingered Jack loop makes for an awesome trail run. This is an even better route for endurance runners or people training for a high-altitude event, since the trail maintains an elevation between 4,816 ft. (Santiam Pass lowpoint) and 6,510 ft. (Porcupine Peak highpoint).

Packing List:

  • Northwest Forest Parking Pass
  • 2+ liters water
  • Iodine or filter to treat water, plenty of running water sources
  • Food depending on length of trip
  • Tennis shoes, hiking shoes, whichever you prefer – the trail is in superb condition
  • Sun glasses + sun protection – burn area means more exposure to sun

South Sister Summit Hike (10,358 ft)

This is the mountain that started it all for me. Seven years ago my dad took me on a hike up Oregon’s third tallest peak and I was exhausted, drained, sore, sunburnt – and completely inspired. Yesterday, I returned with one of my best friends from high school to share this mountain with what would be her first-ever significant summit.

img_6433

Not only is South Sister a stunning image and visible from hundreds of miles throughout Central Oregon, but it is a great beginner climb to introduce hikers to high altitude mountain life. As long as you’re mentally prepared, have good physical endurance, and pack right, there’s no reason why this mountaintop should be out of reach.

Getting there is simple and accessible for any type of city vehicle. The primary route begins at Devil’s Lake Trailhead, which is 26 miles west of Bend off of the Cascade Lakes Highway. You’ll pass Mt. Bachelor and eventually see a sign on your left that leads you to the campground. To start, walk to the very end of the parking lot and follow the unmarked trail past the bathrooms. You’ll cross the main highway (some people will park alongside the highway here too) and come across a sign that says “South Sister Climbers Trail 36.” Fill out a Wilderness Permit at the kiosk and begin your ascent.

The hike begins in a lush forest that stays green year-round. Elevation gain is moderate, and in 1.5 miles you will emerge onto a sandy plain and see a four-way crossing. Pass by the turn off for Moraine Lake and continue up Wikiup Plain, following signs for South Sister Summit. The trail across the plain is soft, flat, and leads you right up to the base of the mountain.

img_6432

Enjoying the flat bit of Wikiup Plain before taking off on the REAL ascent.

Cairns mark the way on this next section and lead you up through rocky ridges to the saddle of Lewis Glacier, where you’ll see a small brilliantly-blue alpine lake. It seems like some people dump their backpacks here before heading to the summit – but I highly discourage that. You still have a few hours round-trip before you make it back to this point and you’re about the encounter the toughest and most exposed part of the climb. Be sure to carry adequate food, water, and sun protection with you.

img_6438

Lewis Glacier saddle + lake.

Leave the lake and follow the ridge up and to your right – the route should be obvious. You will be walking entirely on deposited lava and cinder rock now. This entire trail that leads you to the summit is wide, packed, and very defined. Compared to my first summit seven years ago, there is considerably less scree and potential for sliding. When my dad and I first went up this mountain, I remember both of us begrudgingly sliding one step backwards for every two we took forwards. That being said, Brooke and I did fall on our butts once or twice on the descent.

img_6445

Volcanic ash + scree ridge leading up to the false summit.

This volcanic ridge leads you to the false summit, where you can find manmade wind blocks and stop to catch your breath and fuel up. But don’t fret; the true summit is visible just across a large snowfield, and is just a short, flat, gradual walk ahead. Follow the climber’s trail to the right around the snowfield (which becomes Teardrop Pool when melted out).

img_6450

Final few steps to the summit.

img_6452

img_6476

Brooke standing on the summit.

You’ll find a tall summit rock marked with a small metal pole and a piece of pink ribbon wrapped around it. As tempting as it is to jump around up here, be careful – lava rock is sharp and unforgiving. Enjoy the views of Mt. Bachelor to your south and Middle Sister, North Sister, Mt. Jefferson, and more to your north. Return the way you came and remember; you’re only halfway done. In almost all mountaineering cases, the bulk of accidents happen on the descent.

I’m writing this article after one of the most dangerous seasons that South Sister has ever had. More and more people are climbing the mountain, but more and more are inadequately prepared (either in physical condition or with gear), and an alarming number of hikers have had to be rescued – sometimes waiting overnight for mountain personnel. Be careful, be safe, and if it’s your first time up here – never hike alone.

img_6469

img_6470

For this climb I can’t recommend enough that you choose proper footwear and use a pair of tall hiking boots. Almost the entire trail on the actual mountain consists of sandy scree that will flood your tennis shoes, and sharp rocks that could twist an unsupported ankle. Tennis shoes will not just be uncomfortable – they could be dangerous.

It’s also important to remember weather fluctuations at this altitude. Below the Lewis Glacier Lake you may feel warm, even hot, and want to ditch your extra layers – but fight that urge and be sure to carry up all of your supplies to the summit. It’s considerably more windy and chilly on the summit ridge, and a lot can change in two hours.

img_6475

Views of Broken Top on the descent.

Hike Broken Top Crater for the Best Sunset View of the Three Sisters

Central Oregon’s limitless trail systems can take seasoned hiking mavens and first-time trail goers through miles and miles of beautiful, pristine wilderness. Choosing a hike or trail run is no easy task, if only for the sheer number of possibilities. Fortunately, my friend Dane and I found what I proudly call the #1 best sunset view of the Three Sisters and beyond.

img_6268

Approach hike takes you straight towards Broken Top Mountain.

Between taller and more strenuous summits, and lengthier hikes in low elevation that wouldn’t grant us views of the mountains – we were stumped. We wanted to see as much of the mountains as possible, but we definitely didn’t want to be stuck up in the cold and dark once the sun retreated. Finally, we landed on Broken Top Crater.

This slow, gradual hike covers a little over 4 miles one way for a total 8.4 mile trip. Elevation gain is 1,300 ft. – but be warned, the trail tops out at 8,200 ft., so you’ll definitely feel the altitude on your way up.

img_6273

Perfect views of Bachelor to the south on your approach hike.

To get there, follow Cascade Lakes National Scenic Byway past the Mt. Bachelor ski areas and turn off towards the Todd Lake trailhead. The dirt and rugged Road 370 continues past Todd Lake for a few miles that will take between 15-25 minutes of slow, bumpy moving. Use a high-clearance 4WD vehicle on this road. Eventually you’ll come to a flat, round parking space at the Crater Ditch Trailhead where you’ll start your hike. You need a NW Forest Pass to park here.

Starting off, you’ll join a trail that comes up from Todd Lake trailhead and follow it to your left (if your vehicle isn’t rugged enough for Road 370, you can start this hike from Todd Lake, though it’ll up your mileage to 14 and nearly double your elevation gain). The first third of your hike follows a high bank alongside a stream where you’ll walk straight towards Broken Top Mountain in clear view.

img_6270

Intersection that leads to Green Lakes.

Two paths fork in the road and you’ll veer right towards Broken Top, its opposite direction leading to Green Lakes – another superb hike in Central Oregon. From here, you gain most of your elevation, and slowly climb up around the east side of Broken Top to end up on the north ledge of the crater. After following a rocky moraine up a stream, you’ll top out at one of the most jaw-dropping, crystal clear glacier lakes in the Three Sisters Wilderness.

img_6286

img_6340

Continue on up the same path to a lookout point where you’ll be rewarded with the best sunset view in Central Oregon. From south to north, you’ll see South Sister, Middle Sister, North Sister, Mt. Washington, Three Fingered Jack, Mt. Jefferson, and Black Butte.

img_6290

It’s important to remember that this lookout is perched above 8,000 ft. – so as soon as the sun goes down, the wind will pick up and the temperature will drop. Pack appropriately and be prepared for anything. The entire trail is smooth and somewhat wide, and Dane and I found it pretty easy to navigate our way down in the dark. Just don’t forget your headlamp!

img_6299

img_6335

Photo (c) Dane Tomseth

Believe it or not, there is intermittent cell phone reception around the area, so rest assured you’ll be able to have the real wilderness experience without feeling completely cut off from your navigation system or emergency contacts.

img_6330

Photo (c) Dane Tomseth

Hike East Peak (9,380 ft) in the Wallowa Mountains

The Wallowa Mountains are one of the Seven Wonders of Oregon – and rightfully so. Also dubbed the “Oregon Alps,” this range has over 30 mountains over 9,000 ft. in elevation. While Central Oregon gets more visitors and credit for its massive volcanoes, the Wallowas are a truly stunning sight and well worth the trip to the state’s isolated Northeast corner.

img_6152

Lake Wallowa

The largest and most popular town to visit the Wallowas is Joseph, Oregon, which is actually less than a 4 hour drive from Boise, ID, and a 5.5 hour drive from Portland. This hike starts out of Joseph, and more specifically, utilizes the Wallowa Lake Tramway that takes visitors from the valley floor at 4,450 ft. up to the summit of Mt. Howard at 8,150 ft.

img_6157

To get to East Peak, you’ll take an unmaintained climber’s trail that is not part of the Tramway map or trail system. Don’t worry, the trail itself is very well-defined and nearly impossible to get lost on. To begin, start hiking uphill from the tramway exit on the designated trail. After an eighth of a mile you’ll see an unmarked trail at a T-intersection stem off slightly downwards through some sparse trees. Looking up, you’ll see a meadow and East Peak beyond.

If a Tramway employee is available, it would be in your best interest to be walked to this intersection since it is unmarked. One man was more than happy to volunteer to walk us up and point us in the right direction.

Follow the trail all the way up the ridge, pass over a couple of false summits, and you’ll find yourself standing over one of the best views of the Wallowa Mountains! Look down towards McCully Basin and Aneroid Lake, and out across a sea of 9k+ peaks. You can continue hiking along the ridge to the close-by Hidden Peak (9,460 ft), or if you’re feeling ambitious, keep on going another 3 miles along the ridge to reach Aneroid Mountain (9,701 ft).

img_6167

View from the East Peak Summit

img_6159

There’s another route described on Summitpost (link here) that begins from the valley floor, avoiding the tramway, and ascends past Anderoid Lake.

No need to pack heavy in the snack department. The food in the Summit Grill at the top of the tramway serves a delicious lunch with alcoholic beverages for those who’d like to indulge – you’ve earned it!

Travel with Purpose: Why You Should Trek Through Langtang Valley This Fall

As seen on The Outbound Collective.

Nepal is the gateway to the Himalayas, home of the tallest mountains in the world. For decades the country has attracted global attention for its magnificent beauty, rich culture, and welcoming communities. However, the last year has cast a different type of spotlight on this third-world country that encourages foreigners to visit for new reasons.

The earthquake that devastated Nepal in April of 2015 did more than just take lives and damage buildings; it ruined the tourism industry in many remote village who depend on foreign visitors to maintain their livelihood. The Langtang Valley experienced some of the worst of this impact because of its position between two skyrocketing mountain ranges, and what was once one of the top destinations in the country, quickly became one of the least visited. Nepal isn’t looking for volunteers or Peace Corps members; they need your business as a trekker.

img_4474-2

Rockfall plummeted down both sides of the valley during the earthquake, leaving many buildings irreparable and eventually abandoned.


Nepal’s most popular trekking season is from September through December, when the temperature is moderate, precipitation is minimal, and the views are crystal-clear. Here’s why you should pack your bags and plan a trip to the high hills this fall.


Nepal is one of the world’s top destinations for epic trekking. That’s because of its…

  • Accessibility: Most of Nepal’s trails are easily accessed, and more importantly, they’re friendly to both beginner and experienced hikers. Visitors have the opportunity to shorten or lengthen their trek based on their personal skill and preference.
  • Affordability: Nepal is notoriously shoestring-budget-friendly, in that its lodging, food, and recreation prices are some of the lowest in the world. Plus, you can hire a local guide to escort you during your trek for just $10-20 per day.
  • Beauty: Nepal is the best way to discover and explore the earth’s highest peaks, while experiencing an incredibly vibrant and unique culture. It’s truly the best of both worlds.
img_4482-1

Rebuilding and construction work begins before dawn and ends after dusk, through rain or shine.

The Langtang Valley offers an unparalleled glacial valley experience. You’ll want to see Langtang for its…

  • Proximity: The Langtang Valley is the closest trekking region to Kathmandu, reachable by public bus in five hours, or by a private car in half that time. Villages are close to one another, so you’ll never go long without finding a restaurant or lodge for eating or sleeping.
  • Flexibility: Unlike the difficult-to-reach Annapurna and Khumbu regions, Langtang treks can be completed in as little as 3 to 5 days for travelers with a short time limit.
  • A Community in Need: The Langtang region is open for business, but much of the outside world doesn’t know this yet. Earlier this year gaps of communication left Kathmandu city-goers with the impression that the entire valley was still under construction – but in truth, they’ve been open all along. Lodge owners are desperate for the tourism they’ve built their livelihoods on, and they need your business now more than ever.

img_4478-1

How you can help…

  • Hire Local Guides: From the hustle and bustle of Kathmandu to the smallest villages perched beneath a mountain pass, there are always local guides ready and willing to assist you with your journey. For a small price, you’ll get advice, direction, and support from a person who knows the trails best.
  • Take the Road Less Traveled: Western culture teaches us to stick with the crowds – but in Nepal, it’s better to visit the less-populated establishments. Eat at an empty restaurant, or purchase goods from the shop nobody is going to. You could be the only customer a diner receives all day; and you will be thanked and remembered for that.
  • Give: Spend your money and time with lodge owners, buy an extra cup of tea or one of the pieces of jewelry that your host mother is selling. Nepal is by and far more inexpensive than your life back home; you can afford to treat yourself.

img_4479

The April 2015 earthquake was devastating, no doubt, but one of the most important takeaways I’ve seen firsthand is the resilience and genuine happiness the Nepalese have in the face of tragedy. Lodge owners, construction workers, and even students band together to rebuild their communities and livelihoods. It’s the people – not the mountains – that keep recurring visitors coming back, and who make this country one of the top destinations for tourists worldwide.

Go and see for yourself.

Hike to Utah’s Highpoint: King’s Peak (13,527 ft.)

Summit the tallest peak in Utah at 13,527 ft. on a 2-3 day backpacking trip – or do as we did, and knock it out in a day.

img_5983

King’s Peak peeking its head out at sunlight towards the left.

Overview: 28.8 miles, 4.1k elevation gain

This hike isn’t overly difficult; it only takes endurance. Between the 3 hour drive to the trailhead from Salt Lake City, to the seemingly endless 12 mile approach to the base of King’s Peak, this hike makes for a hell of a day.

Christina and I set our alarms for 12:30am and were on the road out of SLC by 1am. We arrived at the Henry Fork Trailhead (9,400 ft.) and were on our feet hiking by 4am. We wouldn’t reach the car until after 7pm that evening, making our day a little longer than 15 hours.

img_5977

Hiking through Henry’s Fork Basin at sunrise.

The good news is that the elevation here is gradual. In fact, the first half dozen miles seem nearly flat (especially if you’re setting out in the dark and focusing more on not tripping over the rock-and-root-filled trail). The distances I read online were confusing and felt inaccurate once we had hit the trail. Here are the big landmarks we recognized for the first part of our day:

  • 3 miles from TH: Sign for Alligator Lake Trail off to the right
  • 5 miles from TH: Sign for Elkhorn Stream Crossing, follow this to the left
  • 9-10 miles from TH: Crossing Gunsight Pass

The main trail will take you up the left/east side of the valley, where you’ll see Dollar Lake and Henry’s Fork Lake from a distance. Most people camp around these lakes before going for the summit push a day later. Be wary of campfire and human waste restrictions around this area.

img_5987

For the first 9-10 miles, the main trail is clearly marked and easy to follow. Beyond Gunsight Pass (11,900 ft.), the directions we’d read online are sparse and unspecific. You have two options from the top of this pass:

  1. Head straight down into Upper Painter Basin and lose around 500 ft. of elevation. Follow the clearly marked, rocky trail around and up Anderson Pass to the base of King’s Peak.
  2. Turn right at the top of the pass and use a “shortcut” to avoid losing elevation. There’s a faint climber’s trail marked with cairns along this mountainside (which is the base of Gunsight Peak) that leads you straight to Anderson Pass. From here, you can clearly see where you’ll meet up with the main trail and where people start off on the North Ridge Route of King’s Peak.

On both the Anderson Pass shortcut and on King’s Peak itself, there are cairns virtually everywhere, which makes it difficult to decide which markers to follow.

img_5991

img_5992

The trail loses itself on the mountain itself as we head towards the summit in the far-off distance.

One clarifying detail about this climb: This route is a 12-mile approach to the base of King’s Peak, where the climb itself turns into a class-2 scramble. There’s a lot of hand-and-foot work involved towards the summit, and we had to warn a couple people with dogs about this on their way up.

img_6005

All smiles at the summit plaque!

Standing on the summit of King’s Peak is quite a thrill – you can see for endless miles in every direction, and peer the dozen miles from where you came from. If I was doing this hike over again, I’d begin even earlier to avoid the unpredictable weather patterns I discovered during my brief visit to Utah…

We’d read about a 97-degree, crystal clear weather forecast for the day we chose to hike – and I got my first lesson into the Mountain Time Zone’s frequent and unrelenting thunderstorms. Christina and I were stuck in nearly three hours of pouring rain and scattered snow, with thunderbolts screeching down to the valley below us. And of course, we had left our rain and cold weather gear at home.

img_5995

Eventually the skies did clear up, and while we may have not made the best navigational decisions in our haste to escape the storm, we finally found ourselves below Gunsight Pass and facing the endless stretch of flatness to the car. Those last five miles were brutal to say the least, and I hope that Christina has forgiven me for the hell I put her through.

Our Fitbits measured a total of over 30 miles and 5,000 ft. of elevation gain when it was all said and done. No doubt this was from the few “interpretations” we took on the trail, but at the end of the day all that really mattered was that we made it back to the car in one piece.

If you’re looking to attempt this one-day’er, bring plenty of water, food, layers, be sure to learn from our mistakes – and have fun!

Middle Sister Summit Climb (10,047 ft.) via Renfrew Glacier

If you’ve been anywhere near Central Oregon, you’ve seen the Three Sisters Mountains dominate the skyline. Each of these volcanoes exceeds 10,000 ft. and are some of the highest peaks in the state of Oregon. Though they are truly considered sister peaks to one another, each has unique climbing routes that require varying physical conditioning and gear.

Note: Some (crazy) people actually climb all three in one day. Check out this local man who completed the total traverse in 6 hours & 39 minutes.

Middle Sister is navigationally in the middle of the three, is the shortest of the three, and is quite literally in the middle in terms of difficulty of its North Sister and South Sister counterparts. This route requires good knowledge of route-finding and backcountry travel as the bulk of the day requires off-trail traversing and good navigational instincts.

img_5842-version-2

This post describes a western approach from the Obsidian Trailhead (for a good description of the eastern approach, check out this article on Summitpost). This trailhead is easy to find, right off of the historic Highway 242, just plug it into Google Maps. You need to acquire an Obsidian Limited Entry Area Permit before you go – only 30 hikers/day allowed on this trail. Call, email, or visit the McKenzie Ranger Station to do so.

Background: I’ve been up this mountain three times now (summiting once) and still don’t know which precise route I’d recommend. It’s all up to personal preference and interpretation. There are camping opportunities available at Glacier Creek and other areas along the PCT, but we chose to complete this in a one-day trip.

img_5872

You have a couple options starting out on the Obsidian Trail (#3528).

First option: Take a left after about 3.5 miles at Glacier Way (#4336), which will take you right to the start of an “unmaintained climber’s trail” sign and up the Collier Glacier.

Second option: Take Obsidian Trail all the way to a T-junction at the Pacific Crest Trail.

  • Go left (north) here to reach the “unmaintained climber’s trail” sign and continue towards the Collier Glacier on your right (our ascent).
  • Go right (south) here and follow a dry stream bed up a colorful, flowered valley towards the Renfrew Glacier on your left (our descent).

Whichever way you go, you’ll be directly facing both North Sister (to your left) and Middle Sister (on your right). Aim for the saddle between the two.

Pro tip: Use your crampons early on. The rock is incredibly difficult to navigate; you’ll save a lot of time by doing as much snow + glacier travel as possible (take it from this guy and this guy).

img_5843

Some people complete both mountains in one climb, often camping overnight in the saddle between the two, but it should be noted that North Sister’s summit requires difficult class-4 climbing where a rope and helmet are mandatory. Furthermore, North Sister is infamous in Cascade climbing for its rotten and crumbly rock – you should expect plenty of loose rock and rockfall should you attempt this climb.

Once you reach the saddle between North and Middle, continue to your right by scrambling and bouldering over razor-sharp volcanic rock. Once you reach Middle’s ridge, you should find a faint climber’s trail that leads you up the final 800 feet to the summit. Parts of this climb are super sketchy with vertigo-inducing exposure. Like the rest of the climb, it’s easy to get off-trail, so go slowly and think ahead when visually planning your route.

img_5844

Looking up Middle Sister’s ridgeline to the summit. You can see a hiker coming up the snowfield on the left, which is the eastern approach.

From the top you have close-up views of South Sister, Broken Top, and Mt. Bachelor to the north, and North Sister, Mt. Jefferson, and Mt. Washington to the south.

img_5848

After ascending the Collier Glacier (slightly right looking down), we decided to descend via the Renfrew Glacier (directly below Middle Sister’s summit ridge). We wore our crampons down until the snowfield ended, and followed a large natural gully for a few miles until we eventually hit the PCT again. It was tough to find our location, even with compass and map, but we turned right and in under 2 miles joined up with the Obsidian Trail intersection again. Bear left, and continue 5.5 miles to the trailhead parking lot.

img_5874

Overall: Incredibly strenuous day, mostly due to boulder-hopping and route-finding, but an awesome and exhilarating undertaking for the truly adventurous.

Solitude at the Summit of Europe’s Highest Peak: Mt. Elbrus (18,510 ft / 5,642 m)

The tallest mountain in Europe is as unique as any other of the Seven Summits, tucked away in a small ski village of Elbrus on the border of Russia and Georgia. 
High seasons in the dead of winter and heart of summer attract Russian tourists and families, locals selling fur, jam, and sweets, plus a host of climbers from every corner of the world come to fulfill a huge mark off their bucket list.

Cheget Village


When I arrived at our hotel (based at 6,880 ft / 2,100 m), a stretching 3-hour drive from the small Mineralnye Vody airport, I discovered I was the only solo climber of their 60+ guests. I quickly made friends with larger expeditions who offered me tips, shared their perspective of the mountain’s current conditions, and invited me on day hikes.

Exploring the upper valley on my arrival day

I organized this trip through Pilgrim Tours, as part of their Lite Package, and I followed their suggested 8-day acclimatization schedule – which by all means was very speedy. This schedule allowed me a full three optional summit days – which is exactly what I was looking for. 

I spent my arrival day orienting myself around the villages, picking up food for day hikes, and securing rental gear for my nights on the mountain. I got my first taste of traditional Russian cuisine in our hotel’s dining room, a dish that would soon become all too familiar: mayonnaise-drenched salad, thin brothy soup, and a plate heaped with some kind of meat and potatoes.

Typical Russian traffic jam, en route from the airport


Day 1: Acclimatization hike up Mt. Cheget (11,815 ft / 3,601 m)


The Semerka hotel was conveniently situated in Cheget village, at the base of Mt. Cheget. I fought off hard suggestions to take the chairlift up to 3,005 meters, cutting off around 600 meters and two hours of elevation gain, and instead began the hike from the base of the mountain.

The single-seat chairlifts up to 3,000 meters

Cheget marks the border between Russia and Georgia, hikers need to carry their passports in case approached by Georgia border police


I was surprised to learn that most people take the chairlift shortcut, though I understood the reasoning to spend as much time up high as possible. Groups who cut off the first half of this climb would have more time to relax and adjust to the summit height of 3,600 m.

View from the summit of Cheget Peak

A second view from the summit


I sped up the trail after an early breakfast and reached the top in just under three hours. The views of the Caucusus mountain range were absolutely spectacular, with Mt. Elbrus looming to my side. Clouds shifted in and out of the sun all morning, hiding and then revealing this stunning scene.

Elbrus peeked out of the clouds on my descent

I spent about a half hour up top, mostly because I wasn’t completely sure whether I had reached the true summit. Two sister peaks rise up just ahead of Cheget, making me question whether I should be scrambling down the steep rocky path to follow their lead. After some in-depth photo journalism efforts (and further cross-checking these photos with other guides and Google images), I happily determined that I had in fact made it to the summit of Mt. Cheget.

One last view of Elbrus before retreating to Cheget Village


Day 2: First day on the mountain, acclimatization hike and overnight at Old Barrels (12,460 ft / 3,800 m)


This morning I took off right after breakfast and navigated my way up three separate chairlifts until I was on Elbrus proper. My first night I stayed at the Old Barrels, a hut that’s made itself infamous by outdated decor and less-than-first-world toilets.

Cable car ride up to the Barrel Huts


I’m here to shatter the rumors: I LOVED the Barrel Huts! The owner was the sweetest man who spoke a handful of English words – and who made sure I felt set up and at home. I ended up actually getting an entire hut to myself, whether from my early season arrival or a lack of popularity, I’m not sure. 

My hut slept six, much more comfortable than bunks

Here are the important details: The beds are wide, long, and seemed clean enough. There’s plenty of storage under each bed, along the walls, in cabinets, and in a mud room up front for shoes and gear. Each bed comes with a mattress, so don’t make my mistake of renting a sleeping pad. The kitchen is separated into two rooms with two sets of stoves, which (despite what I was told in the village) are absolutely open for guests to cook their own meals. Finally, and maybe most important, the toilets weren’t bad at all. Maybe Nepal numbed my sensitivity to this issue, but I was perfectly placated by the wooden room with a hole in the ground. It was absolutely, perfectly clean.

View from Old Barrel #3


Minutes after I pack away my things I meet a group with Adventure Peaks from the UK who eagerly invite me to join their afternoon acclimatization hike. We have tea and biscuits before setting off, their leader announcing to us that earlier in the morning a man had died on the mountain of a heart attack – heavy news to digest on our first night here.

Our hike goes smoothly and I feel strong and acclimatized, despite having only spent one day above 3,000 meters and no night yet at altitude. We hike upwards for two hours and take a break, where we watch the weather turn rapidly, and sprint back just in time to narrowly avoid a violent sleet storm. I’m laying on my sleeping bag in the hut when I hear the wind howling, and suddenly the entire building is rocking back and forth to the wild gale. A member from the UK team later tells me lightning actually struck one of the electric towers above our huts, causing a huge explosion. Then, two hours later, the clouds part to reveal a glowing sunset over the horizon. Things change quickly around here.

World’s most scenic toilets


Day 3: Acclimatization hike to Pastukhov Rocks (15,400 ft / 4,700 m), overnight at Pilgrim Tours huts (12,800 ft / 3900 m)


My Russian guide Brad had been living on the mountain for a while, shuffling clients up and down the summit, so he suggested not beginning our first day together until 10am. I spent my morning packing up from the Barrels and moving into Pilgrim Tours’ private huts, where I appreciated the nice upgrade and free meals.

Ascending our way up to Pastukhov Rocks

Brad tells me it’ll take us 3-4 hours to reach the bottom of the Pastukhov Rocks (13,700 ft / 4,200 m), a 500 meter long landmark of Elbrus’ south face. Instead, it only takes us 2.5 hours. Our goal was the bottom of the Rocks, but feeling good and accomplishing that early, we walk to the top before calling it a day.

Waving down at my bunkmates

Back at the Pilgrim Tours huts, I’m reunited with friends from South Africa and am placed in their last remaining bunk. Their group is on an expedition with Adventures Global, headed up by its founder Ronnie Muhl. I owe a huge thanks to these guys for their generous tips, encouragement, and all-around splendid company.
Day 4: Summit day up Elbrus’ West peak (18,510 ft / 5,642 m)


I wake up before 1am to the sounds of the 18-person Danish team finishing breakfast and gathering the rest of their gear. My “breakfast,” a nervous shoveling of food into my mouth and gear onto my body, ends just before 2am when Brad and I walk out to the main snowfield to meet the snowcat.

Our snowcat is carrying four other climbers and delivers all six of us to an (ever so slightly) even ground at 5,000 meters. We must have arrived by around 2:30am, where Brad and I dart ahead of the others to begin the climb. Brad breaks trail all morning long: we are the first people on the mountain.

Flickering lights from 1,200 meters below

The slope is steep at points, especially the traverse from the main snowfield to the saddle between both West and East peaks. The fresh snow has our feet slipping often; we place our weight – and trust – in ice axes pierced into the uphill slope. Far below, we can see the sparkling lights of the huts and chairlifts.

The Caucasus Range over the first rays of light


We take a break at the saddle where two young Norwegian guys catch up with us, and we all enjoy a few sips of liquids and a bites of food before heading up the steep summit slope – just two hours from our goal. 

Walking up from the saddle


The four of us slowly made our way up to the final summit mound, rejoicing in the early-morning solitude and the joy of having such a special spot to ourselves.

The slow slug up to the final summit

This is what it feels like to reach one of the Seven Summits!


The first person to sit atop the summit that morning!


On our descent we passed dozens of groups on their way up the mountain. All had chosen to follow the path that Brad had cut hours before. His new route had skirted around a typically-used slope laden with fixed ropes; so we didn’t even use our harnesses at all.

A beautiful kind of hard work

Looking back up at Brad’s new route


In the end, we arrived back at the huts by 9:30 in the morning – just 7 hours after we’d begun our walk in the early hours of the morning. The hellos, hugs, and second and third breakfasts all blended together before I made my way back to the village for a well deserved shower and assessment of sunburn damage. 

All in all it was a great trip and I owe a huge amount of my success to the perfect break in weather – teams just before and after our summit day weren’t so lucky. I’m so grateful to be able to walk away from Russia with another one of the world’s highest peaks reached, and one more of the Seven Summits checked off my list.

Trekking the Tour du Mont Blanc

Wine connoisseurs, cheese aficionados, and outdoor enthusiasts can unite over this breathtakingly beautiful hike high in the heart of the Alps. Completing a total circumnavigation of Western Europe’s tallest peak, Mont Blanc, this adventure will challenge you, awe you, and inspire you along one of the world’s most famous trails.

img_5510

Overview: 3 countries, 7 days, 110 miles, and 33,000 vertical feet.

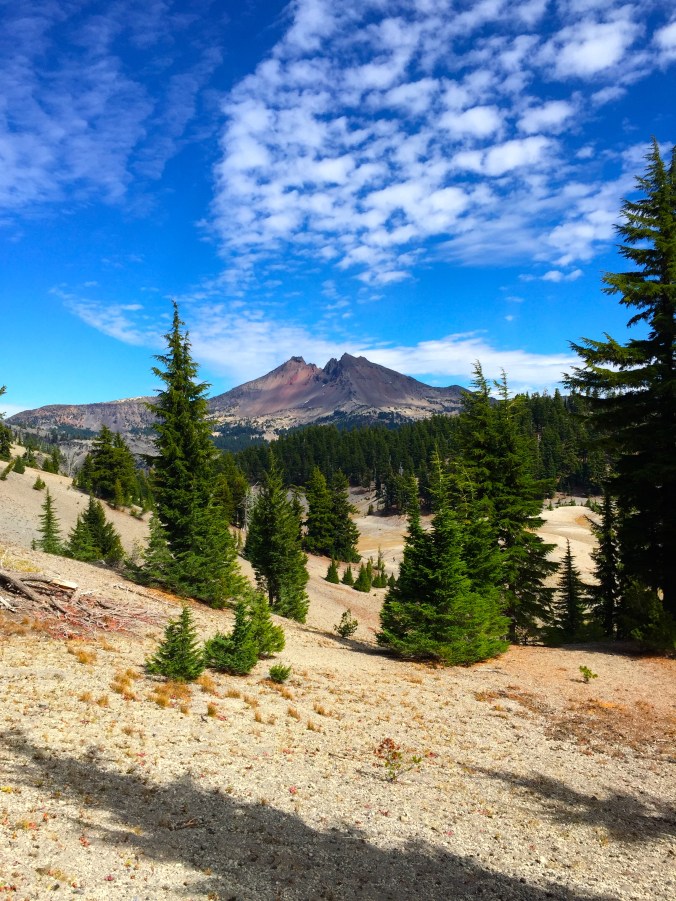
The Tour du Mont Blanc (TMB) is a trail that goes through France, Italy, and Switzerland, and which is walked, cycled, and run by thousands of people every year. The most popular time to hit the trail is between June and September, any time before or after that and you’ll run into worsening weather and snowy routes. There are navigational signs all along the entire trail, and in high season you should have plenty of company with other hikers, so there should be plenty of ways to help you stay on track (or trail).

People head both directions on the TMB, but Kathleen and I chose to go counterclockwise since the views are more promising and the difficult sections more short-lasting. Many people use companies that set up your TMB experience start to finish and save a whole lot of time, coordination, and sweat. Whether you use an agency or not, you’ll want to be sure to book your accommodations far ahead of time as they do fill up in the busy seasons quickly (we had to adjust our itinerary because five months out, certain hostels were already full).

img_5474

I would highly recommend picking up a copy of Trekking the Tour du Mont Blanc by Kev Reynolds for a completely comprehensive history and how-to of this adventure (distances, elevations, and times in this post are pulled from here).

A few important tips & tricks before you start planning your trip: 

  • There are plenty of places to stop for food and water along the TMB, so no need to pack much food or water weight.
  • Walking times on the trail signs are for people with a FAST pace.
  • Cable cars and public busses are sometimes available, but don’t rely on them. Many have limited hours + stops.
  • Carry plenty of cash, both Euros and Swiss Francs, at all times.
  • Auberges (hostels) expect you to bring your own towel, and sometimes a sleeping sheet or sleeping bag.
  • Dinners and breakfasts are included in your stay and are often large cafeteria/summer camp style; meaning you can typically serve yourself as much as you’d like. Beer, wine, and coffee is ALWAYS available for purchase.
  • You can actually get your overnight bags delivered to your next accommodation each night, so you only have to carry a light daypack with water (for relatively cheap).
  • Do not expect to have access to wifi along the TMB.
  • Do not expect to have access to laundry facilities along the TMB – Get used to shower/sink washing your clothes.
  • Almost everybody speaks English.

This is a super popular trail for young backpackers, honeymooners, and seniors 60 & up. There are solo hikers and groups of 12+ people, of every experience level. Whether you spend 7 days or 12 days on the trail, there should be nothing daunting about this trek as long as you pick an itinerary that you’re comfortable with.

img_5352

Day 1: Les Houches to Les Contamines

Distance: 16 km

Height gain: 646m

Height loss: 633m

Time: 5-5.5 hours

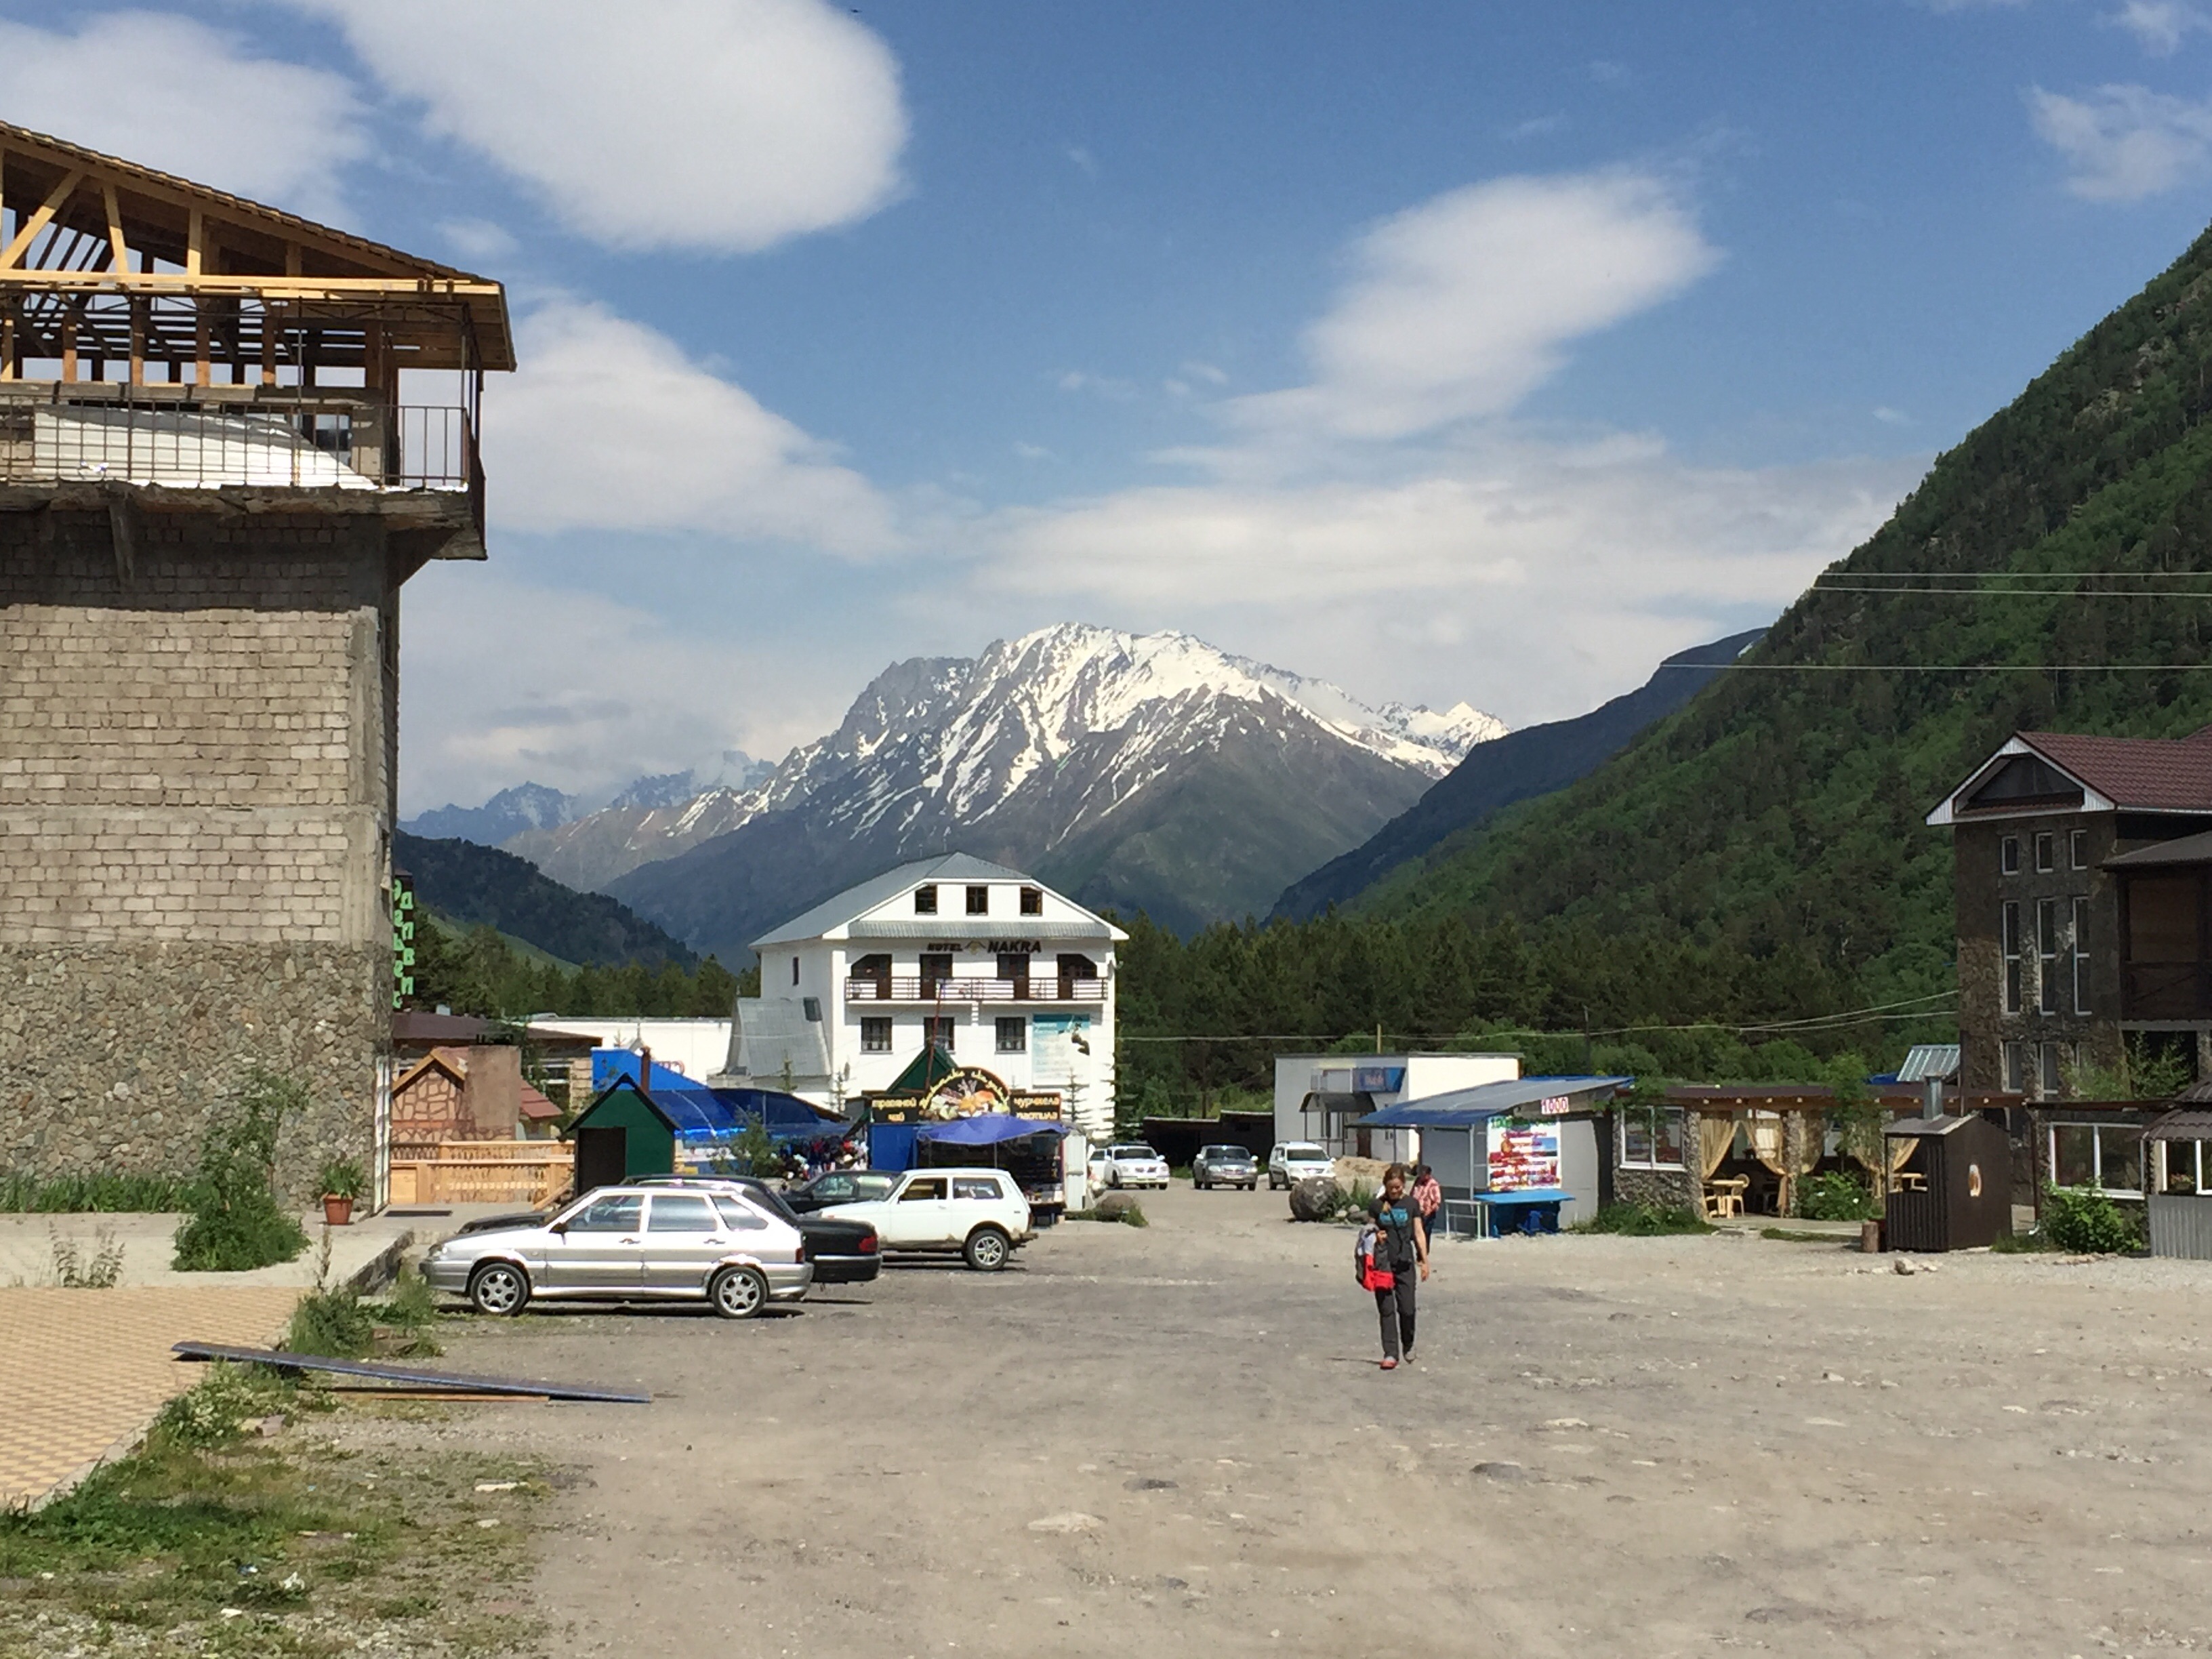
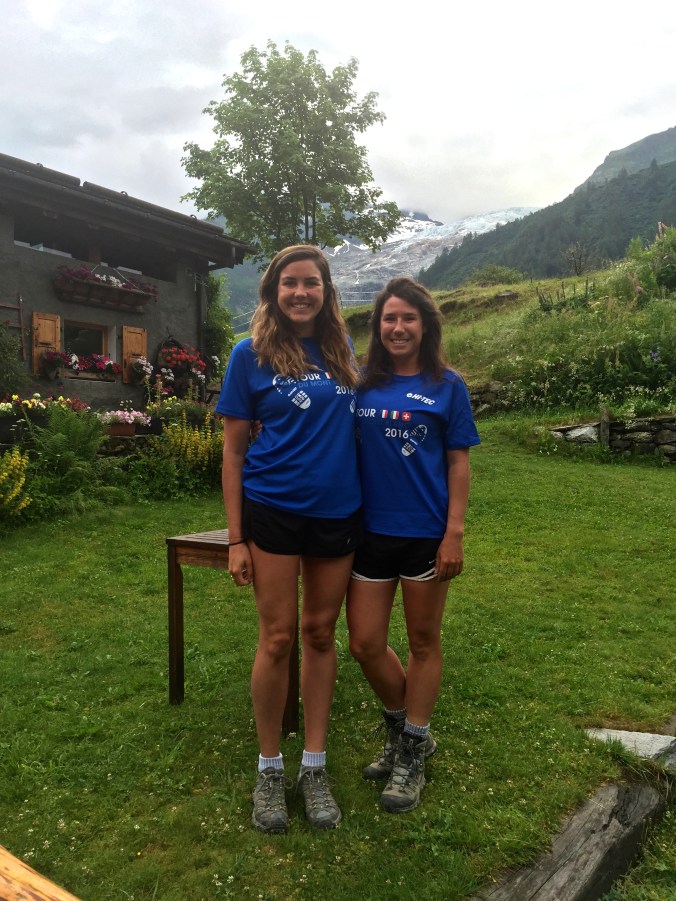
Les Houches or Chamonix-Mont-Blanc are the two main starting off points for the Tour du Mont Blanc, depending on which direction you’re going. Both are large towns with Tourism Centres, laundry facilities, gear shops, and limitless restaurant and lodging options. We loaded our backpacks up with the bare essentials (see packing list below) and left our larger travel bags here, to be delivered to us at the end of the trek in Chamonix.

This first leg of the journey will include more road walking than any other part of this trek. Also unlike a few of the other stages, today you’ll be walking through a number of towns and have plenty of opportunities to fuel up or fill up your water bottles.


Today is a good warm up to kick your legs into hiking mode. There is an alternative stage on this first day that will nearly double your elevation gain, in case you’re feeling extra strong. If you start early, you should arrive in Les Contamines with plenty of time to enjoy lunch, shower, and explore the town while still in sunlight.

img_5404

Day 2: Les Contamines to Refuge les Mottets

Distance: 20km

Height gain: 1579m

Height loss: 876m

Time: 7.5-8 hours

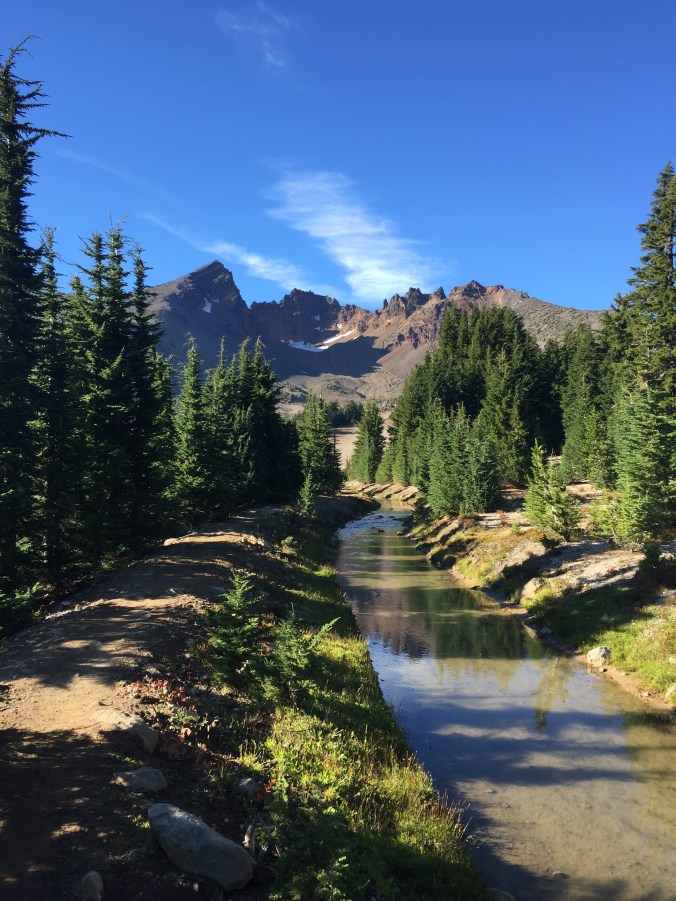
This second day of the entire trek may have been one of our most challenging, and most rewarding. Beginning at sunrise, we followed the Val Montjoie through a lush green forest, past rolling dairy plains, and up a snow-covered path to the top of Col du Bonhomme. All along the way, we’d stop to look at the valley stretching out below us and admire the views, and our progress.


The top of Col du Bonhomme was decked in snow and required some careful side-stepping into the steepest bit. It was here that we noticed other hikers’ reconsideration of their footwear, or lack of other gear like trekking poles.

From the top of the Col, we had two options – a shortcut to the west that would land us right at our accommodation for the night, or the safer traditional route that would take us down to Les Chapieux. We cut off a couple hours of flat, tiresome walking by ascending up to 2,665m to the Col des Fours.

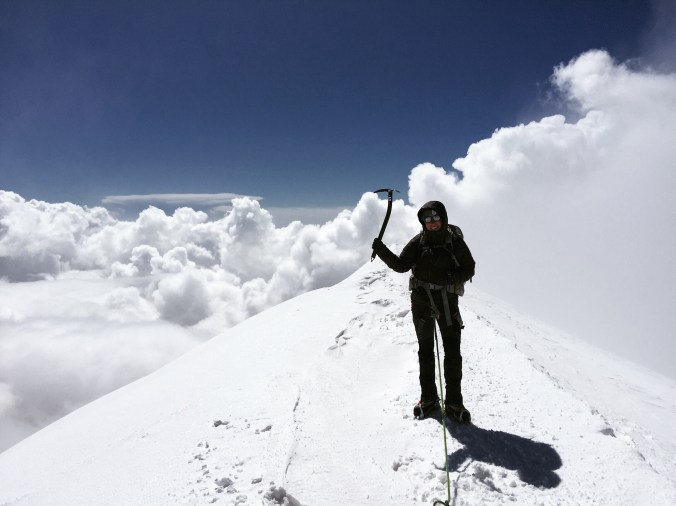
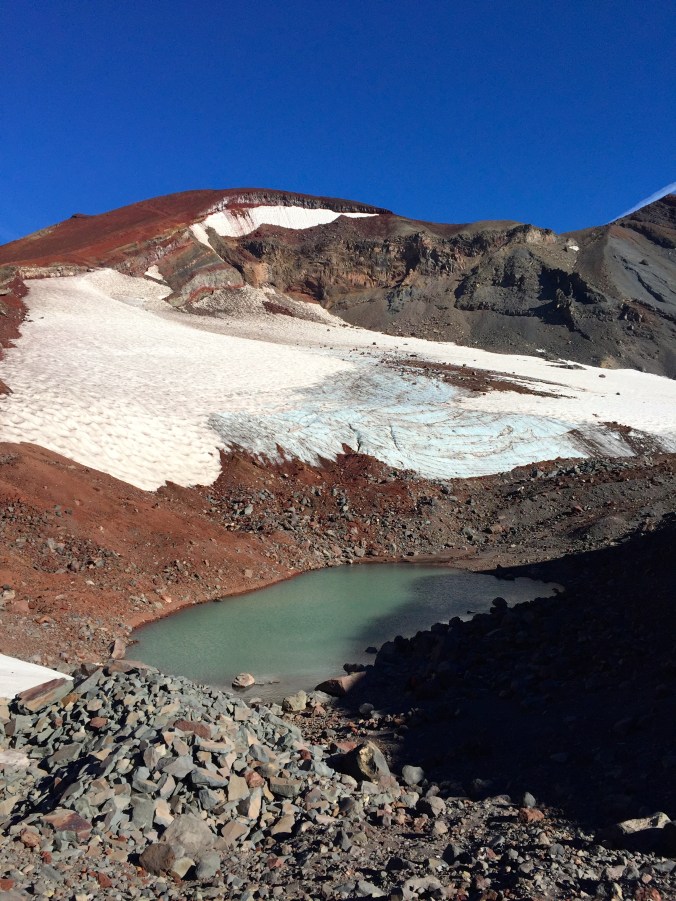
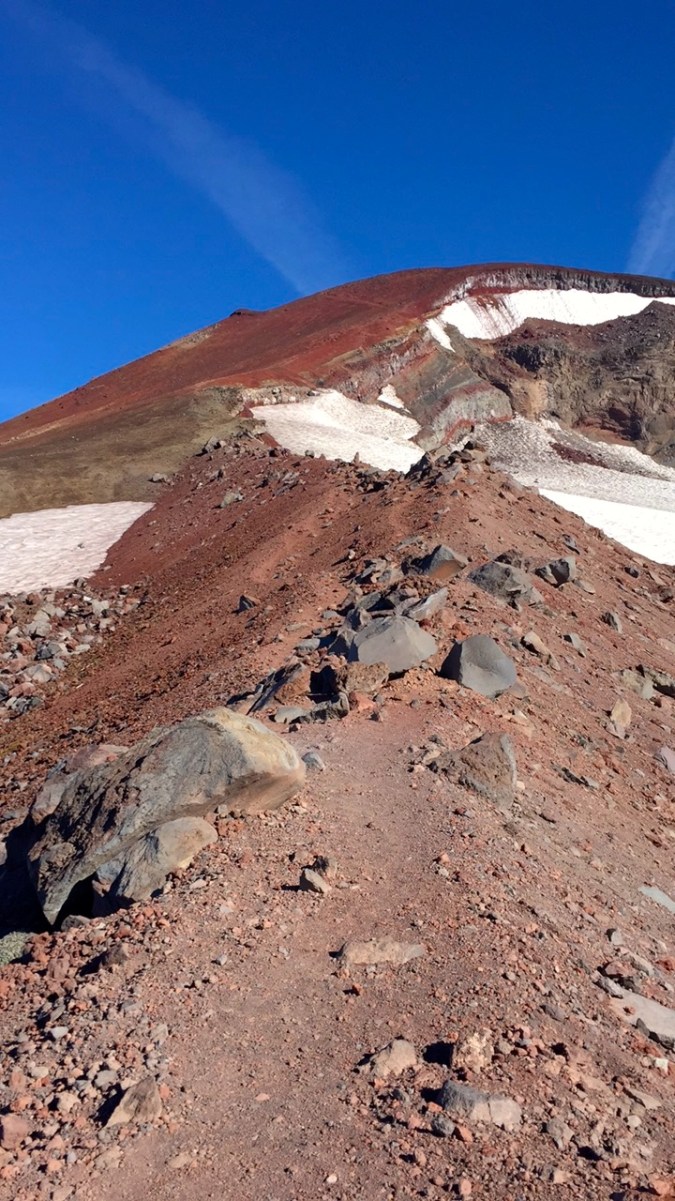
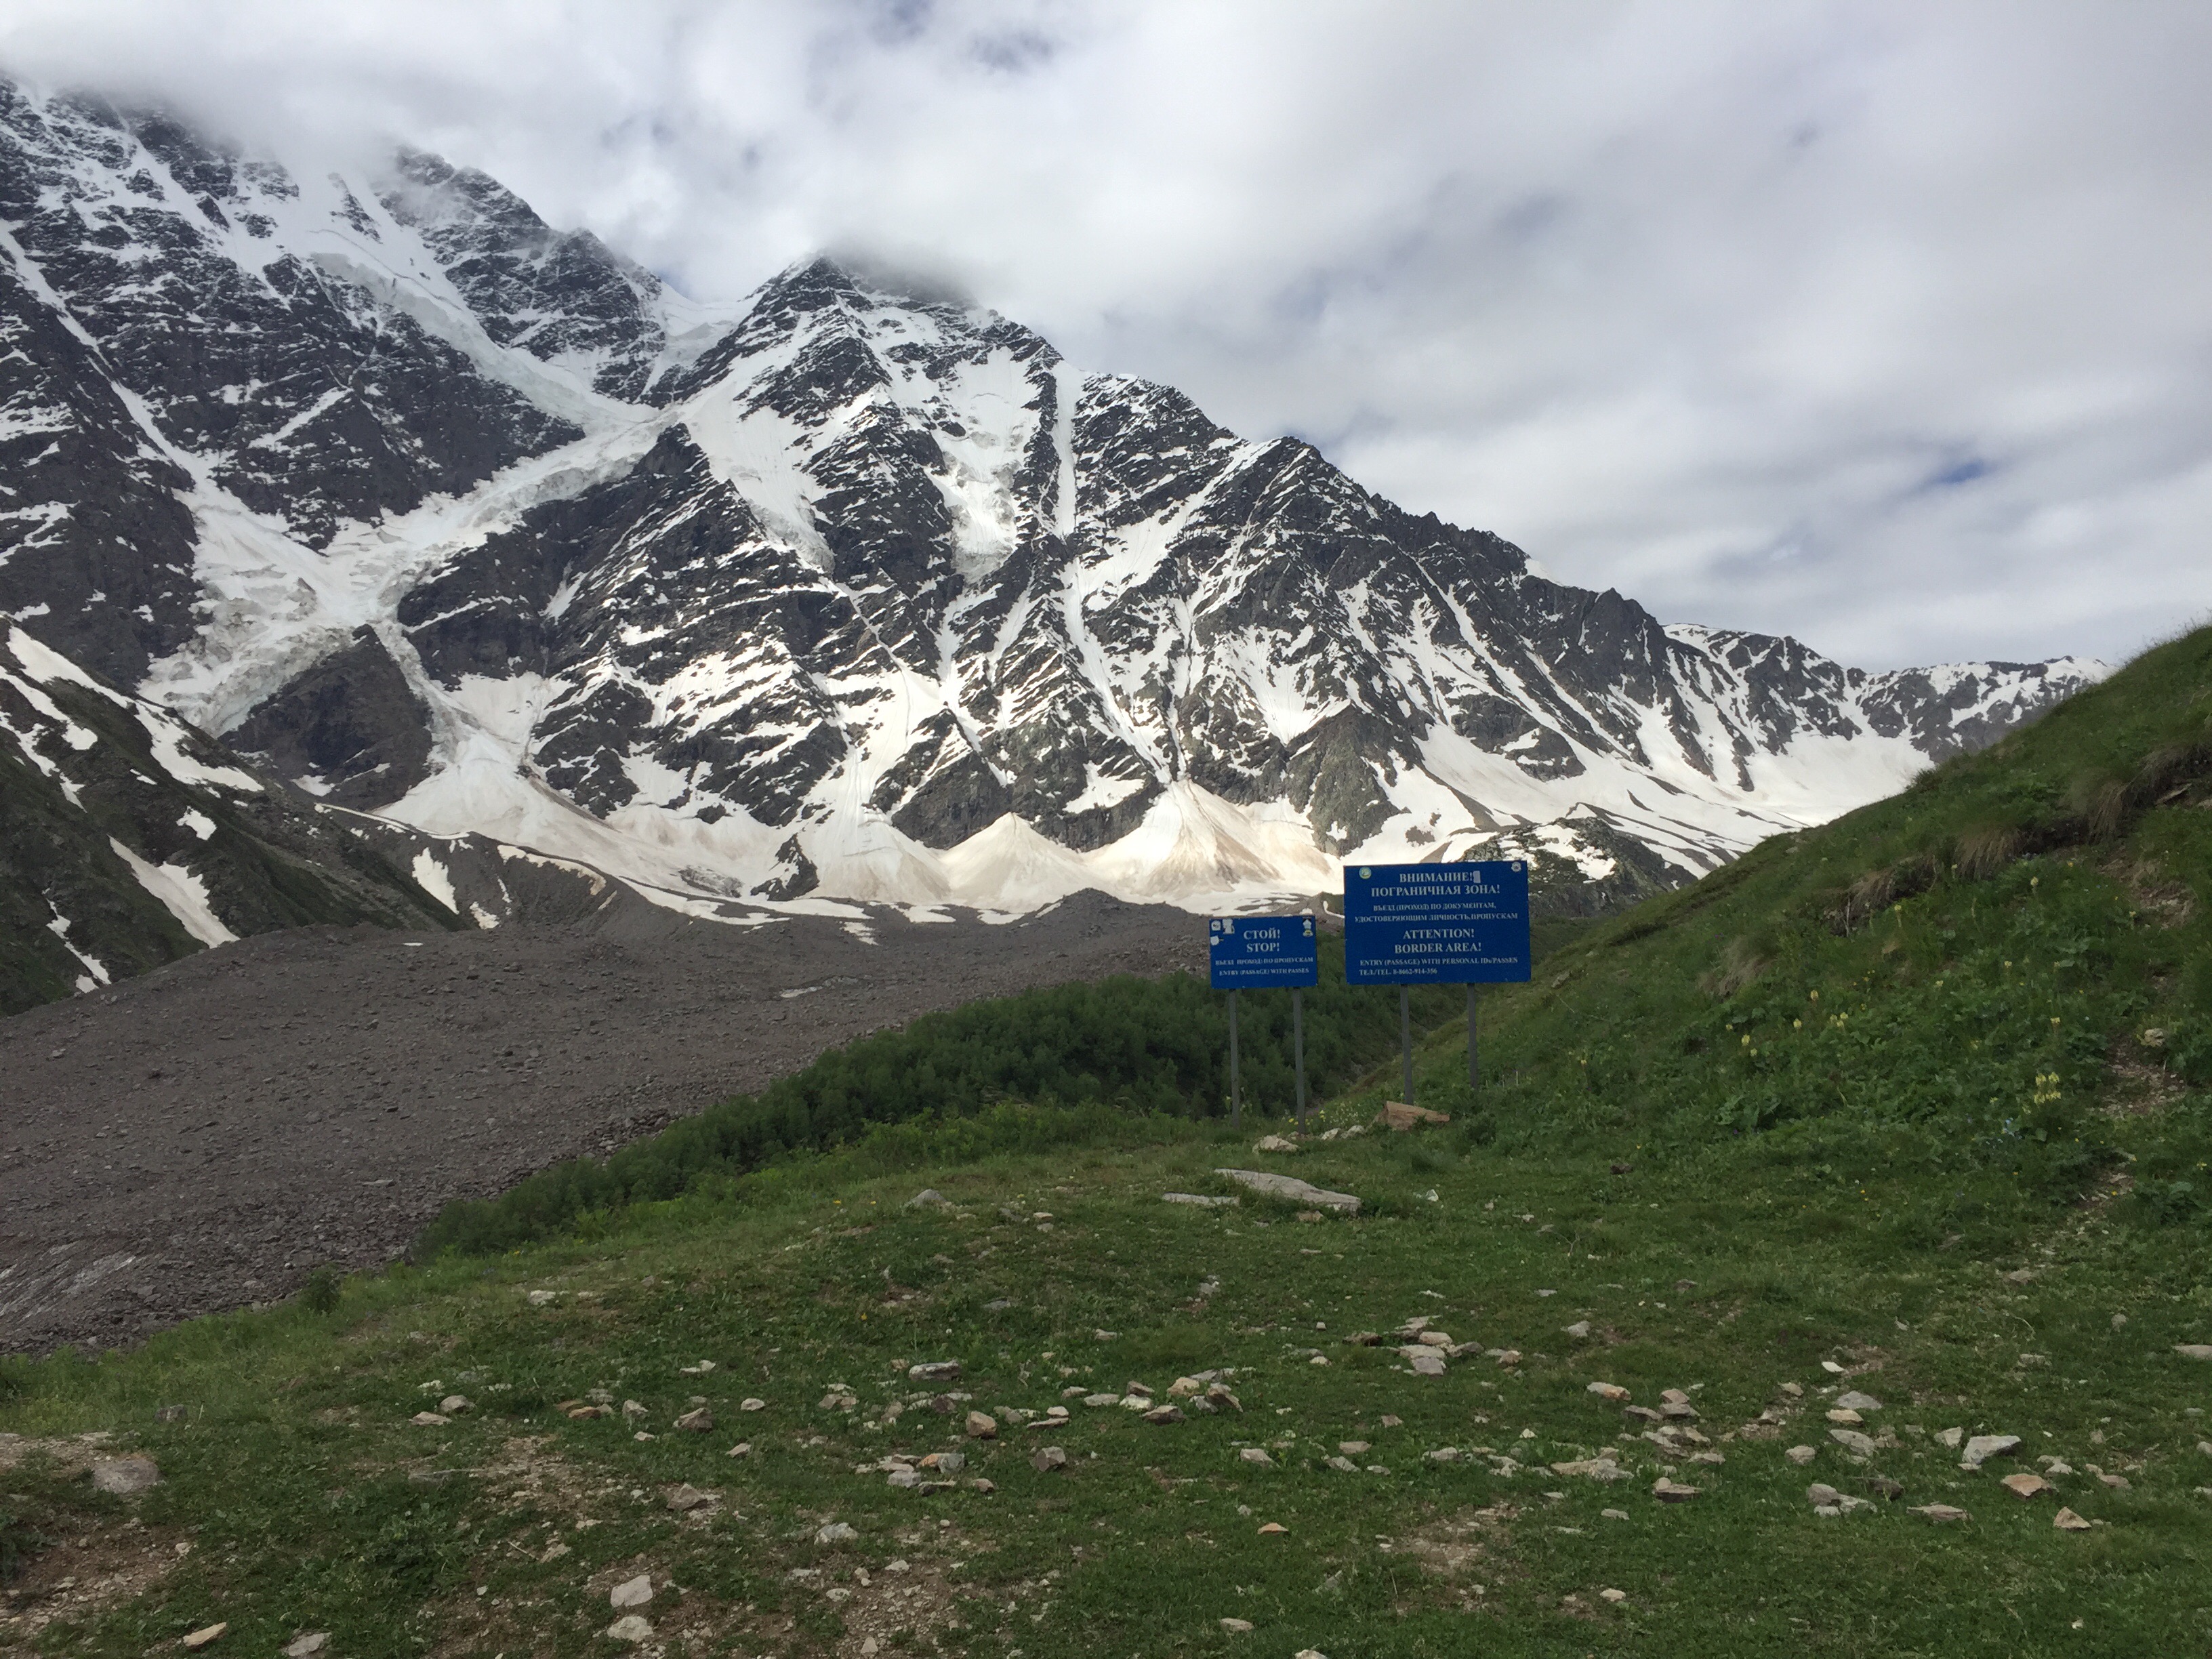
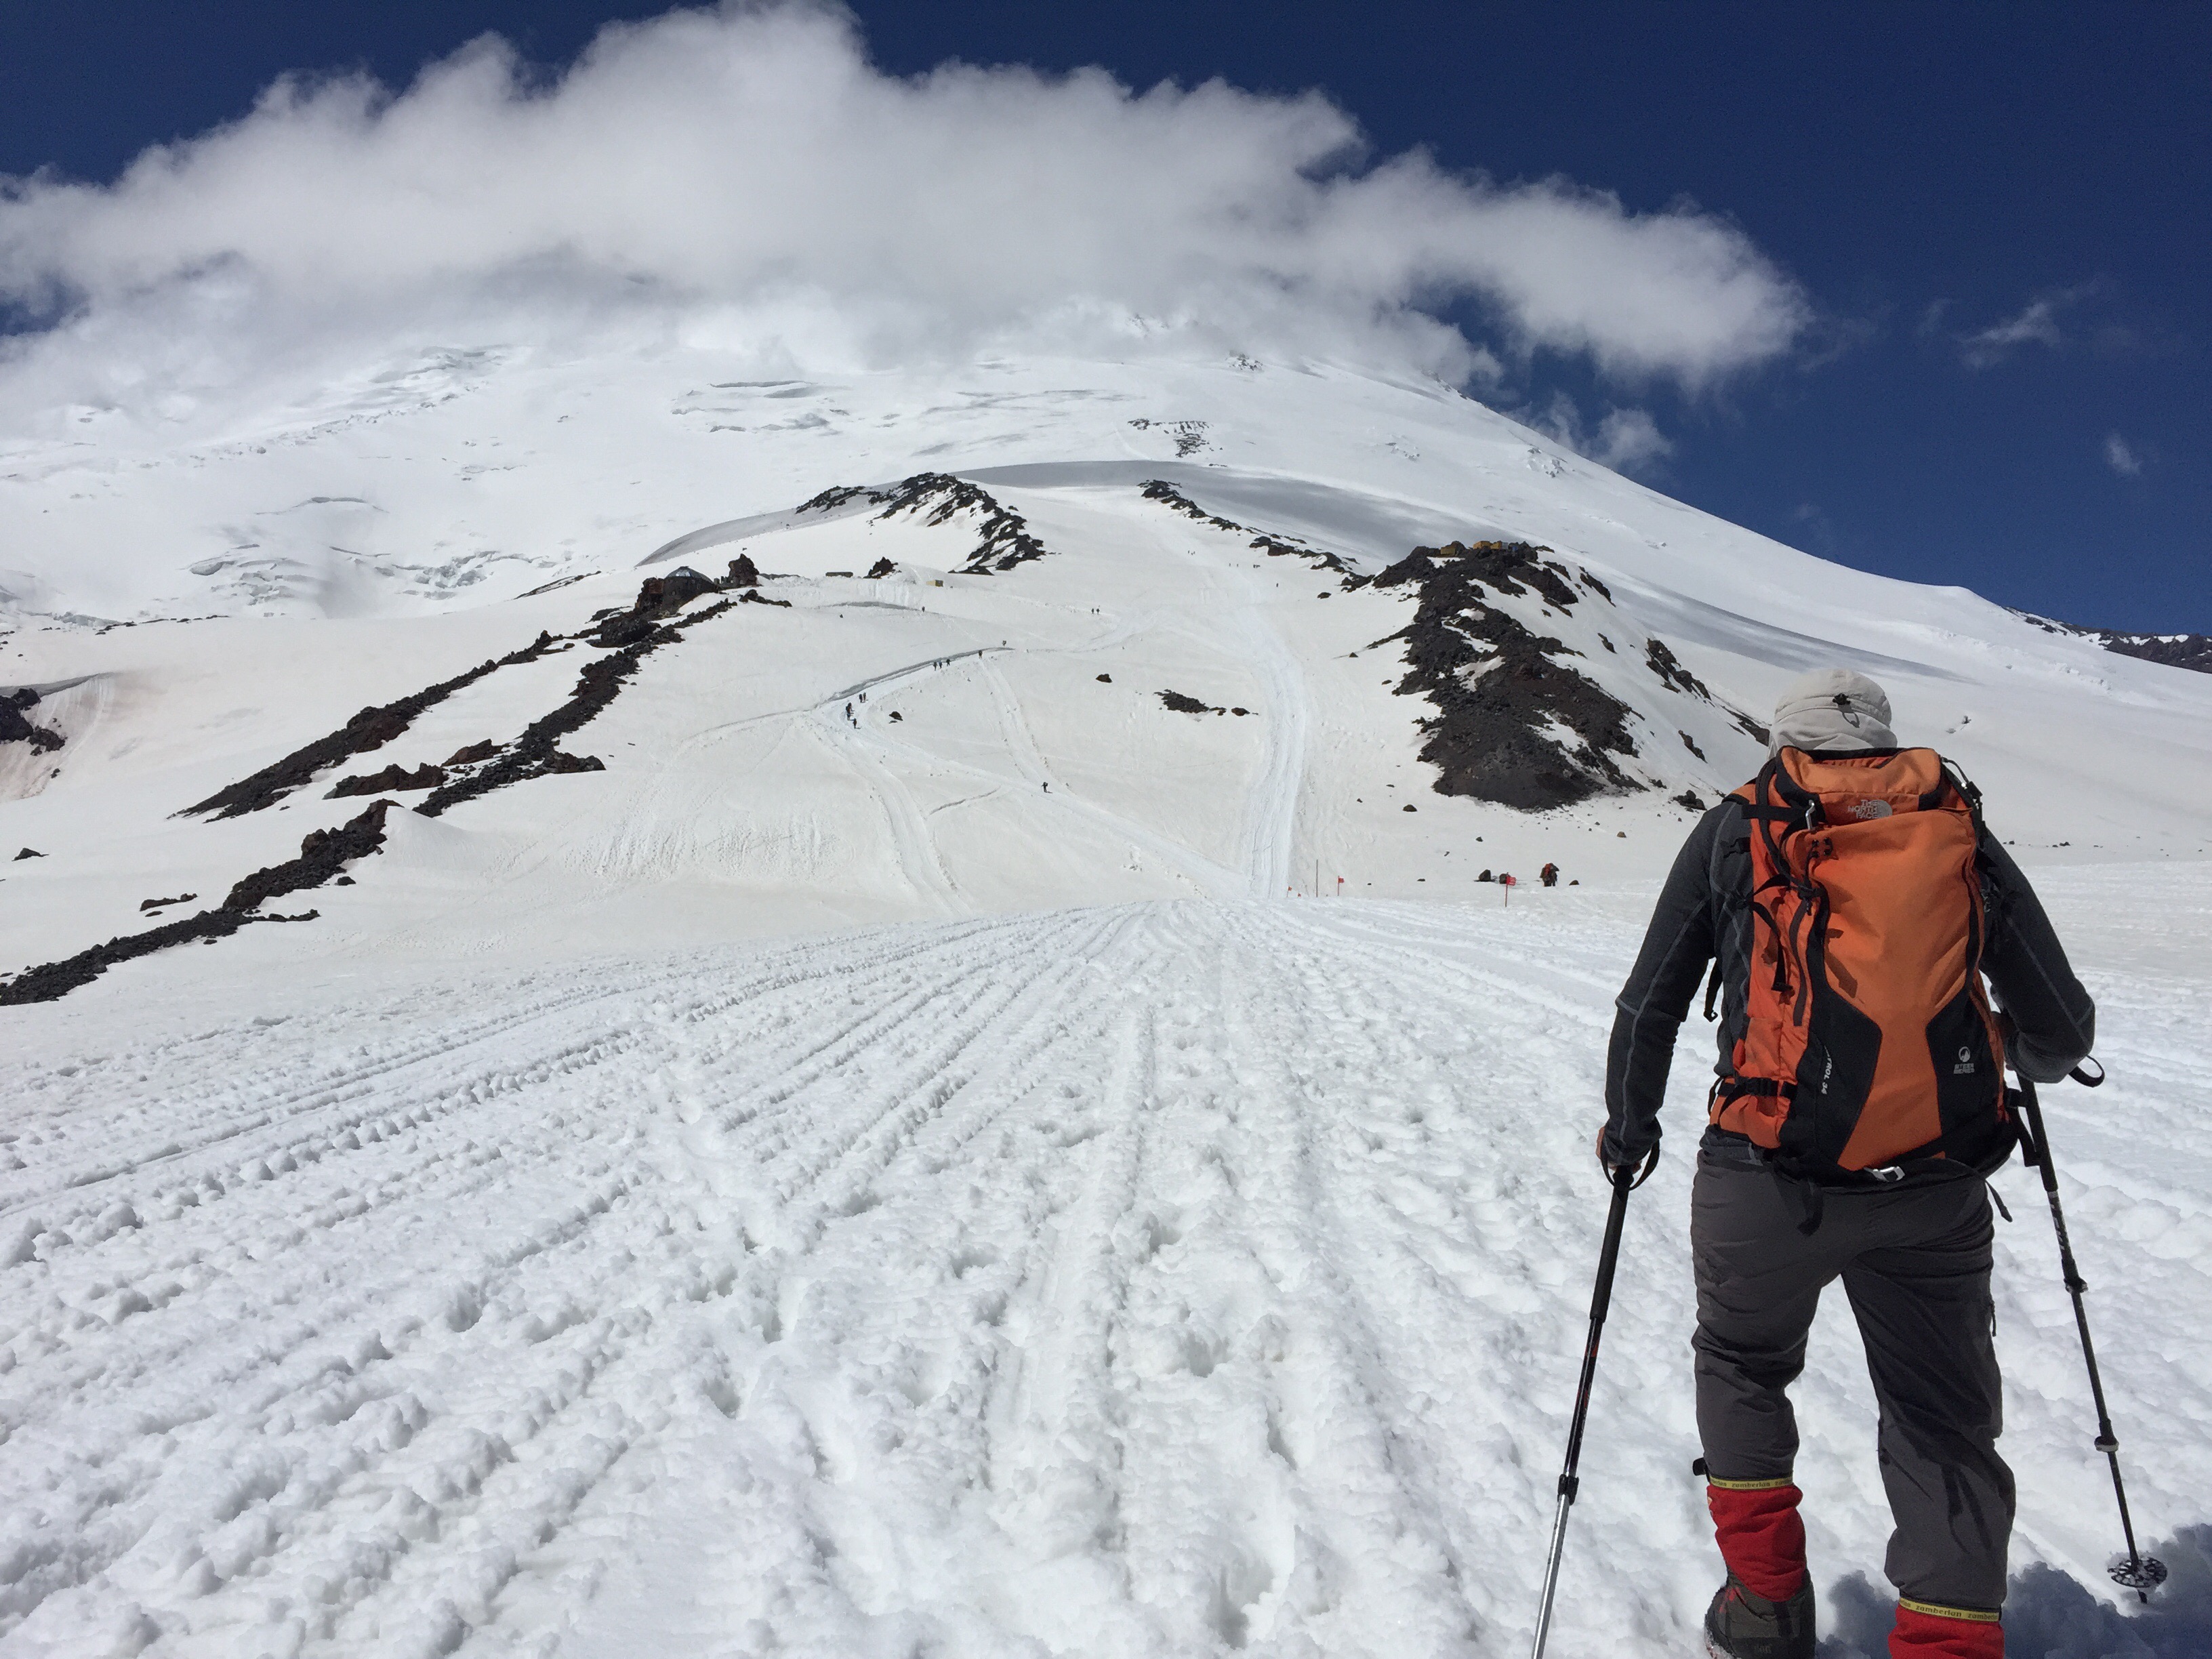
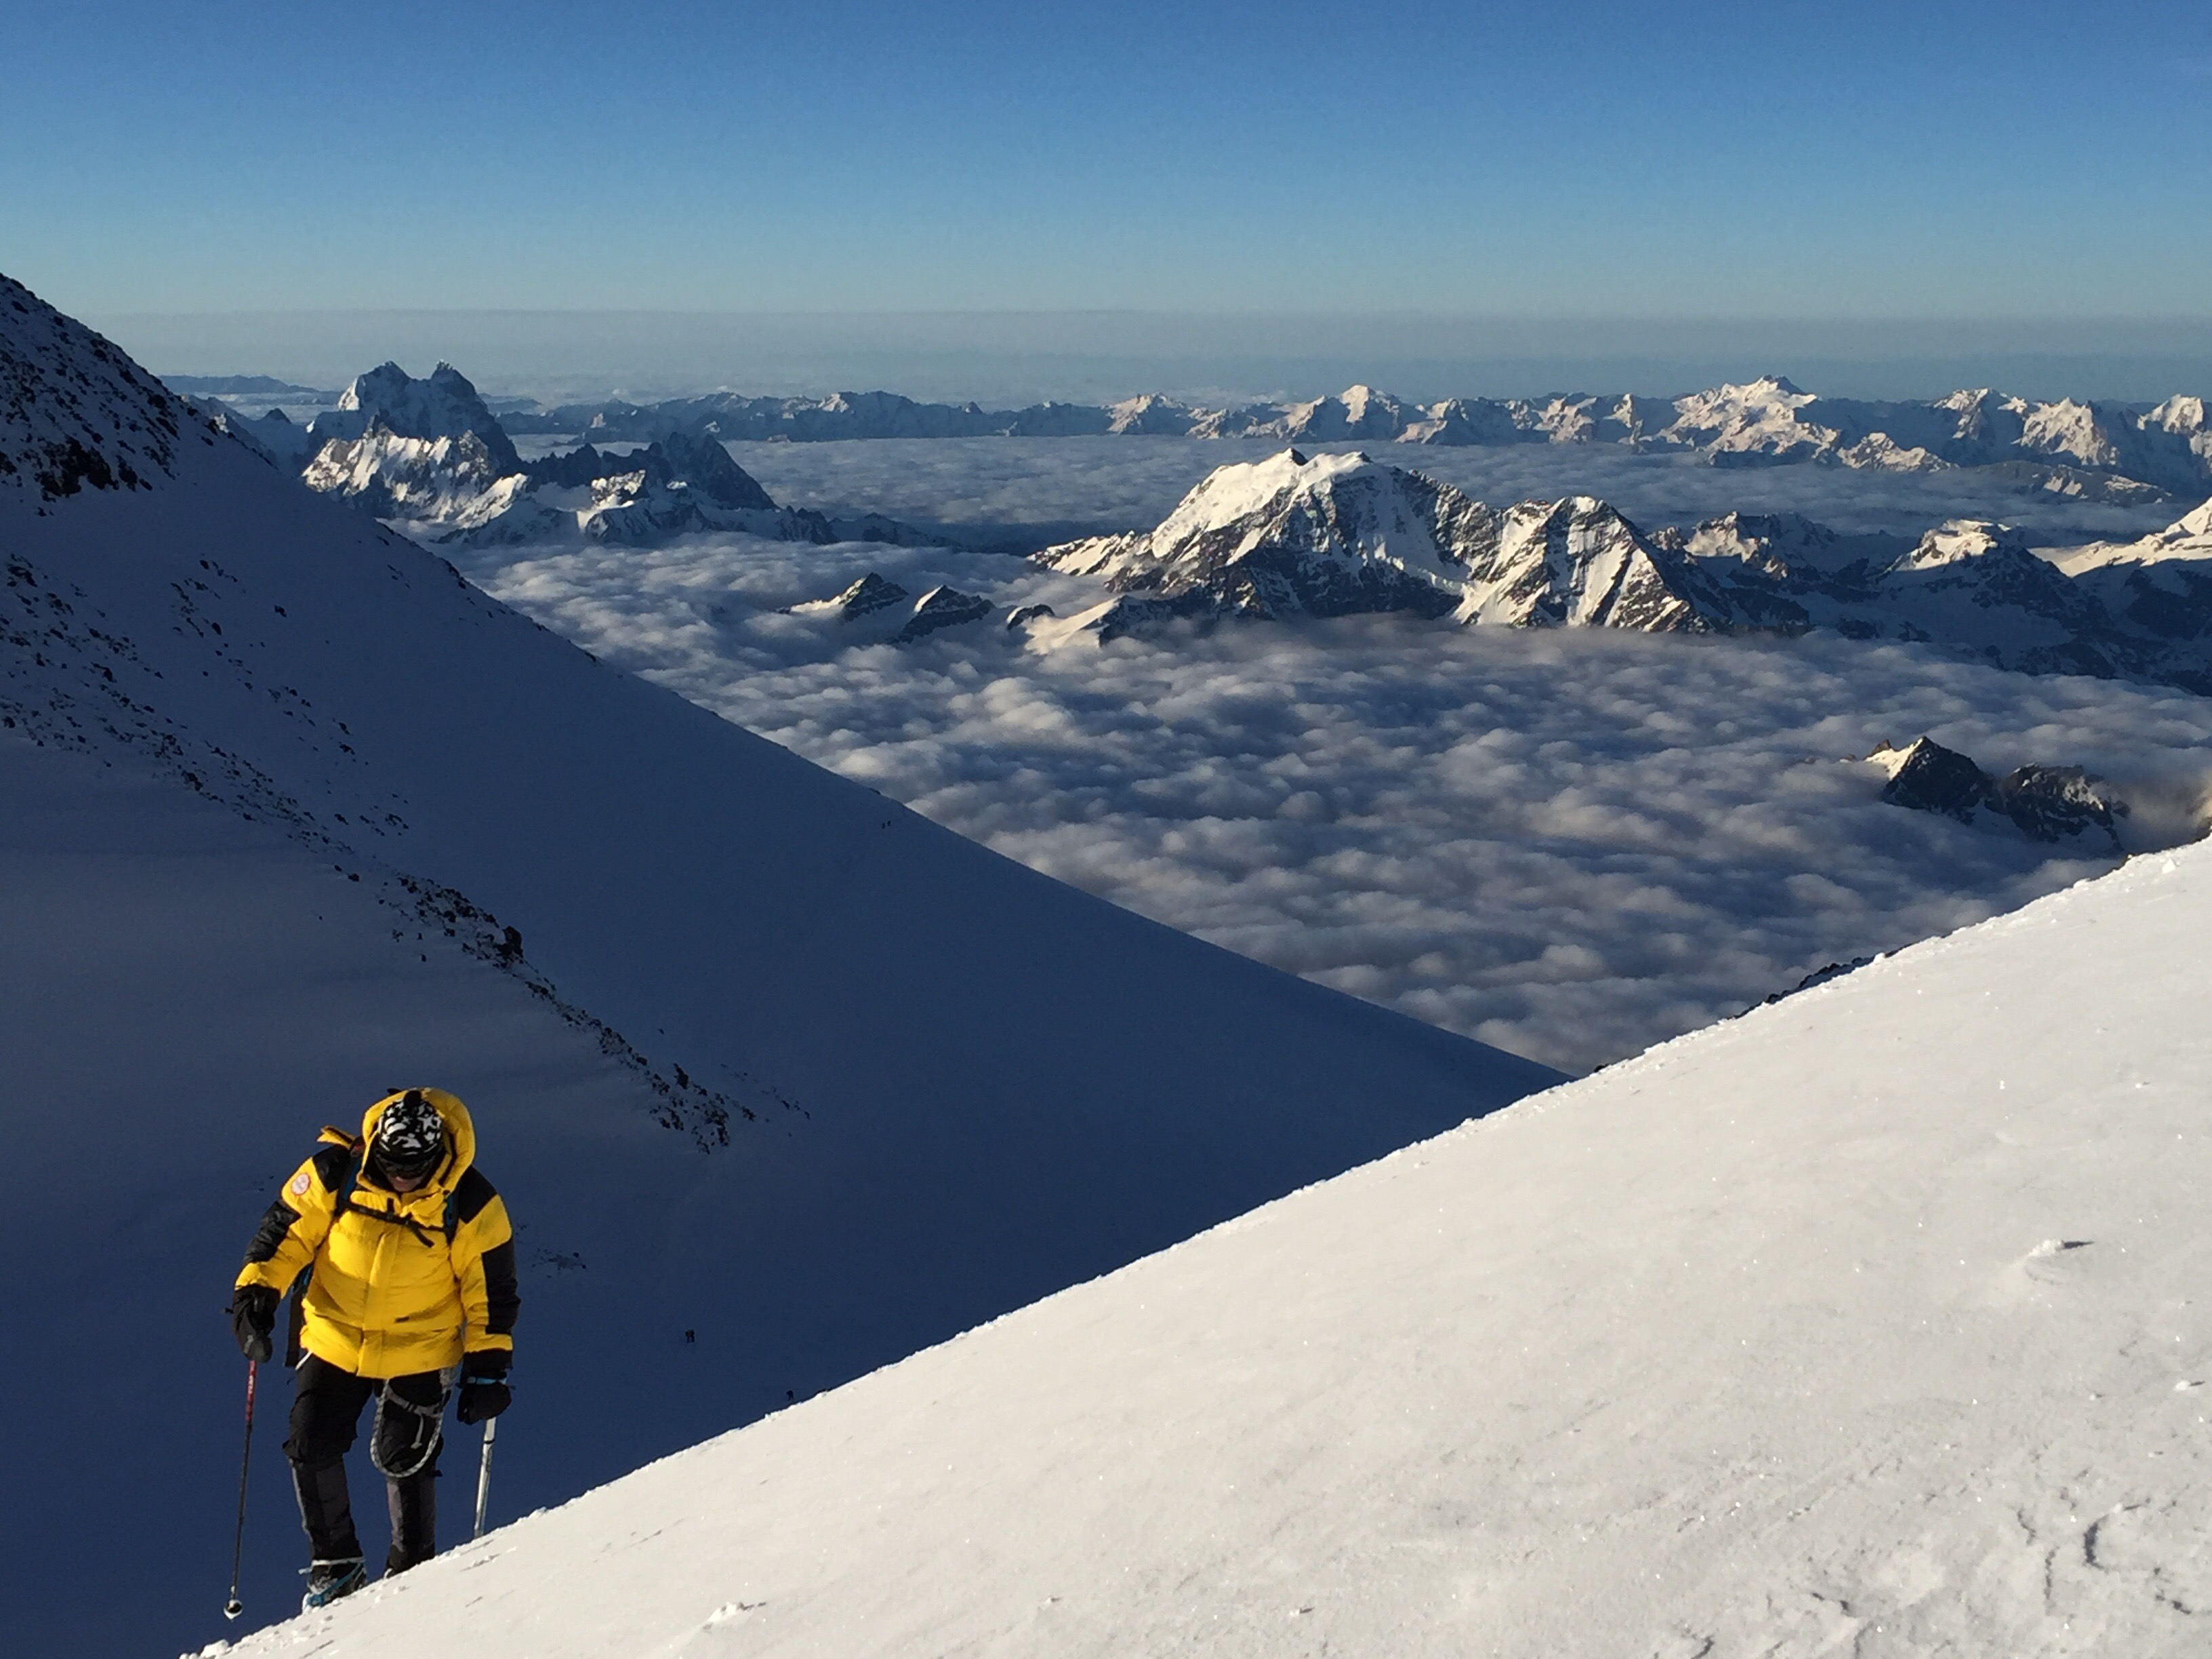
We were here in mid-July, not considered early season at all. However, our crossing over Col des Fours was completely snow-covered and made for a painstakingly slow and careful descent down into the Ville des Glaciers (an hour upvalley from Les Chapieux). Crampons would definitely have been necessary just one month before.

img_5424

One of our most important lessons was learned this day. Both of us put plenty of sunscreen on our faces, but by the time we arrived at Refuge les Mottets, we realized the rest of our bodies were horribly, unbearably burnt. We’d spend the next few nights unable to sleep, every movement of our limbs causing intense and immediate pain. Learn from our mistakes: When traveling on snow, always layer up with clothes and sunscreen.

Both of us loved Refuge les Mottets with its dormitory-style rooms and summer-camp-style cafeteria, which made it easy to meet and chat with other hikers. Before dinner we got to enjoy a pretty spectacular sunset sitting at the top of the valley accompanied by a few ice-cold local beers. And at dinner, food was served in large troughs and passed down the table – plenty for seconds, thirds, as much as you could fill your stomach.

img_5480


Day 3: Refuge les Mottets to Courmayeur

Distance: 28km

Height gain: 1460m

Height loss: 1820m

Time: 8-10.5 hours

We woke up to a beautifully clear, crisp morning at Refuge les Mottets. This auberge was converted from a dairy farm and retains all of its unique and original charm. Tucked away into the green hills beneath Mont Blanc, the building caters exclusively to trekkers, while the farm still produces some of the best and widely-sold cheese in the French Alps. Most of us enjoyed this renowned cheese for dinner, breakfast, and snuck a couple extra slices for the hike ahead.

img_5458

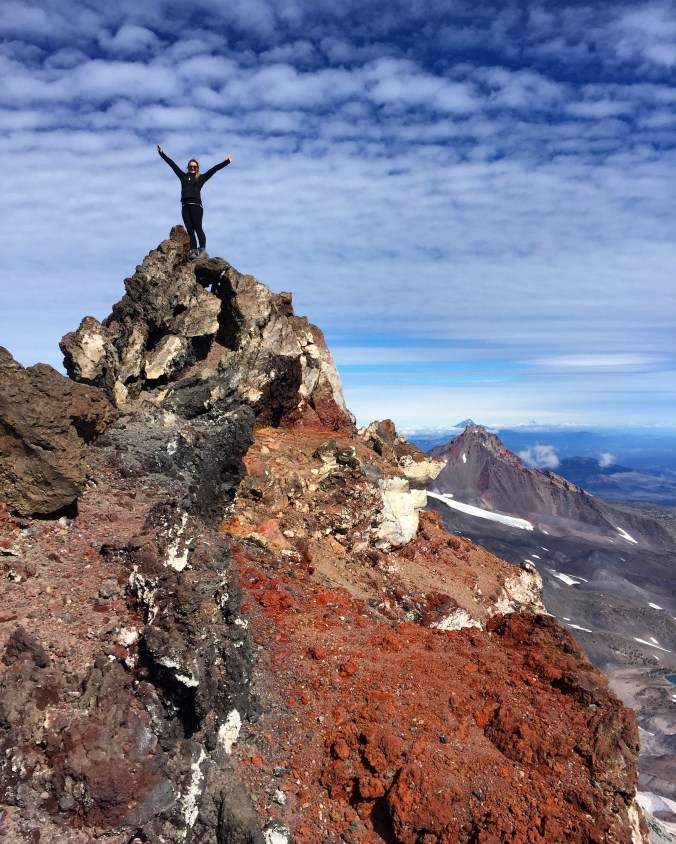
We were on the trail early this morning, coming up on the Col de la Seigne, our crossing from France into Italy. It was a cold, windy morning when we watched the clouds open up before us and we could peer into Vallon de la Lee Blanche and admire the mountains skyrocketing around us. It was a truly stunning landscape.

This third day was long, undulating, and just short of brutal. We were blessed with gorgeous views and weather at every point of the hike, but the trail seemed to stretch on forever. We learned later that many people take a public bus halfway through the day at La Visaille to Courmayeur.

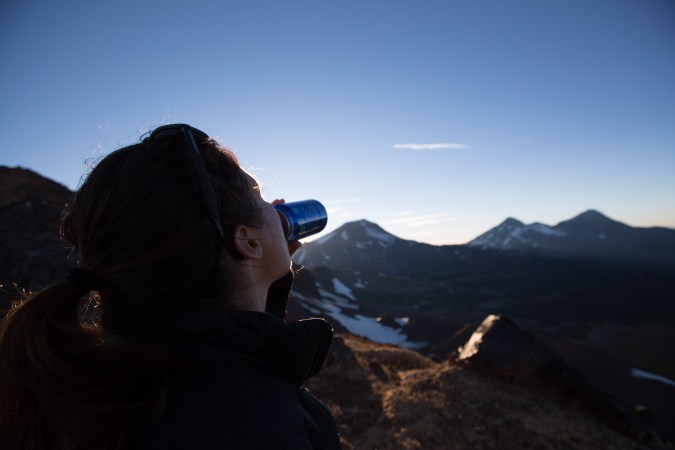
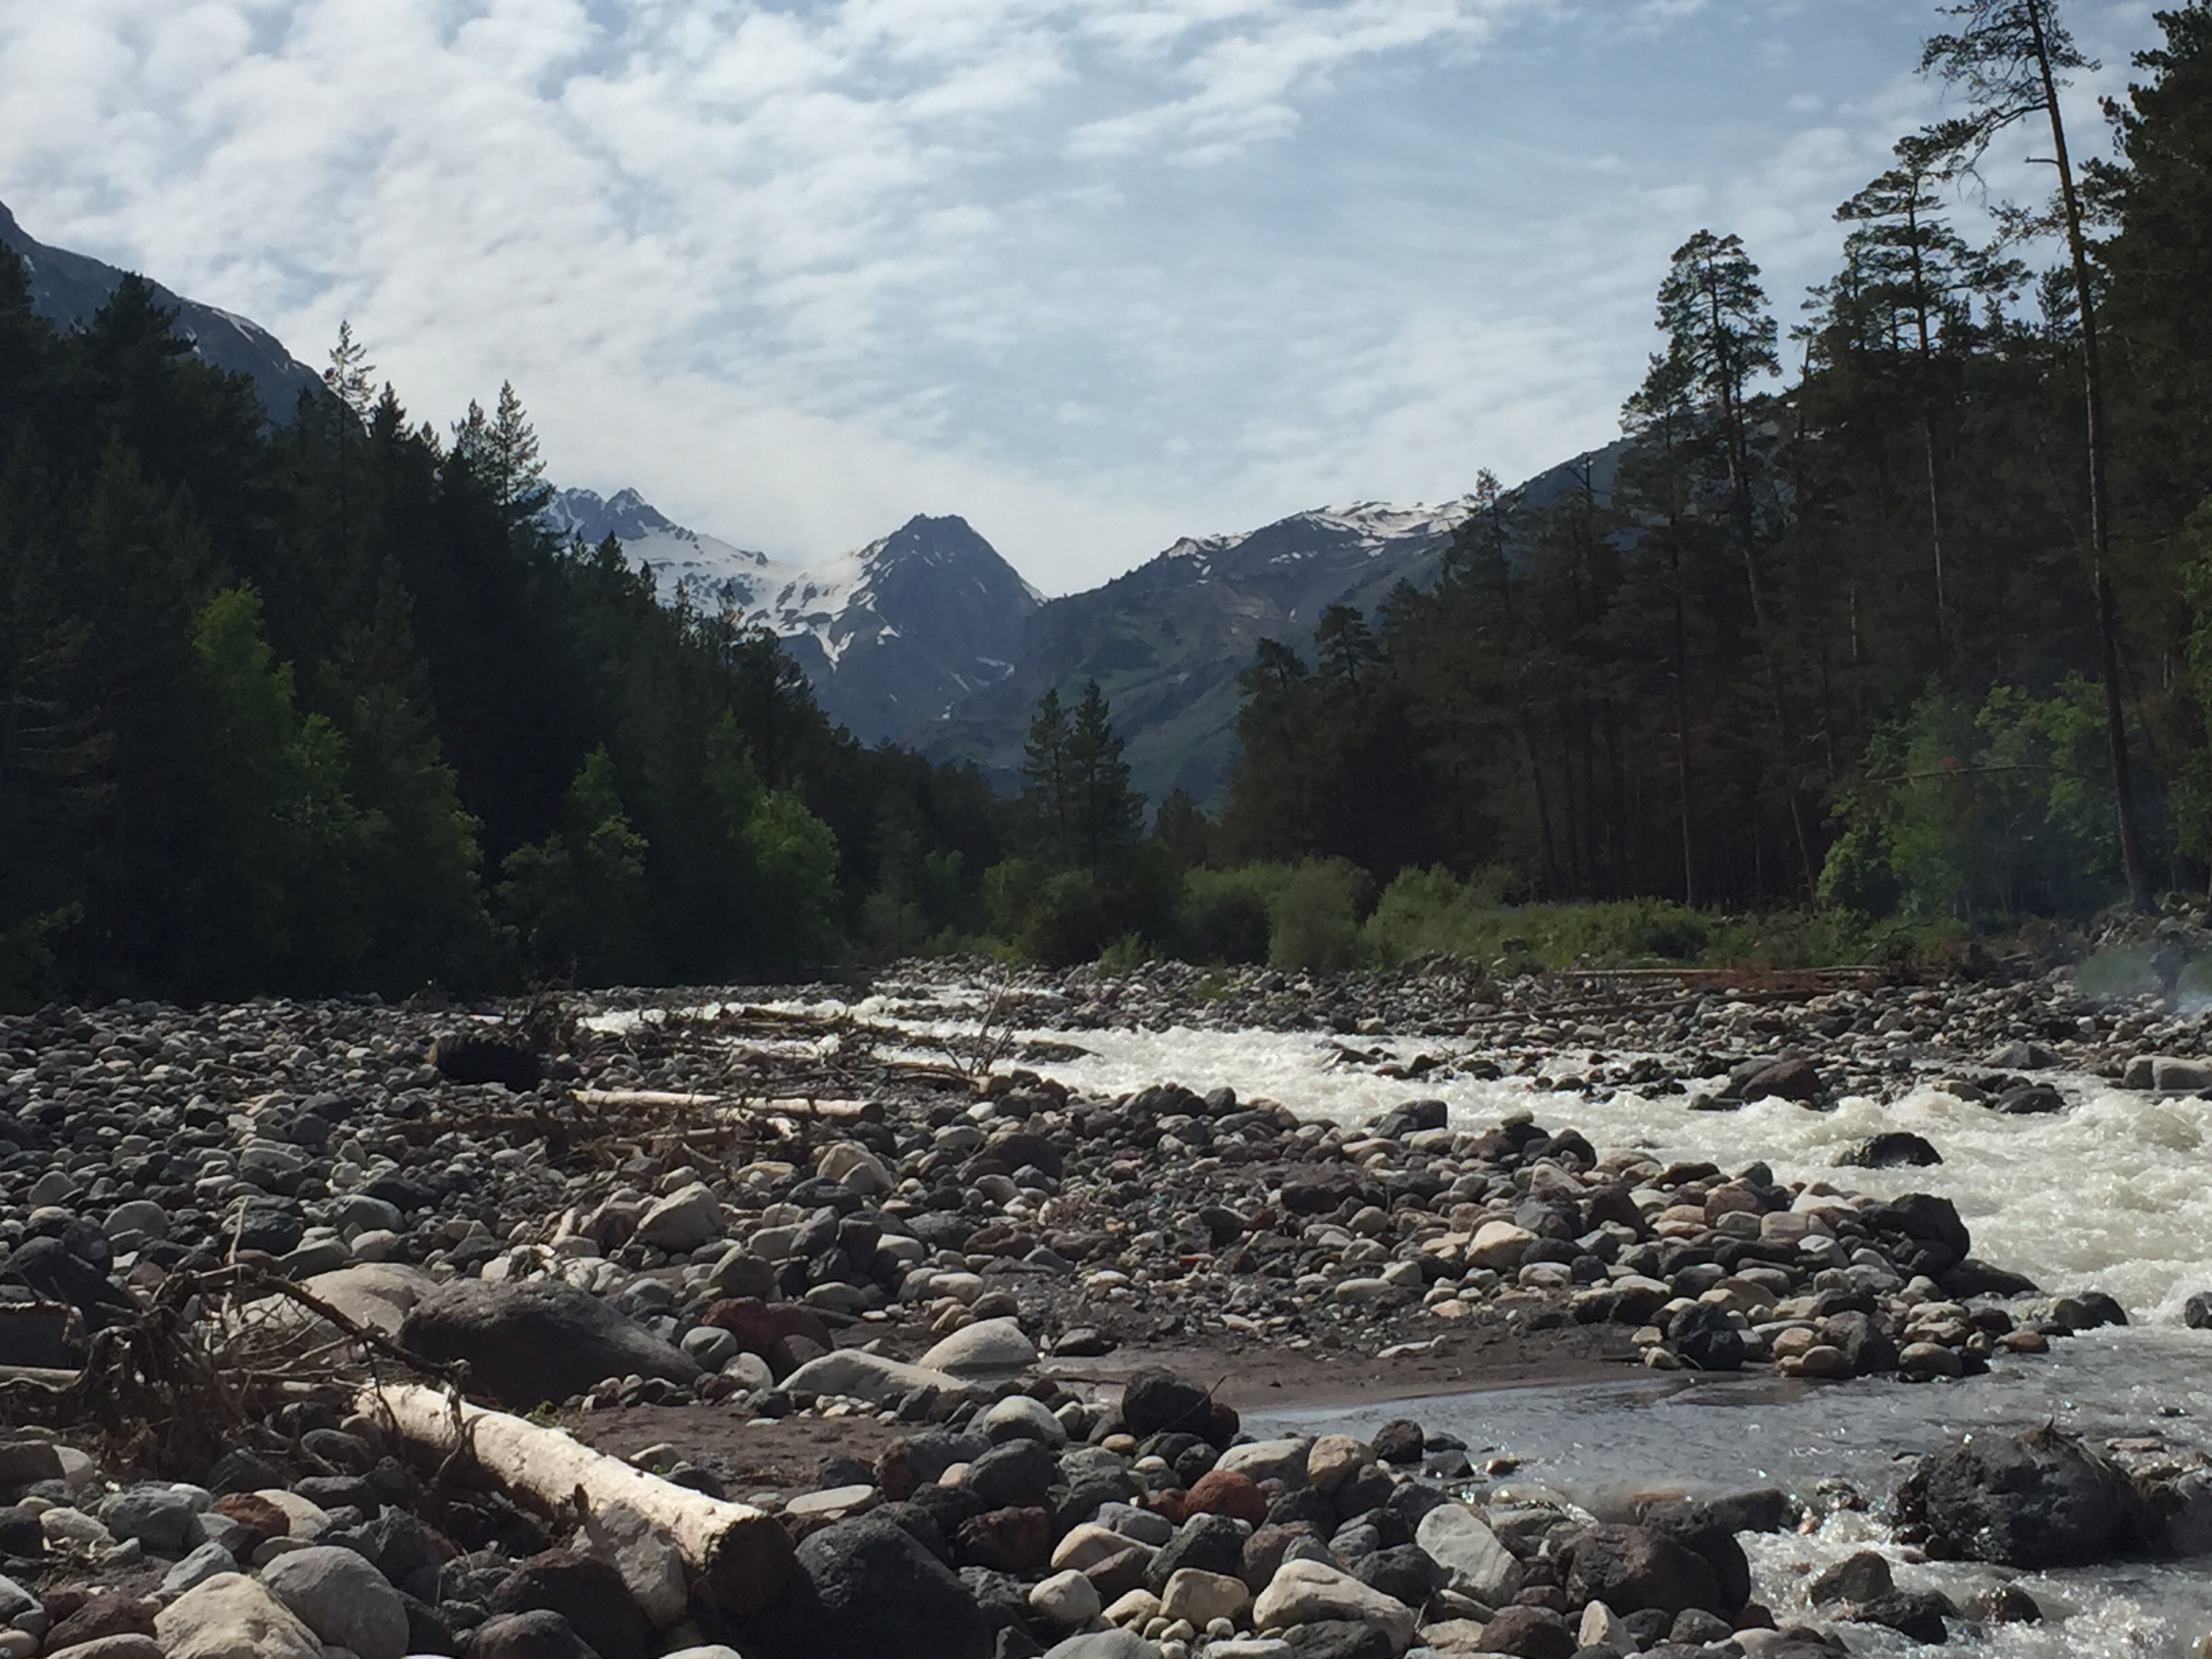
However, this was one of our favorite stretches of the entire trail. We passed a group of ultra runners and boulder-hopped over stream crossings. We drank water straight from the glacier, some of the purest and cleanest water we’d ever tasted. We walked forever along rolling, endless fields of green with mountains jutting up on either side of us. We were lost in our thoughts and absorbed in this beauty.

This third day is one of my favorite stories of our entire trip. We arrive exhausted at Col Checrouit in the late afternoon, another high pass that featured an adorable refuge and restaurant. There is a 3,000 ft. descent ahead of us to reach the Courmayeur valley, but, we see a cable car on top of the col that seemingly takes us all the way down to the valley. So, having had an already exhausting day, Kathleen and I enthusiastically order a liter of wine and salad to split. With happy (but not nearly so full) stomachs we stumble to the cable car to discover it’s closed. No options left but to spend another two hours descending a brutally steep trail while we weave and slur our way to one of our favorite towns yet.

Courmayeur is a classic Italian town perched between towering mountain massifs that stand out from every street corner. We enjoyed authentic Italian pizza, pasta, and gelato, of course accompanied by wine and cheese. Even though we had arrived to town rather late after our cable-car mishap, we stayed out and walked around until almost 10pm to relish in the perfect summer weather. For future TMBers, we would definitely insist on spending a rest day in Courmayeur.

img_5523

Day 4: Courmayeur to Champex (Champex D’en Haut)

Distance: 47km

Height gain: 2175m

Height loss: 2075m

Time: 14.5-16.6 hours

This was the stage that Kathleen and I realized that many people on a shorter trekking schedule will utilize the bus systems to cover as much ground in a day as possible, while cutting off monotonous or unnecessary stretches of the route. Reynolds’ book is broken up into stages, and our Day #4 consisted of three different days work of trekking. So on this morning, we took our first bus ride from Courmayeur to Chalet Val Ferret.

nuhn9960

Turns out, we only spend one night in Italy. From Chalet Val Ferret, we took a switchbacking trail through a richly green meadow, just across the valley from a series of glowing glaciers from Mont Dolent. The trail moves steeply upwards until we reached Grand Col Ferret and took our first steps into Switzerland.

Our introduction to the Swiss Alps did not disappoint. A gentle, gradual trail took us through meadows and past glaciers to our lunchtime refreshment spot at Alpage de la Peule, a summer dairy farm. We continued on the TMB to La Fouly, where we planned to take a bus to our final destination for the evening. The stretch between La Fouly and Champex is similar to the morning stretch we skipped; unremarkable, flat, and easily skippable.

In La Fouly we discovered an ultra race for TMB runners was in full-swing. Racing contestants were coated in sweat and dirt, gaining high fives and cheers from their family members as they ran through town – and we learned that this was only their halfway point. The town was playing music at an open concert stage, and injured runners were limping in and out of the bus-stop-turned-infirmary. We watched the action from a rooftop bar and caught the bus at the opposite end of town.

Driving briefly through lakeside town of Champex, Kathleen and I decided if we’d done it all over again, we would have added an extra day here. A great example of classic Swiss culture in terms of food, drinks, and shops, Champex also boasts the best of lake life, with paddle boarders, canoes, and swimmers lapping through the water in the late afternoon. We learned there is a gondola that can take you above the lake for superb views and picnic spots, and promised we’ll be back in the future.

img_5542

Day 5: Champex D’En Haut to Trient

Distance: 16km

Height gain: 742m

Height loss: 682m

Time: 5-5.5 hours

The auberge we stayed in, Champex D’En Haut, was a short bus ride or a 30 minute walk above the town of Champex. This meant we had a head start when we took off in the morning to begin our day. In terms of accommodation – this place was small, cozy, and a little crowded. Bags and shoes were left in a common room downstairs, and we squeezed six guys and girls into a tiny bunk bedded room. This was not the first time we were told that the auberge does not rent towels (see packing list below), and I distinctly remember sharing a single kitchen hand cloth between Kathleen and I to dry off after our showers. Also remembered: sneaking in Swiss beers and cheers-ing each other underneath the shower stalls.

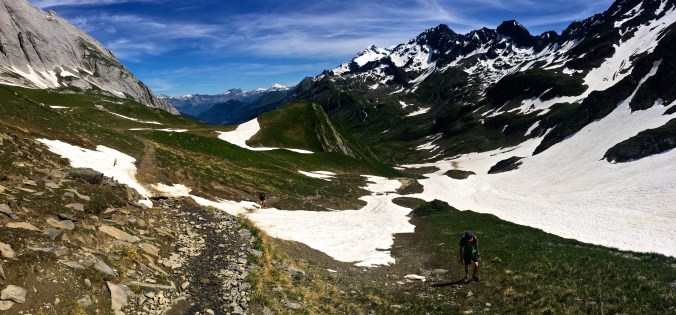
To me, this day felt like the farthest we’d ventured from civilization. We were on our own and away from towns, power lines, and roads for nearly this entire day. It felt fun and familiar to hop over stream crossings and switchback up mountain passes. It was also going to be the shortest day we’d had so far since Day #1. By now our legs were strong and used to steep demands, so in a way, this day was truly a walk in the park.

We had lunch (read: pretzels and chocolate) at Alp Bovine, a wonderful little restaurant on top of a large pasture. I remember a few things in particular about this stop: (1), we met three sets of honeymooners completing this trek here and vowed we’d bring back our fiancés someday, and (2) we ordered lemonade and were served 7-Up.

From Alp Bovine, it wasn’t long to reach Col de la Forclaz, the most commercialized of all of the col crossings we’d done so far. A hotel, restaurant, souvenir shop, parking lot, and bus station sat on top of the pass. It was just a 30 minute descent into Trient, where we’d spend the night, so Kathleen and I felt no shame in indulging in another wine-fueled lunch and hopping on a bus to shortcut our day. It’d been a long week.

img_5562

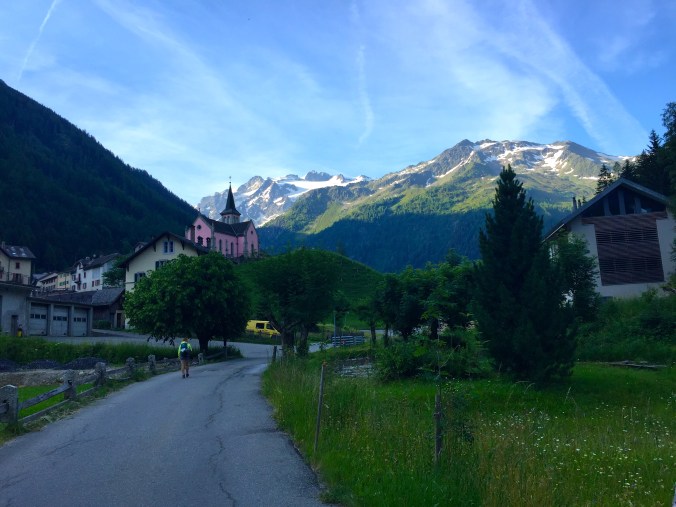
Trient is an adorable little settlement with dark wooded shuttered doors decorating every household, and brilliant red flowers popping out and adding color to the town. Our hostel was new and had a large backyard where kids could play and adults could enjoy the scenery (with a few adult beverages, of course). I remember that France was playing that night in the World Cup, and our hotel put up a projector outside to show the game on a big screen. The mountains loomed over the town’s lit-up chapel, providing another perfectly pleasant summer evening at high altitude.

img_5593

Day 6: Trient to Tre Le Champ (Auberge le Boerne)

Distance: 18km

Height gain: 869m

Height loss: 978m

Time: 6 hours

We started early again, just as the sun was rising, and decided to take the longer and harder route since it was our second to last day. We followed along a mountainside in the shade for the better part of the morning until we came out into an exposed meadow where we could see our highpoint for the day.

img_5574

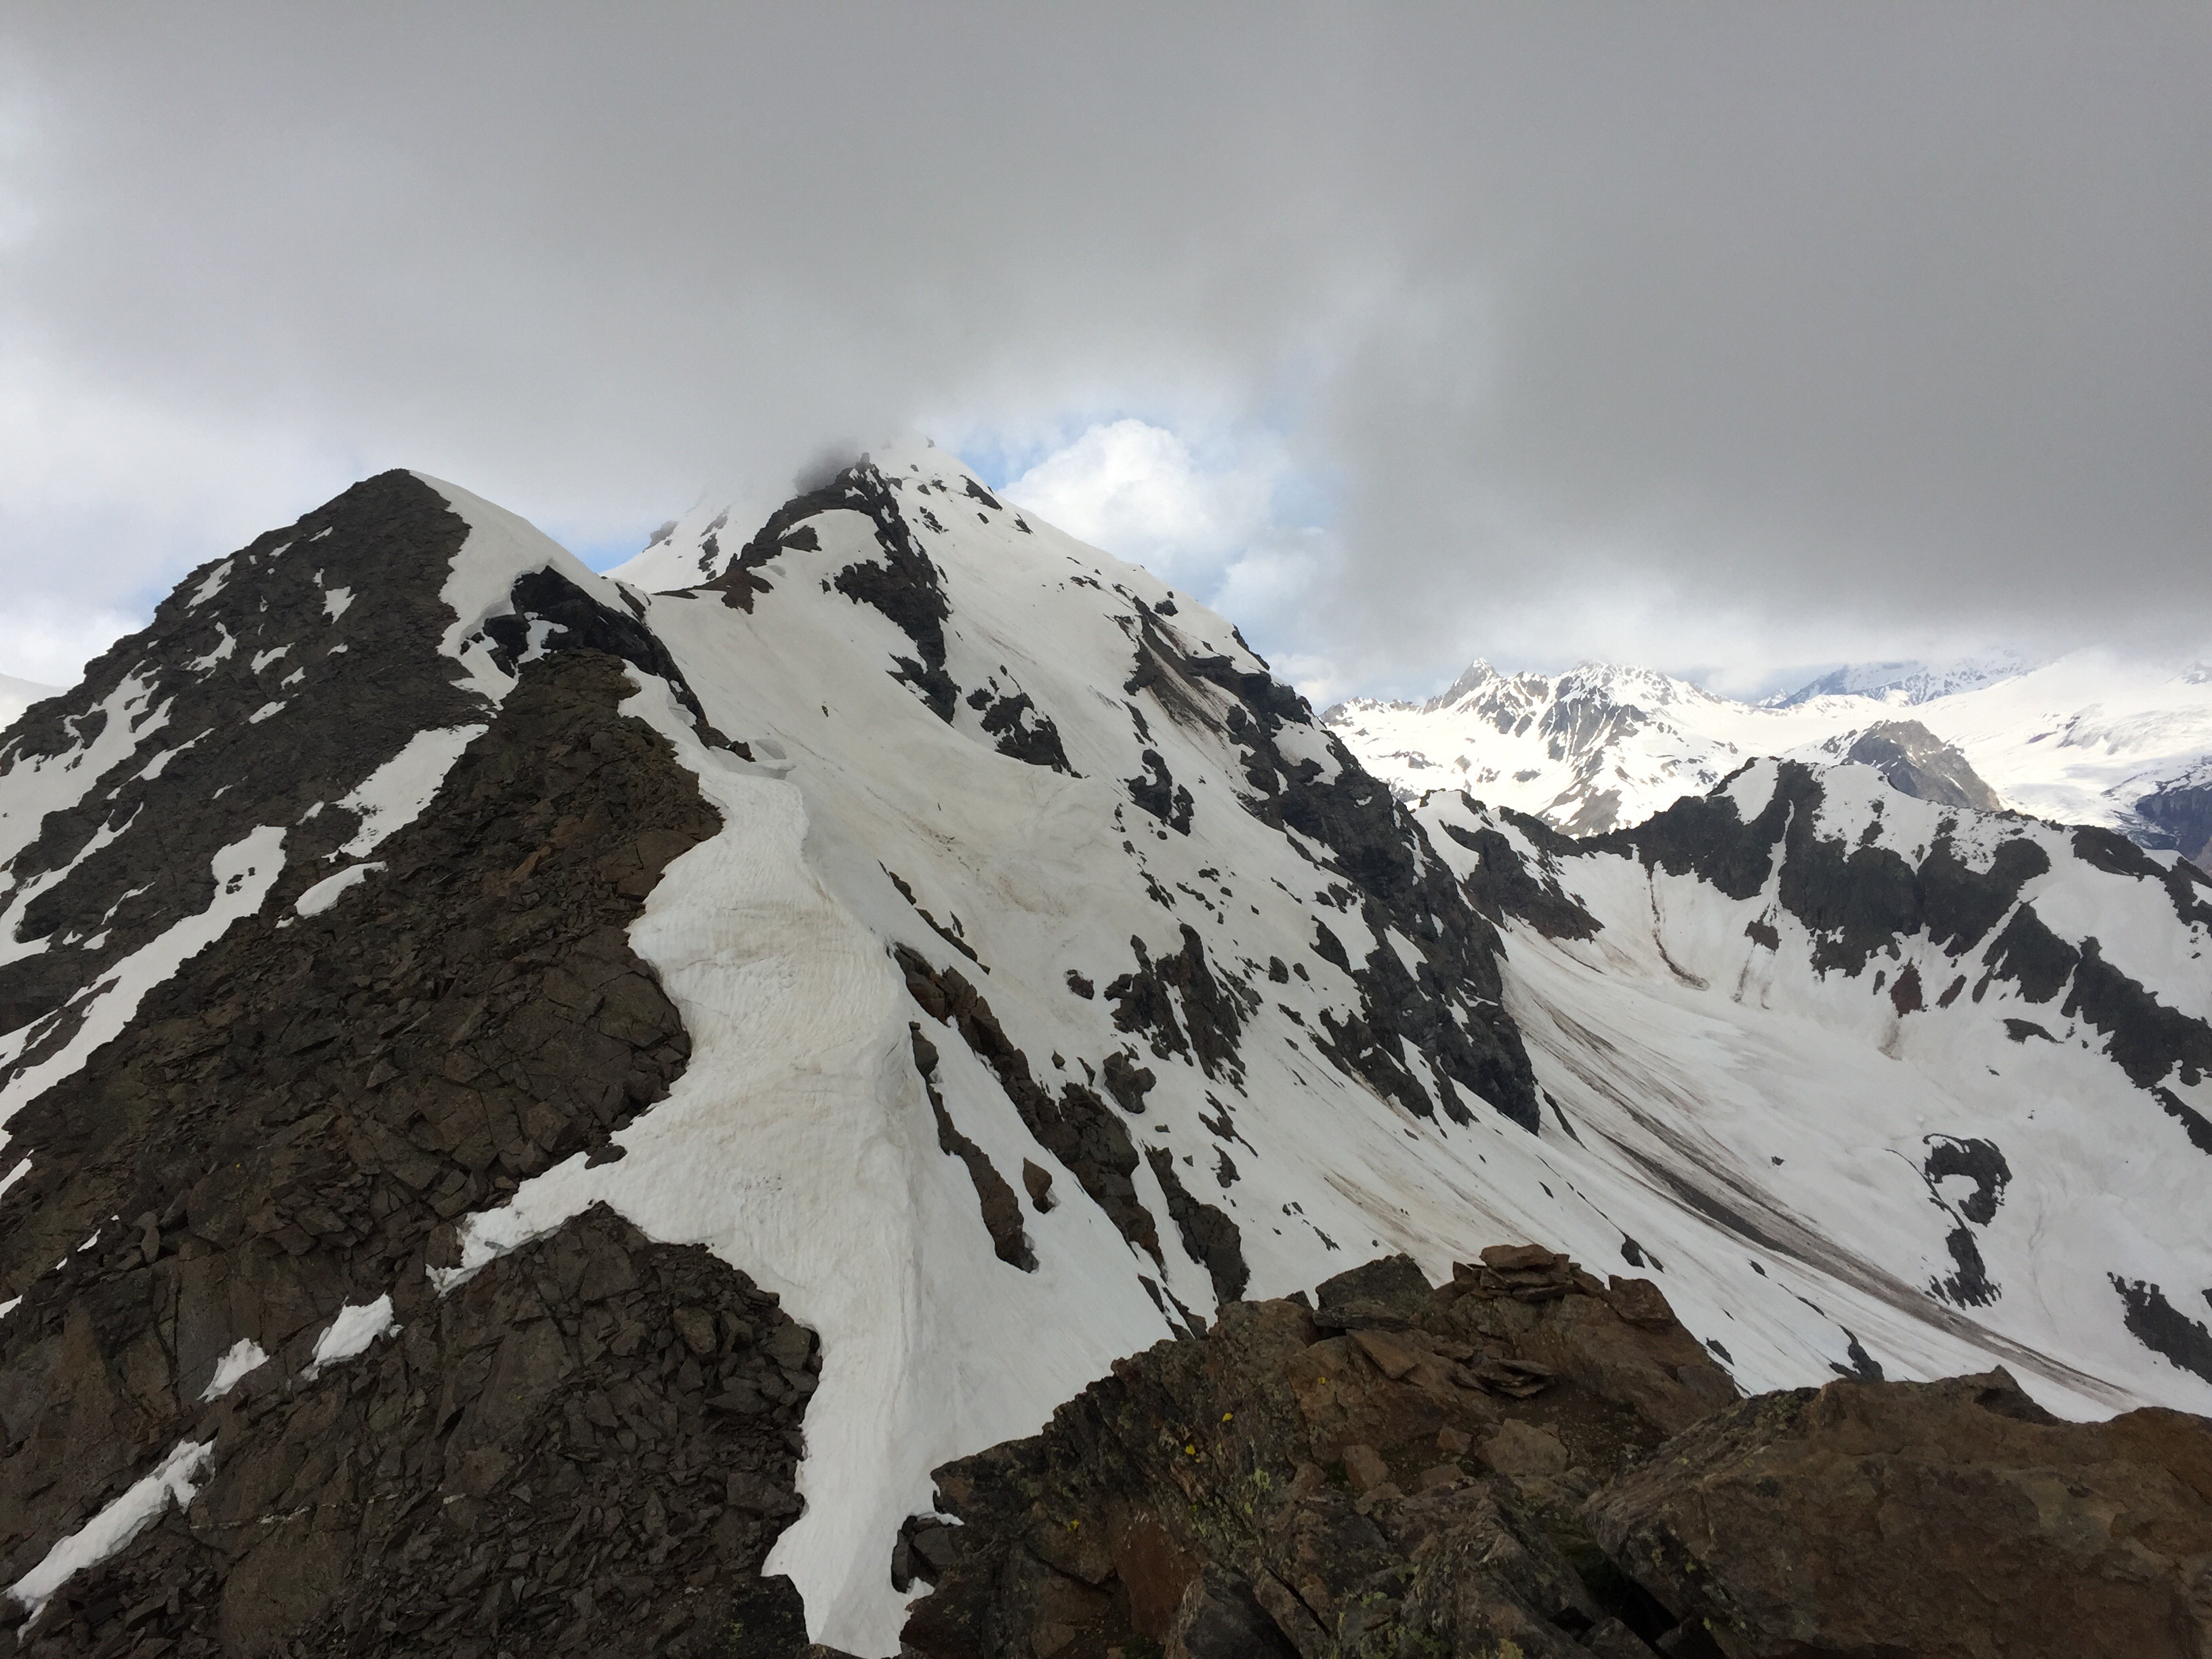
As I’ve mentioned before, this was a heavy snow season, and many sections of the trail that should be been clear and dry by this time in the year were still covered in snow, which made navigating a little more difficult and a lot more fun. On this stretch of trail in particular, that meant shortcutting up and around a large snowfield that covered our path, which looked a little like crawling on hands and knees up an incredibly steep and slippery hillside.

Once on top, we felt like we could see across the entire world – when in reality we were mostly just looking at the Col de Balme before us, our final country crossing back into France. An old stone building sits on top of the col where we enjoyed coffee and hot chocolate on this chilly mid-morning, before setting out down the valley, where we could see Chamonix beyond.

On our way to Tre Le Champ we passed a couple who were hiking clockwise (opposite us), headed to Champex. When we told them we were staying in Auberge le Boerne, they warned us that the building was like the “old woman who lived in a shoe” nursery rhyme. Our expectations did not disappoint. Looking at the floor plan of the house, it seemed as though someone had quite literally tried to cram as many bunk beds on top of and next to each other as possible, layered like waffles. Picture winding stairs, and even a ladder, leading to crooks and nannies and attics filled with beds and people. Our poor friend was placed in the middle of three bunk beds with occupants on either side, which made a midnight bathroom run nearly impossible.

img_5616

Day 7: Tre Le Champ to Chamonix

Distance: 25km

Height gain: 1540m

Height loss: 1800m

Time: 10-12 hours

Though these numbers measure the walking distance, height, and time, we were forced to take a few shortcuts on our final day. Our original itinerary was to stay in Lac Blanc overnight on this day, but by the time we were booking accommodations in January, the refuge here had already filled up (goes to show how popular of a trek this is, and how far ahead you should be prepared in advance). We also had a small window of clear weather in the morning before torrential rain would come in, so we moved fast.

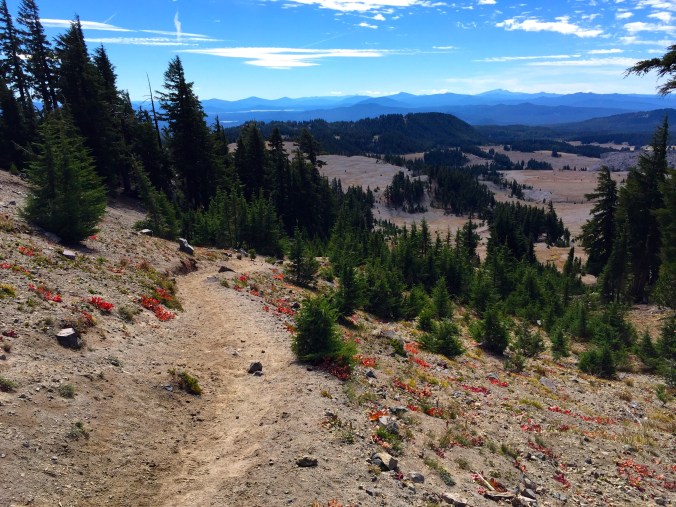
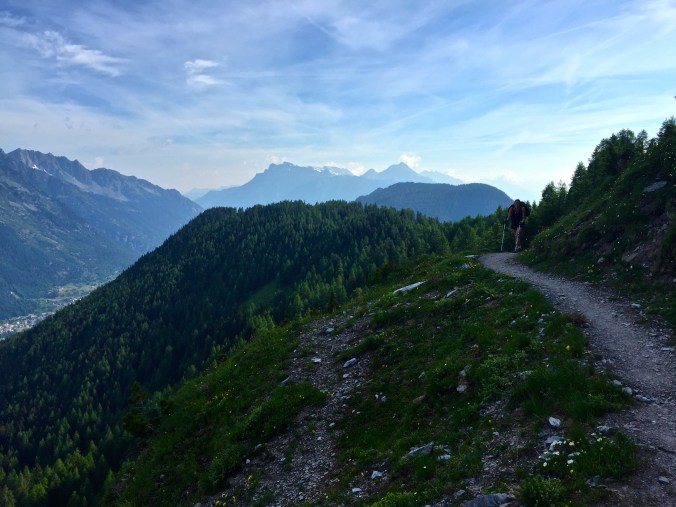
Leaving Tre Le Champ, we followed a trail that zigzagged along the mountainside above the Chamonix valley, having the busy villages below in our sight almost all day long. After just a couple hours we emerged into a wide field for winter sports and followed ski lifts farther up the mountain. It had started to rain on us, so we donned our rain jackets, rain covers, and high-tailed it to the cable car at La Flegere.

buet9008

We had almost zero visibility on this mountaintop as we sipped hot chocolate and coffee to warm us up before descending in a cozy, enclosed cable car and hopping on a bus to take us from Les Praz to Chamonix-Mont-Blanc city center.

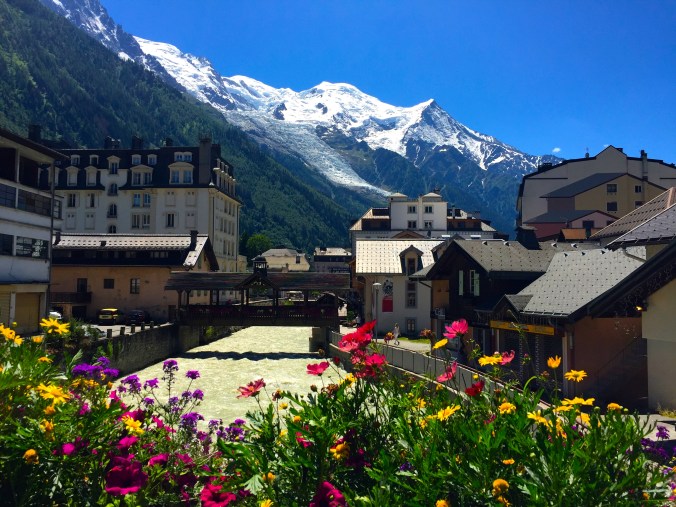
Chamonix is a world-class ski resort and adventure sports village for a reason. Every street corner sells a varied set of luxury fashion goods, ice climbing and snow gear, as well as top-notch Savoyarde restaurants featuring local French wines and cheese. Despite the rain, Kathleen and I made the most of our time in this town together and felt right at home amid the shopping and gastronomic adventures.

img_5680

Our experience on the TMB was truly unforgettable. While I’m glad we got to complete this world-renowned hike as two young fit women, I can’t wait to return to this trail to run, cycle, or winter hike someday.

Overall, you should pack light for your TMB experience. As mentioned in the tips & tricks above, you’ll have constant access to food and water, and be able to buy toiletries along the way should you need. Think simple, think light, and don’t be afraid to rewear your sweaty clothes!

Packing List:

  • Trekking poles (even if you’ve never used them before – trust us)
  • Solid, comfortable hiking boots
  • Crampons may be necessary in early season
  • Nothing larger than a 40L backpack
  • Always carry cash
  • Hats (one with a brim for sun protection, one wool for evenings)
  • Sunglasses
  • Sunscreen – and use it! The sun shows no mercy at these altitudes
  • Hand sanitizer
  • Plenty of rain gear
  • Towels, sleeping sheet or sleeping bag for auberges
  • Very few personal toiletries