Climb Mt. Baker (10,781 ft.) via the Easton Glacier Route

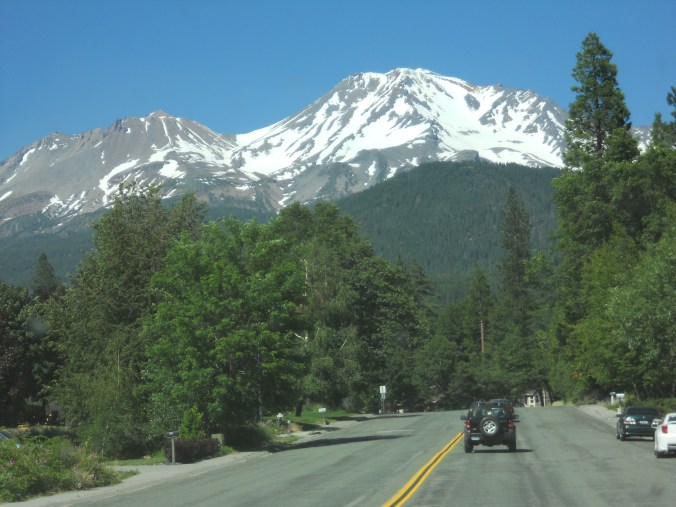
Summit the third-highest mountain Washington at 10,781 ft., the most heavily glaciated peak of the Cascade Range volcanoes after Mt. Rainier.

img_0429_2

Overview: 16 miles roundtrip, 7,600 ft. elevation gain

The Easton Glacier route is one of the mountain’s most popular and likewise, most crowded. Check out Mt. Baker’s Squak Glacier route or Coleman Deming Glacier route for an alternative climb with similar difficulty.

You’ll start out at Schreibers Meadow Trailhead (3,200 ft.). To get there, exit off of I-5 north of Mount Vernon, head east on Highway 20, and turn left on Baker Lake Road. Follow this past Rocky Creek Bridge, taking a left on Forest Road 12 and a right on Forest Road 13. The parking lot is huge – but will still fill up during summer weekends. There’s plenty of roadside parking leading up to the TH. Don’t forget your NW Forest Pass parking permit!

img_0400_2

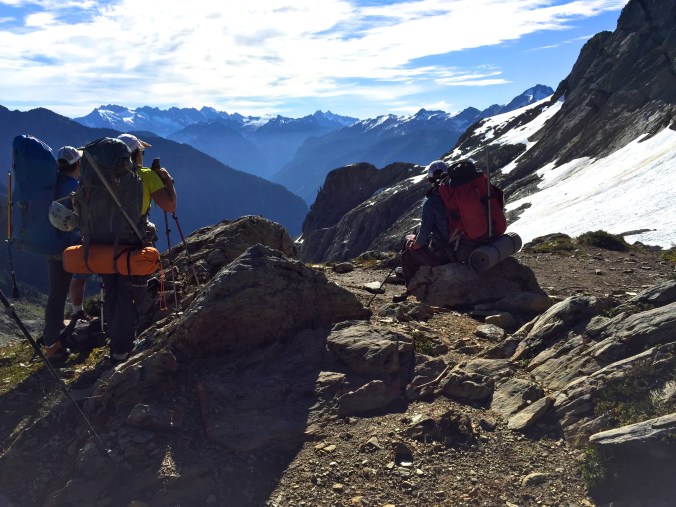
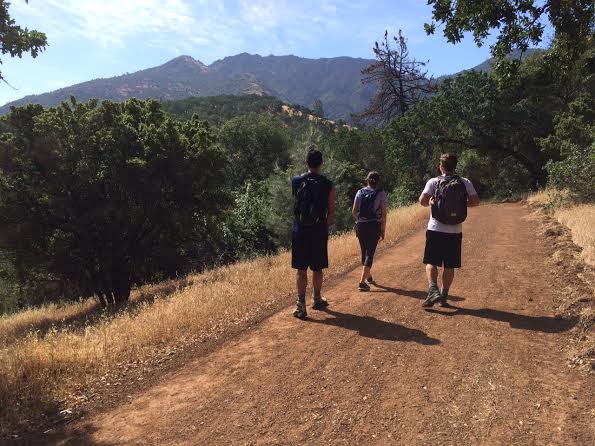
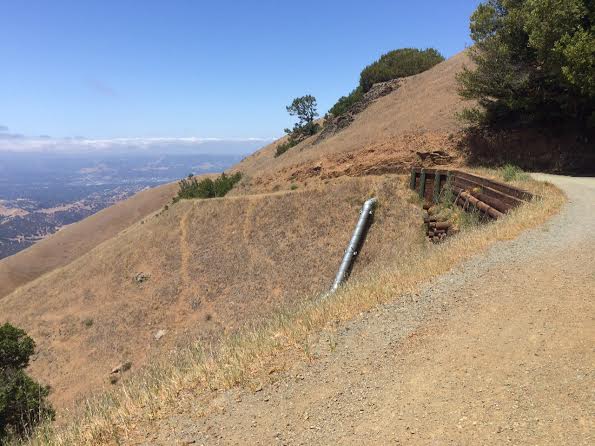
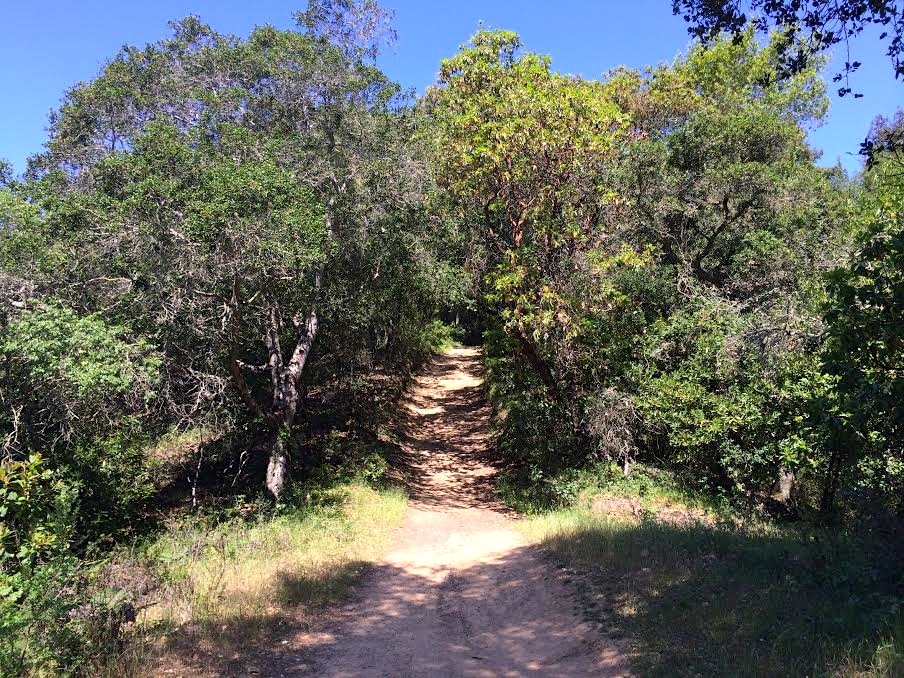
Hiking up Railroad Grade.

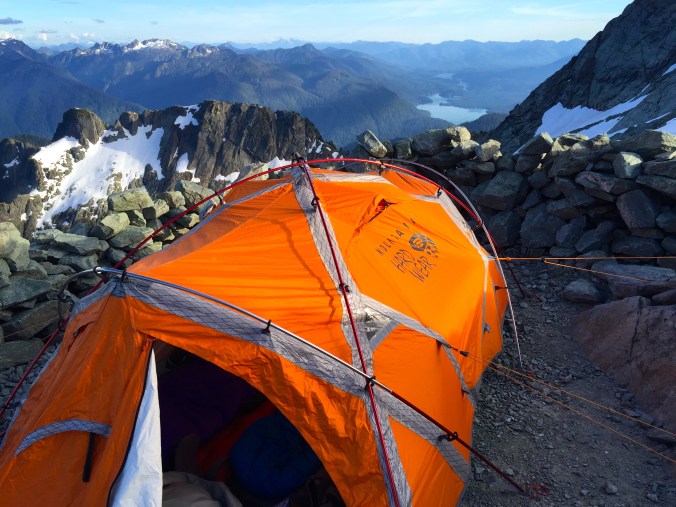
Start your hike out on Railroad Grade trail, and after a couple miles, keep right to continue up Railroad Grade itself. (We missed this turnoff and had a fun scramble up a creek bed to meet the trail – might have been more fun without our overnight camping gear.) Railroad Grade itself is a rocky moraine that looks and feels like a ridge. Follow the clearly-defined trail up to a huge area of flat camping spots, around 6,500 ft. In busy season this will look like a tent city, there must have been 50-75 people when we were there in late June.

img_0402_2

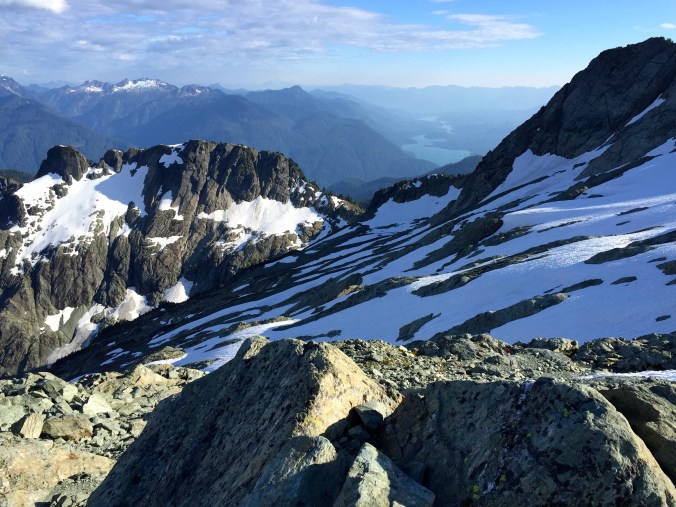
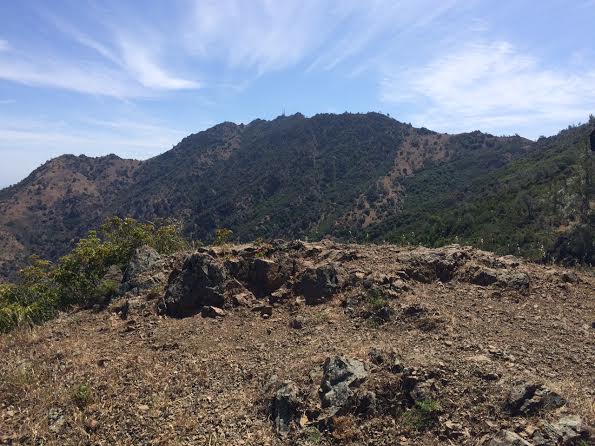
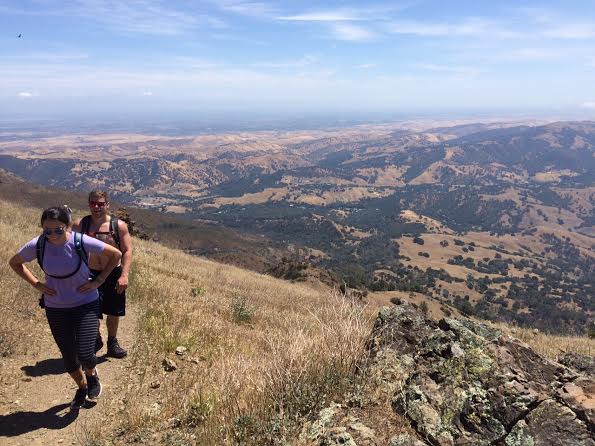
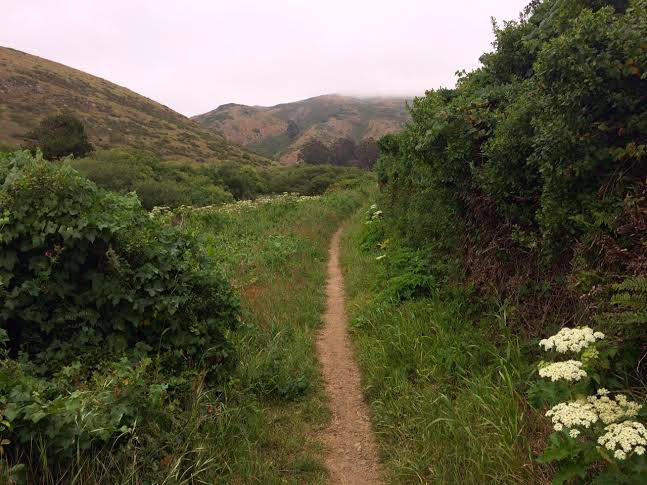
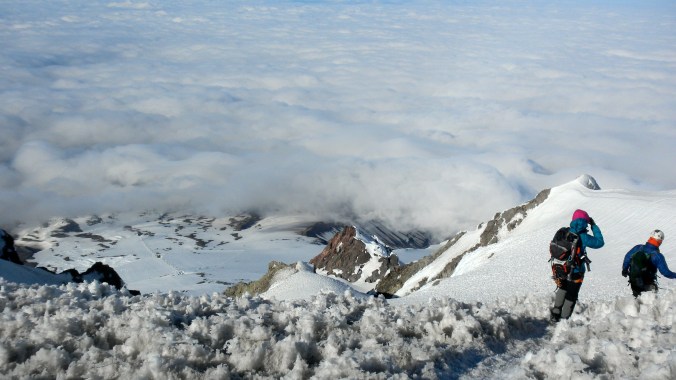
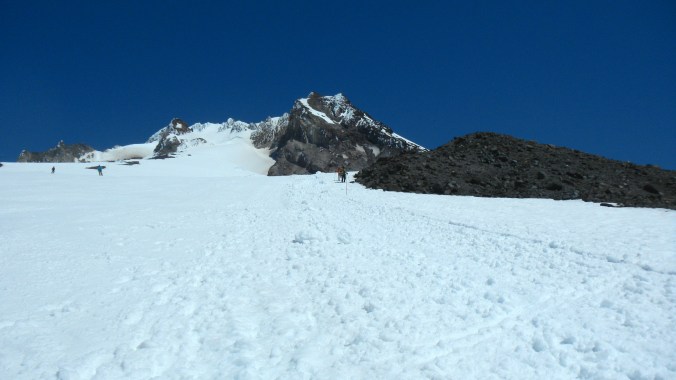
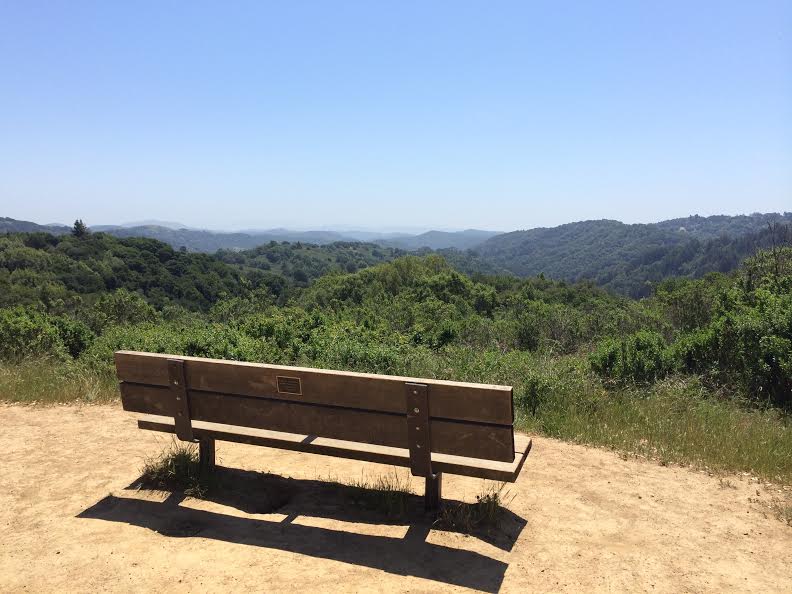
Superb North Cascade camping views.

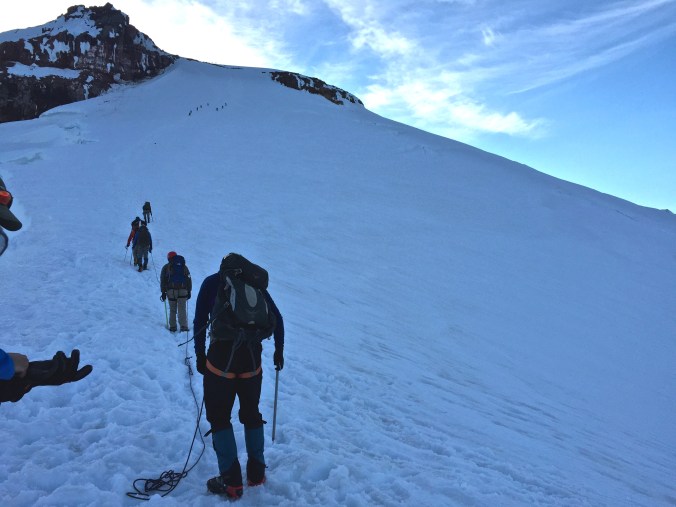
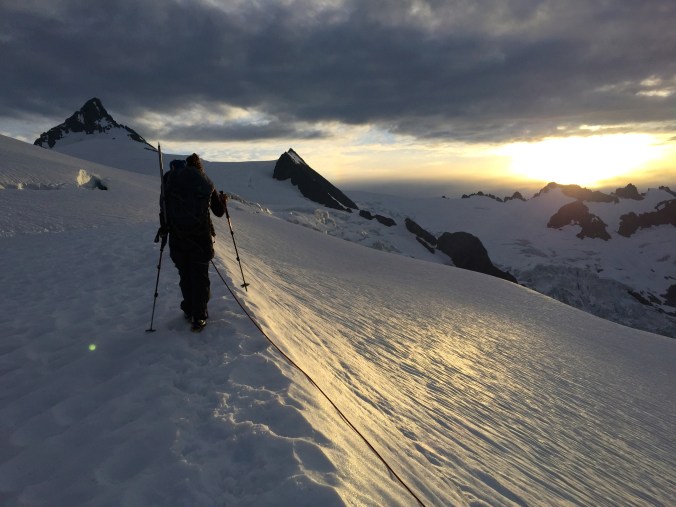
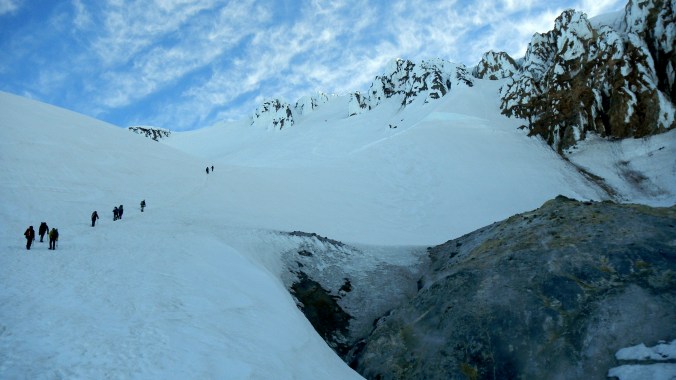
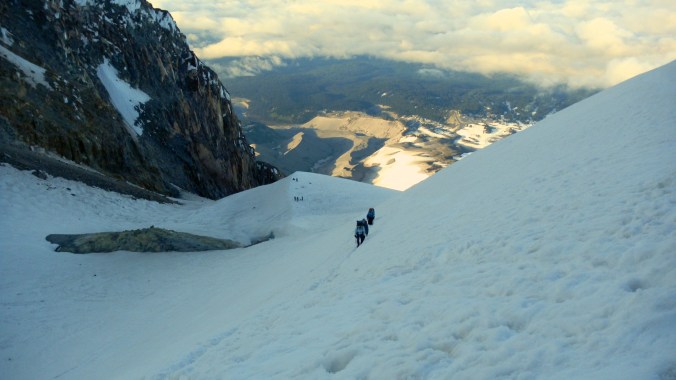
Above the campsites you’ll start your glacier travel on Easton Glacier, and at this point the route will vary depending on time of year and snow season. You’ll likely cross a few snow bridges across the larger crevasses; I’ve never heard of ladder crossings being used on this route. Since Mt. Baker is the second most heavily glaciated peak of all the Cascade volcanoes, there are huge crevasse dangers on summit day. Stay roped up to your team and make sure everybody has had training on crevasse rescue techniques.

img_0407_2

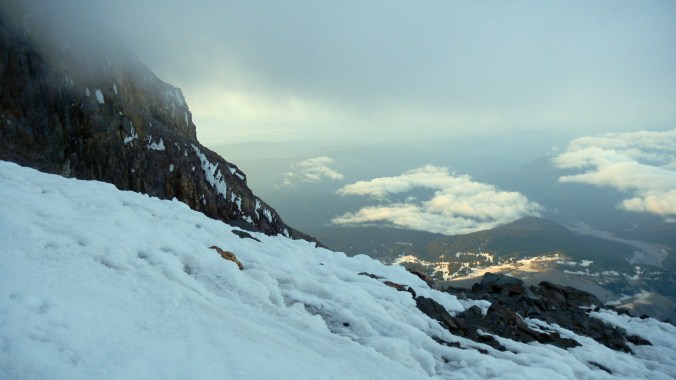
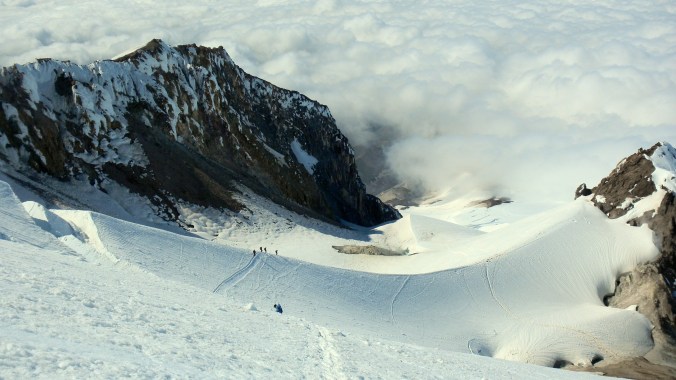
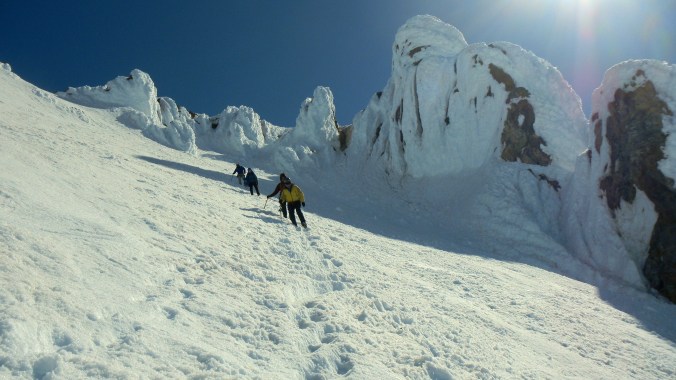
Keep northwest towards the Crater Rim at 9,750 ft., where you’ll smell the “rotten egg” sulphur gas coming from the crater. The last 1,000 ft. are the most difficult of the day and take you up a combination of icy rock and snow to the base of The Roman Wall: the crux of your climb – both equally intimidating and thrilling. Ascend carefully up this steep grade, which can be 40-45 degrees and often icy.

img_0408_2-version-2

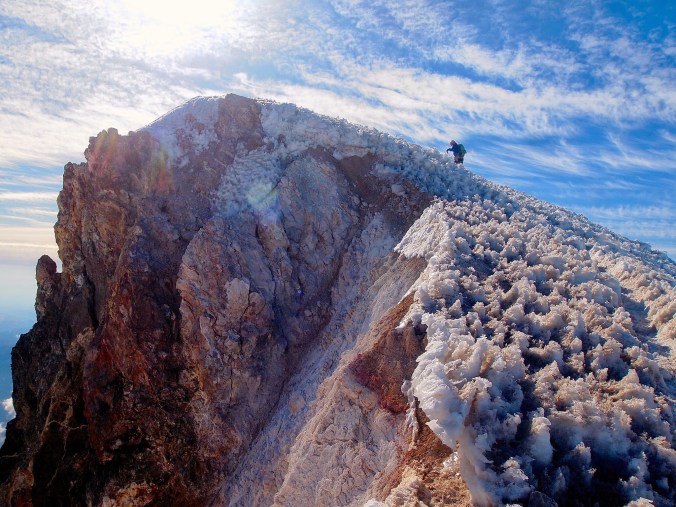
Heading up the Roman Wall.

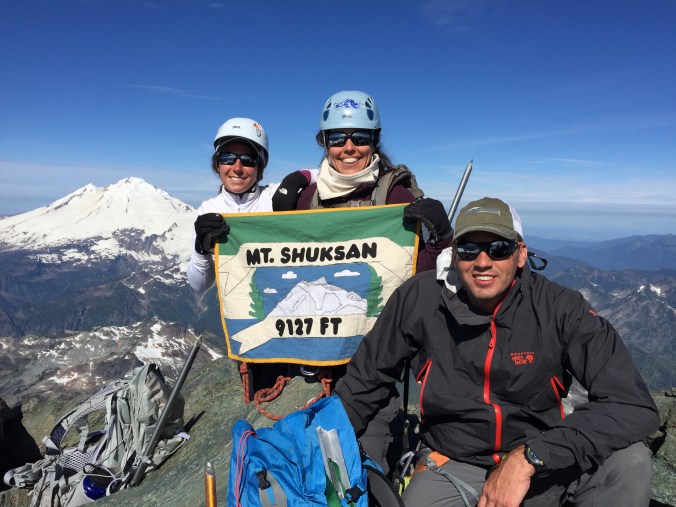
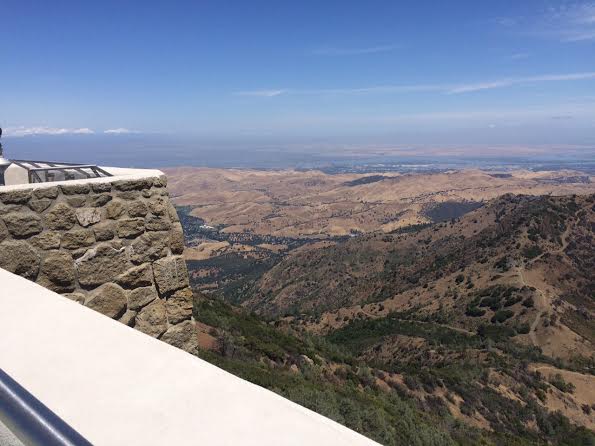
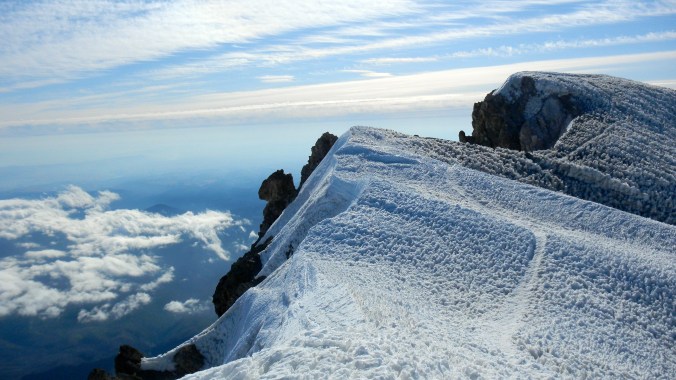
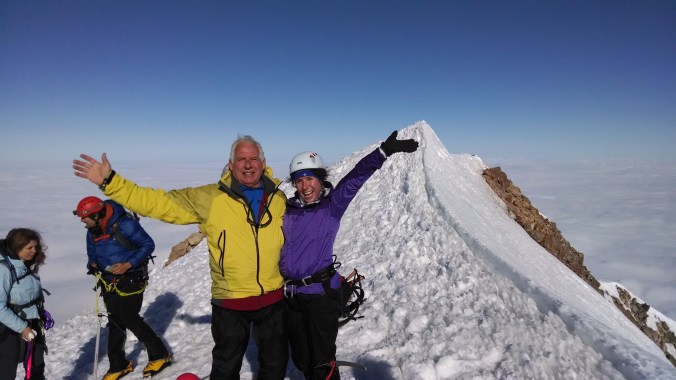
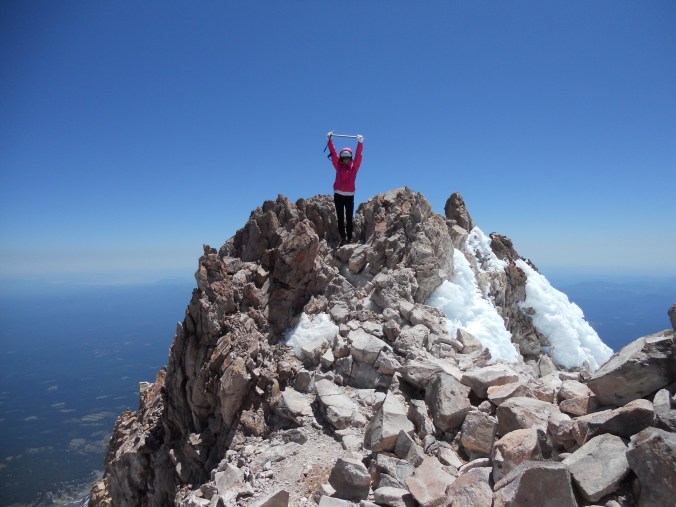
Once you’ve breached the top of the wall, you’ll have a clear view of the Grant’s Peak – the true summit – just across a long plateau. Take your time making it to the top and soak in the views of Glacier Peak and the North Cascades stretching out below you.

img_0411_2

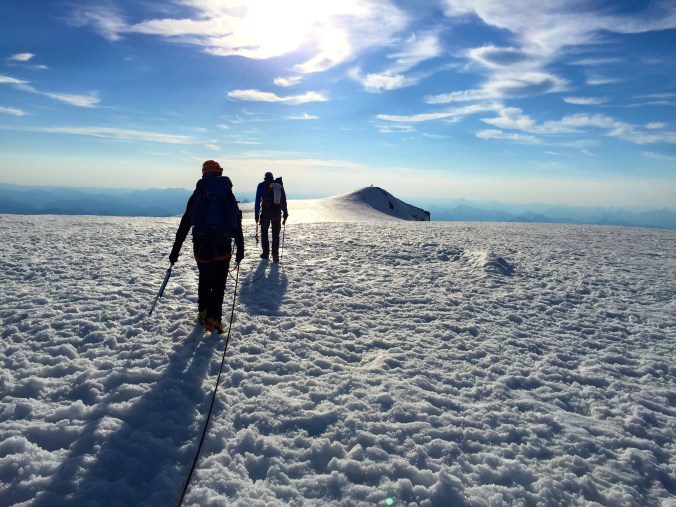
Summit plateau towards Grant’s Peak, Mt. Baker’s official summit name.

img_0419_2

As always, begin early (alpine start ~ midnight to 2am) so you have the advantage of hard, frozen snow for your crampons to grip into. On your descent, be aware of crevasse dangers and wary of any snow bridges that might have melted out from the sun.

Surprisingly, there are no permits required to climb Mt. Baker, but I recommend one person in your party to fill out a trail registration at the trailhead.

Packing List:

  • Northwest Forest Pass Trailhead Parking Permit
  • Trekking poles
  • Ice axe
  • Crampons
  • Crampon-compatible mountaineering boots
  • Helmet
  • Alpine harness, rope, ice tools
  • Overnight snow camping gear (tent, stove, cookware, sleeping bag, etc.)
  • Headlamp + extra batteries
  • Navigational gear
  • 2+ liters of water
  • Means to boil or treat water with iodine
  • Plenty of food
  • Blue bags for human waste
  • First aid kit, emergency GPS spotter
  • Emergency bivvy or shelter
  • Sun protection, storm protection, plenty of layers!

Mt. Shuksan (9,131 ft.) Summit Climb via Sulphide Glacier

Climb the Crown Jewel of the North Cascades up to 9,131 ft. for stunning mountain views, challenging rock and ice climbing, and vertigo-inducing heights.

img_0278_2

Approach hike, above Shannon Ridge.

Overview: 16 miles roundtrip, 6,600 ft. elevation gain

The Sulphide Glacier is the easiest and most popular route to the summit of Mt. Shuksan, and is a great beginner’s glacier + rock climb. More experienced climbers may enjoy the Fisher Chimneys route. The route described here makes for a very long two days because of its gradual, drawn-out approach (you’ll want trekking poles for this).

I joined Mountain Gurus for this climb and can’t recommend their services enough. As part of a 4-day Intro to Mountaineering Course, we spent each day learning the fundamentals of glacier travel, crevasse rescue training, ropes and rock climbing techniques, and general mountain safety guidelines.

img_0265_2

You’ll begin at Shannon Ridge Trailhead, which is pretty easy to find and accessible for any type of vehicle. To get there, exit I-5 at Burlington and head east on Highway 20. Turn onto Baker Lake Road and continue 23 miles until you reach Shannon Creek Campground. Turn left on Forest Road 1152, drive just past a 4 mile marker, and take a sharp right onto Forest Road 1152-014 to the very end of the road. The parking lot is wide and flat, as is the road leading there, no need for a high-clearance vehicle.

img_0271

To begin your hike, you’ll start out on an old road trail 2.5 miles up to Shannon Ridge, which will give you awe-inspiring views of the valleys and mountains around. Follow the ridge another 2 miles over a pass to your right, and continue on until you are at the southern wing of Mt. Shuksan with the summit pyramid in sight.

img_0355_2

We ended up making a higher camp than we were expecting, a little above 6,000 ft., because it was a low-snow year and couldn’t find access to running water lower down. In any event, plan to camp on the snow and to melt snow for water, though you should be able to find some runoff you can boil or treat. The campsite we chose was truly an amphitheater of the North Cascades National Park, surrounded by jagged peaks from every angle.

img_0312_2

On summit day you’ll slog across the (seemingly) never-ending Sulphide Glacier to the base of the rock pyramid, along the way passing the intersection of Fisher Chimneys on your left. You’ll want to be roped up to your team along the glacier as there are crevasse dangers on either side.

img_0330_2

The summit pinnacle is a 400 ft. tall rock pyramid that is pretty straightforward and decorated with numerous anchors and ropes from older expeditions. The easiest and most direct way up is through a class 3-4 gully that may be covered in snow or ice earlier in the season. Later in the season, this gully may become a “bowling alley” of loose rocks. Use your judgment and forego the summit if conditions seem unstable.

img_0342_2

Once you’ve made it to the top, take a few deep breaths and pat yourself on the back! Like so many places in the North Cascades NP, the higher you go, the more rewarding the views. A sea of peaks looks up at you from below the summit of Shuksan, and hidden from view until the top is Mt. Baker looming to the west.

img_0338_2

img_0356_2

As always, begin early (alpine start ~ 3 or 4am) so you have the advantage of hard, frozen snow for your crampons to grip into. This is a particularly popular climb so the later you begin, the more chances you have of running into a bottleneck up the summit gully or crowds at the top of the rock pinnacle.

Astonishingly, there is a pit toilet about 200 ft. downhill of the high camp overnight area. It is very exposed (both for the user and for audiences above), so be prepared to use your blue bags if necessary.

img_0361_2

Packing List:

  • North Cascades National Park Permit
  • Trekking poles
  • Ice axe
  • Crampons
  • Crampon-compatible mountaineering boots
  • Helmet
  • Alpine harness
  • Ice tool, snow pickets, ice screws, rope
  • Crevasse rescue kit
  • Headlamp + extra batteries
  • Overnight snow camping gear (tent, stove, cookware, sleeping bag, etc.)
  • Navigational gear
  • 2+ liters of water
  • Means to boil or treat water with iodine
  • Plenty of food
  • Blue bags for human waste
  • First aid kit, emergency GPS spotter
  • Emergency bivvy or shelter
  • Sun protection, storm protection, plenty of layers!

Mt. Diablo Base to Summit

As isolated as it is impressive, Mt. Diablo has the second largest visual prominence in the world, behind Mt. Kilimanjaro. That means from its summit you can see the Sierra Nevadas to the east and even Mt. Lassen, 181 miles north. It’s truly one of the most demanding peaks in the Bay Area, and makes for a hell of a day hike.

Starting up Eagle Creek Trail with the summit in clear view ahead of us.

Starting up Eagle Creek Trail with the summit in clear view ahead of us

I’d been up Diablo three years ago and decided to do the opposite loop from that time. This way was much more scenic, forested, and less crowded than taking the fire road up, albeit much more challenging. Here’s the distance breakdown:

  • Oak Road (fire road): 0.3 miles
  • Eagle Peak Trail: 3.1 miles
  • Bald Ridge Trail: 1.5 miles
  • North Peak Trail: 0.9 miles
  • Summit Trail: 0.7 miles (up to Visitor Center & Lookout)
  • Juniper Trail: 1.4 miles
  • Deer Flat Roadd (fire road): 1.6 miles
  • Mitchell Canyon Road (fire road): 3.7 miles
  • Total: 13.2 miles

    Taking a break before heading up Bald Ridge Trail.

    Taking a break before heading up Bald Ridge Trail.

    The steep ascent up Eagle Peak Trail was without a doubt, the most challenging of the day. Still, we made incredible time. We’d been warned – and expected – to have a 6 to 8 hour day ahead of us, but we reached the summit after only 2.5 hours of hiking. Descending took almost as long, probably because by the end of the day we were all exhausted and dragging our feet down the hills. Still, we were all in all very happy with our route choice and end time.

    Partway up Bald Ridge Trail… yet the summit still seems so far away.

    Clear views of the valley on the final ascent up the Summit Trail.

    Clear views of the valley on the final ascent up the Summit Trail.

    Corner of the lookout from the Mt. Diablo Visitor Center.

    Corner of the lookout from the Mt. Diablo Visitor Center.

    The one thing I remembered most about this hike from completing it years before was the anticlimactic feeling of arriving at the summit surrounded by people who had driven up. Still, there was a number of hikers who looked as rugged and worn out as we’d felt, lined up at the summit water spigot. Both the Visitor Center and lookout platform offer great 360 degree views and is lined with binoculars for far-off views on clear days.

Like I’d mentioned before, our route down was much less scenic, following a wide fire road for the entire journey. We saw larger groups of people ascending this direction, or stopping partway at scattered picnic tables. This road really drags on, and since it’s a couple miles longer (but less steep), than the way up – we were more than ready to throw down our packs and call it a day once we’d reached the car.

Beginning of a long, windy descent down the Deer Flat fire road to the Mitchell Canyon fire road.

Beginning of a long, windy descent down the Deer Flat fire road to the Mitchell Canyon fire road.

  •  

    QUICK STATS

  • Length: 13.2 miles
  • Elevation gain: 3.2k ft.
  • Time: 5 hours

Muir Beach to Rodeo Beach via the Coastal Trail

With six weeks left until my upcoming North Cascades climbs, I need to intensify my endurance training. I’ll be doing two back-to-back climbs on mountains averaging around 10k ft. in altitude, and as I’ve learned from past experiences, the only way to prepare for that is to run, hike, and climb with as much elevation gain as possible on my weekend training days.

Muir Beach is one of the first trails I discovered when I moved to SF, and has stuck to be one of my favorites. I’ve brought my parents, out-of-town friends, and regular hiking buddies here. Its out-and-back style makes it an easy route to shorten or lengthen based on your mood. Here’s a distance breakdown of popular turn-around points:

  • Muir Beach to Coastal Fire Road intersection: 2.2 miles
  • Muir Beach to Tennessee Valley: 3.1 miles
  • Muir Beach to Hill 88: 4.5 miles
  • Total one-way from Muir Beach to Rodeo Beach: 5.9 miles
Quarter-mile into the hike, looking down at Muir Beach.

Quarter-mile into the hike, looking down at Muir Beach.

I chose the perfect day, with San Francisco’s famous fog hanging overhead for most of the morning. It was chilly, but easy to warm up with the waterfront hills.

The first half mile is steep. The entire trail follows the coastline and winds up and down its peaks, and in and out of its valleys. You’re essentially walking (or running) from a lower elevation to a higher elevation and back the entire time, which some may find completely exasperating, or to others, as a challenge.

Shoreline views from the Coastal Trail.

Shoreline views from the Coastal Trail.

About halfway between Muir Beach and Tennessee Valley is a turnoff for Pirate’s Cove, a hidden little beach surrounded by tall, wind-swept and sea-swept rocks. At this intersection you’ll find one of two sets of rugged, wooden stairs on the trail that will slow down traffic a little. When trail running, this is one of the only spots that I’ll need to halt my speed to trudge up each step.

Just one more up-and-over and the trail widens as it merges with a fire road for the final stretch into Tennessee Valley.

Top of the fire road, looking down at Tennessee Valley - shoreline hidden by the hills.

Top of the fire road, looking down at Tennessee Valley – shoreline hidden by the hills.

When the fire road intersects with another wide trail, turn left for just 100 yards and you’ll see the continuation of the Coastal Trail on your right, with a mileage sign to Rodeo Beach. The walk from this intersection to the Tennessee Valley shoreline is 0.7 miles, which would’ve added 1.4 miles to my trip. I’ve done this option before and turned around at the beach, making the total hike around 7 miles.

Being in the valley means you’ve lost all of that legwork you did to get yourself up those hills, which also means you get to repeat that effort to get over to Rodeo Beach. To emphasize; it’s a lot of steep, steep hill climbing, and there’s not much benefit to the up-and-down nature of the path other than sheer enjoyment.

Leaving Tennessee Valley to go up, up, up and over to Rodeo Beach.

Leaving Tennessee Valley to go up, up, up and over to Rodeo Beach.

Here’s the most fun part of the trail. In the course of 1.15 miles, the Coastal Trail gains 800′ in elevation and peaks out at an exposed, windy plateau overlooking Tennessee Valley and even farther on. Continue up this hill to the tallest point of the day, and you’ll intersect a paved cycling road. Turning left here takes you a quarter mile to Hill 88. I’ve used this as a landmark too, returning to Muir Beach from Hill 88 makes a little more than a 9 mile track.

Turning right instead, the trail winds another mile and a half or so down to Rodeo Beach, which will probably be more crowded than Muir Beach. Make your way all the way down to the sand, and you get to look back and see all of the miles and elevation you get to do all over again on your return!

Overlooking Rodeo Beach, with views of the Golden Gate Bridge barely visible in the background.

Overlooking Rodeo Beach, with views of the Golden Gate Bridge barely visible in the background.

QUICK STATS

  • Length: 11.8 miles
  • Elevation gain: 3.5k ft.
  • Time: 3.25 hours

Mt. Hood Summit Climb

Photos from Mt. Hood, June 12, 2014 with Portland-based climbing group Mazamas.

  • Length: 8 miles
  • Elevation gain: 5,439 ft.
  • Summit: 11,239 ft.
  • Time: 12:30 am – 12:30 pm
  • Total time: 12 hours

dscn09661

First clear shot of the day, just as the sun is coming up. We can barely see the Palmer ski lift here, which we followed all the way up from Timberline Lodge after our midnight start.

dscn09671

dscn09681

Enjoying a break at sunrise, with the shadow of Mt. Hood visible over the valley.

dscn09741

The summit is nearly there, yet we still have at least a couple hours of climbing to ascend the final 700 feet.

dscn09751

dscn09761

Walking past Devils Kitchen, on the lower left. This is an active fumarole area that reeks of sulfur.

dscn09771

Looking up the Hogsback. Many climbers rope up on this section, depending on icy conditions. If one person falls off of the steep edge, the person they are roped to must jump off of the other side to balance the weight.

dscn09781

dscn09791

Final stretch to the summit over the icy trail.

dscn09821

dscn09861

Bundled up at the summit with Mt. St. Helens in the background.

dscn09901

Daunting view looking down back at the Hogsback, from the bergshrund.

dscn09911

OLYMPUS DIGITAL CAMERA

The whole Mazamas crew, at the summit.

OLYMPUS DIGITAL CAMERA

Pristine weather at Mt. Hood’s summit.

img_20140612_0806290631

Dad and I, celebrating our successful climb.

dscn09881

Rappeling down the Old Chute.

dscn09891

Descending from the summit, with the Pearly Gates shining over.

dscn09931

Halfway down, last view of the summit before we reach the trailhead at Timberline Lodge.

Purisima Creek Redwoods: Hiking over Half Moon Bay

My office is in a unique location; at the intersection of El Camino Real and Highway Bridge 92, which stretches from Hayward through San Mateo and over into Half Moon Bay. It’s easy for commuters to head north or south on the Peninsula, or even over to the East Bay, but the Half Moon Bay hills and endless trails along Skyline remain largely undiscovered. So, I took advantage of an early Friday afternoon to visit one of my favorite parks.

e9UqavEMSiml7aA8HstqQIG0fI8MH-AZwOfglBPDlgsbWcEI617qUjMMn6qF-QMSrZqu4RKtmmng_p9-di4I9d_MfNy7ZPsriH00T8Z0ZLMrB95Gce0yEuepBa-VecA9BWLmBUZRSic16haX3n1awhGkR8OziL3JxGenbG117JG1n0K6XRSrhxa289T9Xxac0_oz_KjjVs

Descending, still towards the top, along the Whittemore Gulch Trail

The main parking lot is right off of Skyline, which means the first half of the hike goes across the hills and into a valley, where it follows along the Purisima Creek. The route I chose circles the entire park counter-clockwise and is the longest circuit available in this open space. Here’s how the distance breaks down:

  • North Ridge Trail: 1.2 miles
  • Whittemore Gulch Trail: 2.2 miles
  • Purisima Creek Trail: 2.3 miles
  • Craig Britton Trail: 2.6 miles
  • Harkins Ridge Trail: 1.2 miles
Redwoods along Purisima Creek

Redwoods along Purisima Creek

The first two trails wind along the upper, exposed part of the hills for quite a while before dipping into the forest. Even then, it’s gradual, I had barely realized I’d entered the forest before I was surrounded by redwoods and had reached the valley floor; Purisima Creek.

There’s another major trailhead and parking area where Whittemore Gulch meets the Purisima Creek Trail, at the bridge to cross the creek. This trail becomes wider, flatter, and smoother, perfect for trail runners. I half-ran and half-hiked, slowing down over some of the ruttier areas that have been dug out by horses and cyclists. There are a lot of roots and rocks to look out for on these trails too, and areas on the Whittemore Gulch and Craig Britton can be tricky with slanting, steep slopes.

Sleep slopes along the Craig Britton Trail

Sleep slopes along the Craig Britton Trail

Craig Britton continues at a relatively flat elevation through the thick, forested redwoods until it intersects with Harkins Ridge Trail. The scenery changes as this trail goes up, redwoods falling away to thinner trees that let in more sunlight. By the time I reached the Harkins Ridge Trail and trudged up its dusty steep hills, I’d almost forgotten the entire first third of my day that had been like this – I was so used to the thick forest and tall trees.

The final views before the parking lot really reminded me how much this open space has to offer; completely different landscapes, wildlife, and ecosystems scattered between the dense valley floor and the top of the Skyline hills.

Final view over Half Moon Bay before the last stretch to the trailhead parking lot

Final view over Half Moon Bay before the last stretch to the trailhead parking lot

QUICK STATS

  • Length: 9.5 miles
  • Elevation gain: 1.8k
  • Time: 2.5 hours

Redwood Regional Park: West Ridge Trail to East Ridge Trail

It’s difficult to have a car in San Francisco. But it’s oh-so worth it when it comes to weekend getaways, especially with all the Bay Area has to offer. I’ve been to Muir Woods, Mt. Tamalpais, and Stinson Beach more times than I can count, so a few weeks ago I decided to check out what’s hiding in the East Bay, and found the perfect day trip less than 30 minutes outside of the city.

Redwood Regional Park, part of the East Bay Regional Park District, is a huge open space that’s super accessible, tucked away in the East Bay hills just a short drive from Oakland. From San Francisco, take 580 East off of the Bay Bridge and turn left off of the 35th Ave exit. This road turns into Redwood Road, which will take you to the main entrance of the park. There’s plenty of parking for a $5 fee, or you can squeeze in between other cars on the side of the main road just outside the entrance, which is how I entered the park today.

I created my own loop based on recommendations I’d read and convenience to my car location, but you can view each trail and loop more closely on Mappery.

When I first entered the park on foot, I found a couple of ways to jump up on a trail to my left that ran along a creek bed. This area of the park is lush with green plants and glows under a canopy of trees, with a very small one-track trail lined with rocks and roots. I managed to fall flat on my face within the first five minutes of my day.


Winding up towards the West Ridge Trail

Winding up towards the West Ridge Trail

I followed this trail up the left-side ridge and hit my destination, the West Ridge Trail, and continued on higher up. The path widens here to accommodate equestrians, bikers, and more hikers, and goes for miles and miles – and steeper and steeper. The West Ridge Trail narrows and widens again, snaking through thick forests and leveling out at look points with stunning views. I passed through so many ecosystems, from the thick green forest you see above through tall redwoods and up above dusty pastures covered in wildflowers.

More uphill on the West Ridge Trail

More uphill on the West Ridge Trail

These first few miles were the steepest of the day, and I was regularly alternating between trail running on flat surfaces to cutting my pace in half up hills. The bulk of my elevation gain was condensed into just the first third of this hike, which means ending the day at 1.6k total gain made a strenuous beginning. At the highest point of the West Ridge Trail, the path crosses a road that leads to Chabot Space & Science Center, and from then on, it’s pretty much all downhill.

Looking back up the West Ridge Trail, winding through the redwoods.

Looking back up the West Ridge Trail, winding through the redwoods.

Just about halfway through my hike, the windy trail through the redwoods evened out to a gaping valley on my right, and a parking lot up emerged ahead on the left. This is where the West Ridge Trail becomes the East Ridge Trail, and where I found many more people either starting or ending their day. There are a lot of leisurely trails that fork off of the main one and many people wander down these for shorter hikes or picnic spots. It’s easy to get stuck here, enjoying the views.

View from the East Ridge Trailhead

View from the East Ridge Trailhead. Naturally, the photo does not capture the beauty of this spot.

The last half of the hike was easy, and mostly downhill. The East Ridge is unlike its other half in that it’s largely exposed, dusty, and out of the redwoods. But both of these things also mean that I was able to see farther because of the lower tree line, and I paid more attention to the hills on the horizon since I was looking their direction, heading down. There’s something about a view like this, when I’ve stopped long enough to feel the blood in my limbs slow and my lungs open and I feel like I’m seeing this distance for the first time. It’s like taking that first breath of air when you come up from an ocean dive.

Afternoon rest spot on the East Ridge Trail, Redwood Regional Park.

Afternoon rest spot on the East Ridge Trail, Redwood Regional Park.

It was a beautiful, easy day that wasn’t completely inundated with crowds (unlike other Bay Area hiking options), and it reminded me of how lucky San Franciscans are to have so many options in this area.

QUICK STATS

  • Length: 7.5 miles
  • Elevation gain: 1.6k
  • Time: 2.25 hours

Desolation Wilderness: An attempt of Pyramid Peak

We set out to climb an impressive mark in the Sierra Nevada, specifically the Crystal Range, just to the west of Lake Tahoe: Pyramid Peak, the tallest point in the Desolation Wilderness, and a “must-do” hike according to other peak baggers around California. I had spent last weekend in Yosemite at Glacier Point, a peak standing at 7,214 ft., and had experienced a long, hot, grueling day that left me thirsty and with sunburns.

Now, Yosemite is just 2.5 hours south of Tahoe National Forest, so I imagined similar conditions on what I believed was a comparable hike. Furthermore, the Lyons Creek trailhead that leads to Pyramid Peak sits at 6,700 ft. and the top of the mountain reaches 9,983 ft., so I was braced for a challenging day hike – nothing more – and brought three friends along. I felt pretty prepared.

We can joke about it now; but we were absolutely, comically unprepared.

Driving up Wrights Lake Road, off of Highway 50, just before sunrise

Driving up Wrights Lake Road, off of Highway 50, just before sunrise

We left San Francisco at 4 a.m. and set out northeast. Only once we were winding up highway 50 towards Tahoe did we start seeing patches of snow, and when we finally caught our first glimpse of the mountains from the road, we all echoed the same thought: “Are those peaks… completely capped in snow?” We had not anticipated snow, at all.

I had to put my car into four-wheel drive heading up Wrights Lane Road, which takes you 4 miles off of highway 50 and straight to the Lyons Creek Trailhead, one of the more popular approaches up Pyramid Peak via the West Ridge route. We parked next to only one other car and set off in 1.5 to 2 ft. of snow around 6:45 a.m. I was the only one in the group wearing shoes that were not water resistant, and though my extra-tall gaiters helped guard snow from slipping inside of the tops of my boots, it did nothing for the soles, which were helplessly soggy all day long. All of our feet were soaked throughout the entire day, and at our turnaround spot two of the guys wrung out ounces and ounces of liquid from their sopping, sweaty socks. It was nasty.

We followed a set of tracks for the first two or three miles until they zig-zagged away from each other into different directions. We started following one, having to turn around after a quarter mile, and would follow the other until it doubled back and seemed to loop around to the original trail. Finally, Joey took the lead and started trail blazing into what we thought looked like the most obvious direction. Mind you, we did not have a map or a compass with us, we walked solely on instinct and with the intention to reach the clearing that we assumed must be so close.

Hiking through daybreak up the Lyons Creek Trail

Hiking through daybreak up the Lyons Creek Trail

That clearing was nowhere near as close as we thought it would be. Also, trail blazing is hard work. We were lifting our legs and dragging ourselves through almost 2 feet of untouched snow, reaching over trees and brush and rocks as we stumbled upon them. We did get validation that we were walking in the right direction each time we came across a cut log – those became one of our only signs that we were on the right path. Still, it was a tiresome and long process getting out of the main forest area.

When we finally reached the clearing that we’d been waiting hours to stumble upon, I realized that we had walked 7 miles that morning even though Sylvia Lake was supposed to have only been 4.7 miles from the trailhead. Part of that mileage would have come from turning around a handful of times, but I was worried that we might have been moving too far to the west, and missed a trail on the east, putting us even farther from the lake. A little after 10:30am, when we’d been walking for nearly 4 hours, we decided to camp out on a log to enjoy lunch, relax, and turn around. We left our sunny field spot at 11:30 and got back to the car by 2:00.

Our resting spot, with Pyramid Peak visible in the background.

Our resting spot, with Pyramid Peak visible in the background.

On the return, the streams we’d been hopping over (or in some cases, walked straight through) were rapidly expanding and quickening from the melting snow. The final two miles of our trip looked like an entirely different trail with the small tributaries that formed in the hours that had warmed us that morning.

Overall, it was a solid attempt. Everyone had high spirits and was eager to trek on through the less-than-ideal conditions. We all aided each other through the difficult snowy steps over logs and across streambeds, and most importantly, we’re all psyched to come back in a couple months once the snow has melted to give Pyramid Peak another shot.

QUICK STATS

  • Expected length: 11.4 miles
  • Actual length: 12.1 miles
  • Expected elevation gain: 3,300 ft
  • Actual elevation gain: 1,300 ft
  • Time: 7 hours
Panorama shot from Wrights Lake Road across the Desolation Wilderness

Panorama shot from Wrights Lake Road across the Desolation Wilderness

Glacier Point: Yosemite’s Panorama Trail

THE IDEA

I had never been to Yosemite before, so I wanted to make my first time worth something. I didn’t have to research for long before I found dozens of reviews calling Yosemite’s Panorama Trail one of the most scenic and must-see of the park. The 8.5 mile trail was marked “challenging” on most websites, so I could think of no word other than “grueling” to describe the round-trip version of this trip I had conjured on my own.

GETTING THERE – 1:45 a.m.

My alarm was set for 1:45 a.m., and I was out the door by 2:00. This was a late Friday night/Saturday morning for San Francisco, so I wasn’t surprised to see a number of drivers out around the city. Once passing through Oakland, though, it was smooth sailing. Around 4:00 I hit highway 120, which I knew would take me all the way to the West gates of the park, so I stopped for gas, coffee, and donuts. It probably only took me a little over an hour to reach the entrance of the park, making a grand total of 3 hours from my start in SF. However, and I’m glad I had called the park ranger in advance for this tip, I drove for 1.25 hours within Yosemite before reaching my destination, Glacier Point. As she reminded me the day before, it’s a big, big park.

I reached the Glacier Point parking lot at 6:15, and enjoyed the dawn on the steps of the large stone amphitheater carved into the side of the hill, overlooking Yosemite’s granite walls and Half Dome at the center of it. The sun started peeking over the hills at 6:30, and I soaked in the rays like a smile for a couple of minutes before beginning my journey.

First 10 minutes of day break, descending the Panorama Trail from Glacier Point

First 10 minutes of day break, descending the Panorama Trail from Glacier Point

SUNRISE START – 6:45

I opted to take the road less traveled for this trip. By beating the crowds with a sunrise start, I hiked for nearly 4.5 hours alone and uninterrupted. Since Glacier Point is around 25 miles and a couple thousand vertical feet outside of Yosemite Valley, it’s a much more popular afternoon destination for hikers than morning. So in this planning, I walked against the first crowds I encountered in the later morning coming up from the Valley, and again walked the opposite direction of hikers in the afternoon who were descending from Glacier Point. The direction and timing were perfect for a solo adventure, if not a completely delusional undertaking.

DESCENT

It’s counter-intuitive to begin a day hiking down the side of a mountain, rather than up it. In fact the early morning descending slope went against everything that my body was prepared for. That being said, it was a nice hike down, and a warm day even at 7:00 a.m.

Throughout the entire day, it was easy to stay on track. Each trail was clearly marked, and there were numerous intersections that allowed me to check my distance about every two miles. After the first 2.5 miles, I saw the large granite slabs that surround Illilouette Fall, and crossed a wooden footbridge to the only uphill section going this direction. Keeping my eyes peeled for the lookout spot I’d read so much about – and which makes this trail so unique – I soon saw the unmarked grey path in a little less than a mile. This path that veers to the left off of the main drag takes you to Panorama Point, which was hands-down the most beautiful view I saw all day.

Overlooking Panorama Point

Overlooking Panorama Point

I continued down the traditional Panorama hiking route, past Nevada Fall and Vernal Fall. The top of Nevada Fall offers another vantage point to look out across the park, and walking down the steep, crooked steps that parallel Vernal Fall gave me a cool break from the sun with its shadowed slopes and mist coming off from the waterfall. I read that these were two of the most impressive waterfalls in the park.

Now, note: The small stone steps that line Vernal Fall barely allow 2 bodies to pass through or past each other, so things get bottlenecked here pretty easily. But really, the only point that was inundated with crowds was once I reached the Valley floor, which was packed with people starting the hike up.

TURNAROUND – 10:30-10:50

The trail runs into road at the Happy Isles Trailhead, where I found a shuttle stop for the Valley’s free transportation. There was a snack stand that wasn’t open yet, so I began walking about a half mile to Curry Village hoping to find food. Alas, I did not, and sat on a boulder on the side of the road for a snack and a quick break before I started back up.

ASCENT

A mile past the Happy Isles Trailhead, the path splits left up the Mist Trail and right up the John Muir Trail. These are equidistant in length and meet back up in just about a mile, only difference is avoiding the slower hikers on the steep slopes of the Mist Trail. I did run into a couple of thru-hikers who were following the entire 221-mile John Muir Trail from Yosemite National Park to Mt. Whitney. They were pretty clean looking, so I had to imagine that they were following the traditional north-to-south route.

John Muir Trail to top of Nevada Fall

John Muir Trail to top of Nevada Fall

My time down and my time up were nearly identical, 4 hours either way. In the morning I had taken my time to venture off of the trail for the detours mentioned above (Panorama Point, Nevada Falls), and in the afternoon I had significantly slowed my pace and doubled my number of stops for rest and water. By the end of the day I had drunken almost all of the three liters I had brought with me.

END – 3:00

The last four miles of this trail were grueling, if not for the afternoon heat intensifying, but for the psychological torment of ending a day-long hike headed uphill, rather than down. But finally, over 19 miles and 6,100 elevation gain later, I made it to the top, much sweatier and more sunburnt than when I’d started.

QUICK STATS

  • 17 miles (with no detours) – 19.5 miles for me
  • Estimated 5,000 elevation gain
  • 8 hours

Mt. Shasta Summit Climb via Avalanche Gulch (14,179 ft.)

Mt. Shasta (14,180 ft.) is a spectacular beginner mountaineering experience. Great for serious hikers who want to take the next step into high-altitude alpine climbing.

Overview:

  • Length: 11 miles
  • Elevation gain: 7,300 ft.
  • Summit: 14,179 ft.
  • Time: 4:15 am – 5:30 pm
  • Total time: 13.25 hours

dscn0024

The Avalanche Gulch route is the second easiest, non-technical route to the summit of Mt. Shasta after the Clear Creek Route, but is by far the most popular. Many people complete this climb in one day from the trailhead, but you also have the opportunity to overnight at Horse Camp (7,950 ft.) or Helen Lake (10,400 ft.).

Begin at Bunny Flat Trailhead (6,940 ft.), off of Everitt Memorial Highway. This road and parking lot are snow plowed year-round and you’ll run into plenty of families using the area to sled, hike, or picnic in the summer. Follow the signs for 2 miles to Horse Camp where you’ll find a cabin and large, flat areas for camping.

Pro tip: If you’re lucky enough to stumble upon this place alone, the cabin makes for a great overnight shelter. There are long, wide benches great for sleeping, and a small wood stove that’s easy to use. Be sure you bring a sleeping pad – the benches absorb cold air and will leave you hypothermic without an extra layer between your bag and the wood. This is also a good place to leave extra gear (tent, stove, etc.) for your summit push.

dscn0043

Brian at daybreak, scoping out our route for the day.


Even if the trail is snowed over, from Horse Camp your route should be obvious. Staring up the southern flanks of Mt. Shasta, follow the natural channel of Avalanche Gulch all the way up to Helen Lake.

dscn0048

Looking up Avalanche Gulch, Helen Lake is the long horizontal shelf right in the middle.

Since this is a southern approach, depending on when you choose to begin in the morning, the sun will be blocked by the eastern Sargents Ridge and Green Butte Ridge. It’s important to do as much snow travel in the dark as possible so that your legs aren’t sinking into soft, melted snow on your ascent. I highly recommend an early alpine start (around 2am) if you’re beginning from the trailhead so that you can avoid the uncomfortable and harsh radiation that the sun will reflect from the snow.

Above Helen Lake, you’ll see a large rock formation called The Heart, and above this up on the ridge line, a protruding formation to The Heart’s right called Thumb Rock. Climb in between these two landmarks until you reach Red Banks (12,800 ft.). This photo and this photo should help you visualize this. You can also choose to approach Red Banks farther to the left up a steep chimney, the groups we saw doing this were roped up to one another.

dscn0050

Steep grades going up to Helen Lake in Avalanche Gulch.

dscn0069

Some groups are roped together towards the steepest part of the climb, up Red Banks.

dscn0067

dscn0078

Continue up the Red Banks ridgeline until you reach Misery Hill (13,800 ft.), a landmark that’s rightfully earned its name. It isn’t until the top of this hill that you can actually see the true summit for the first time. The summit pyramid is a rough pile of rock and ice that makes for an easy and fun scramble to the top of Mt. Shasta (14,180 ft.).

dscn0083

First view of the summit.

dscn0105

All smiles at the summit!

On your descent you may have the opportunity to glissade part of the gulch – pack an extra layer of pants or slick material that you don’t care about ripping up. Remember to take off your crampons and use your boots and ice axe as brakes as you glissade.

dscn0114

Be prepared for any typical mountain climate emergencies. Winds, storms, and whiteout conditions can occur on the mountain at any time and delay or completely stop an exit attempt. Because Mt. Shasta is an isolated volcano, solitary from any mountain range, it is more susceptible to these types of crises.

Be wary of AMS and descend at first signs of symptoms.

dscn0116